Thursday, September 28, 2023

Charity Comforter

The Sunday I picked up the 4 comforters for binding, I noticed the comforter that was in the frame for knotting was one I had pieced.

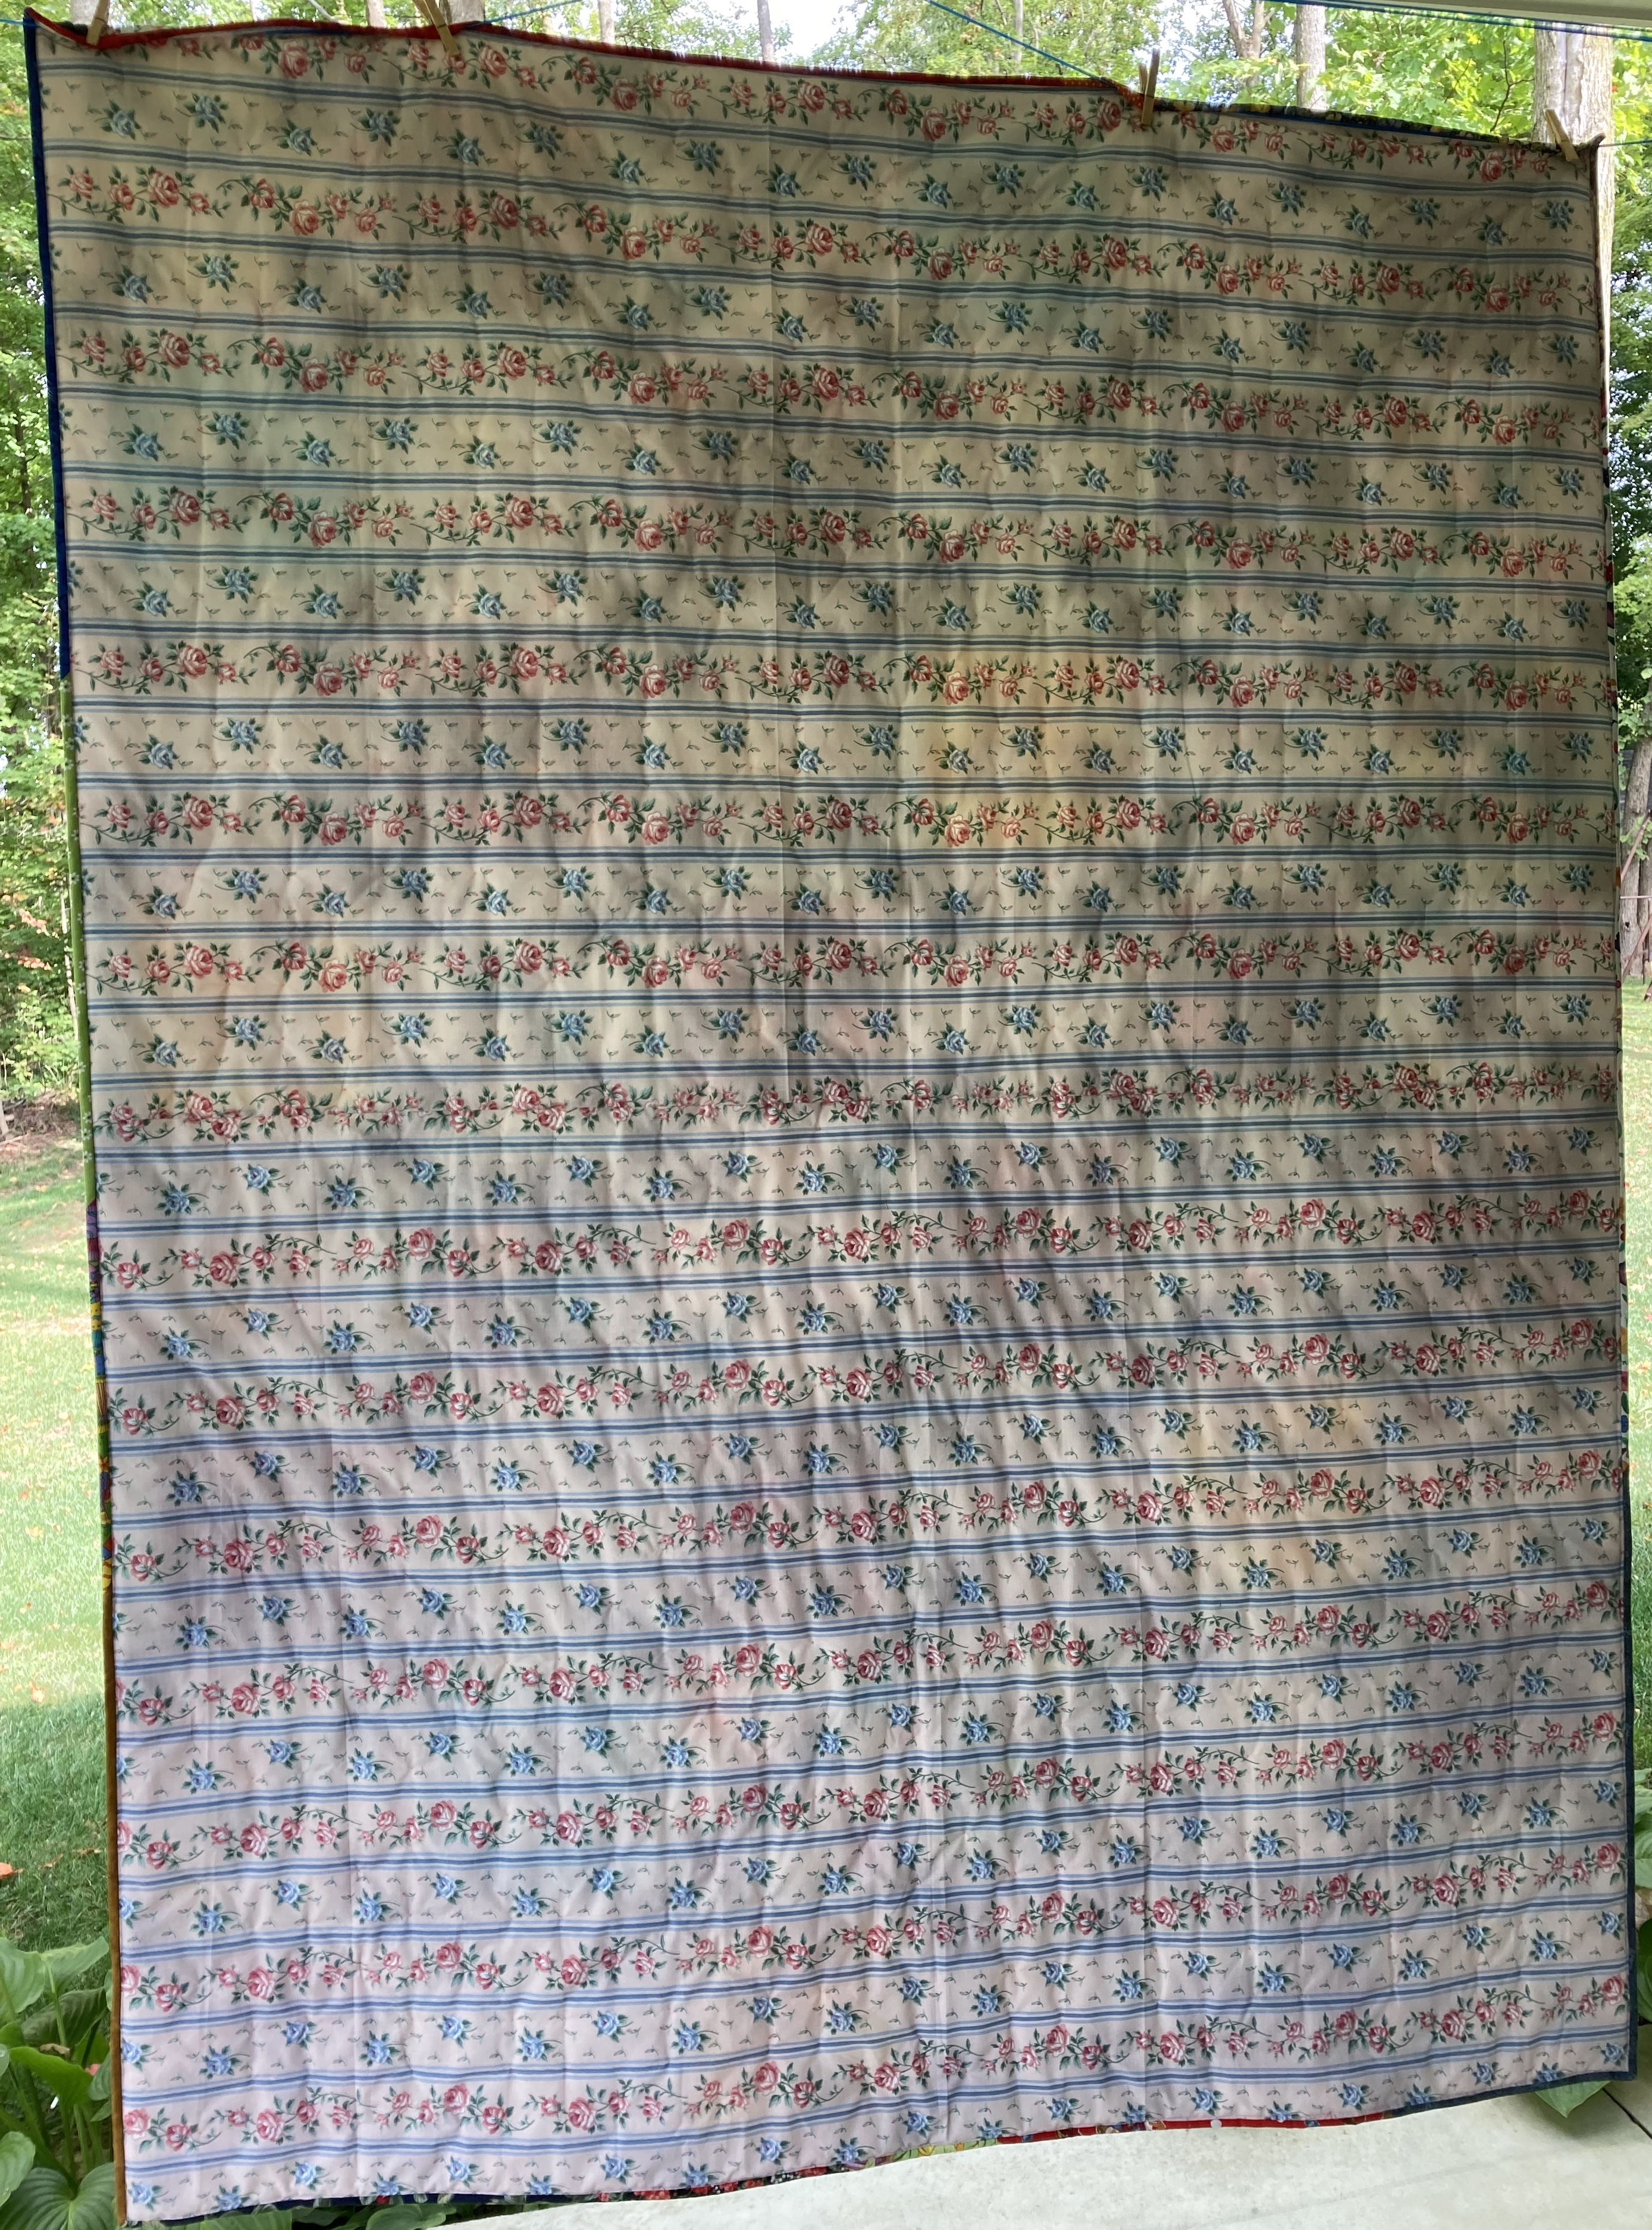
 Last Sunday I took the 4 comforters back to church and placed them in the cupboard. I noticed there was a knotted comforter ready to be bound in there. I opened it to look at it and saw it was the one that had been in the frame the Sunday before. I brought it home to bind.

Normally we just turn the backing fabric over and use that for binding but I had used some blah striped pink fabric from my mother's stash for the backing. I thought it needed prettier binding than that. 

I have a basket where I put the leftover binding from projects. I pulled them out of there, sewed them together and made a scrappy binding for this comforter. 

This comforter will end up with MCC.

The sixteen pieced blocks in this quilt were made with the RSC color of the month. I have no memory though of piecing the puss in the corner blocks! 

I think I'll sew along in the RSC next year and make 16 pieced blocks again. They're such an easy block to piece for charity quilts.

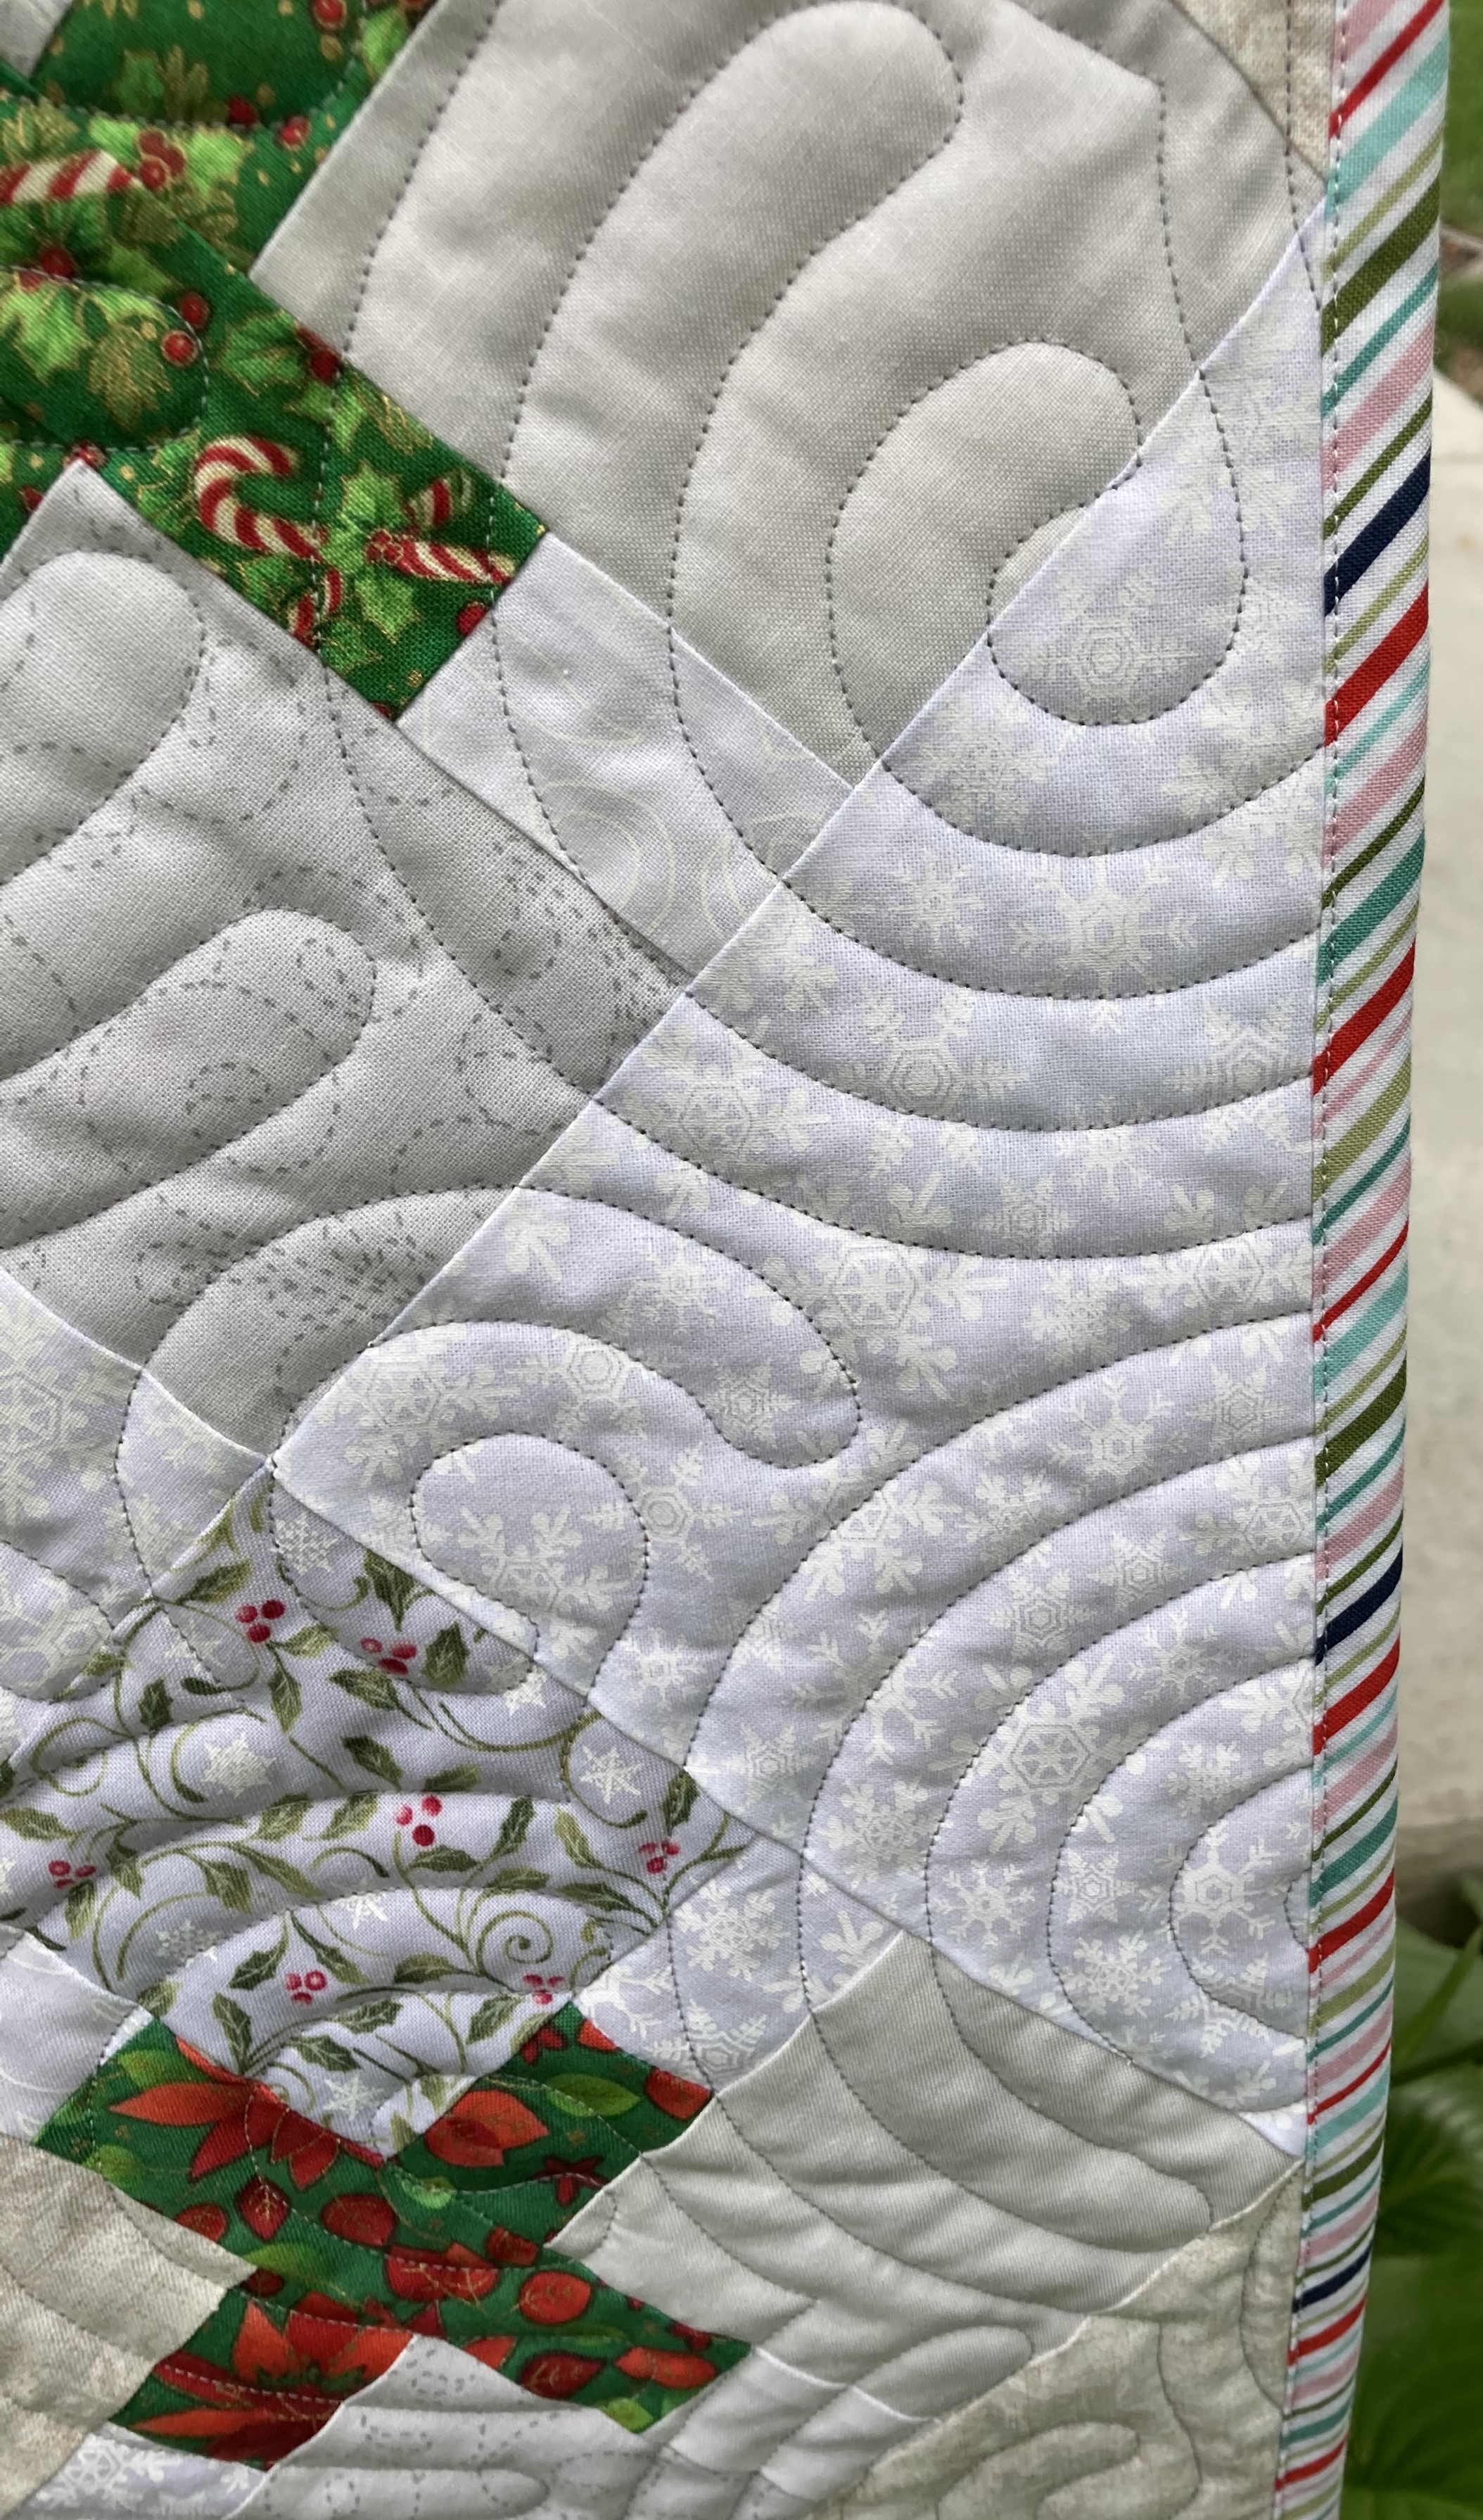
When I posted about the comforters I bound last week, someone asked how they hang together since they're not quilted? A comforter is NOT quilted, it's knotted. My church uses crochet thread to knot, some places use yarn. If you look at the comforter I wrote about today, you can see the knots. If you look at the 3rd one in the prior post, you can see the strings which have been sewn onto the comforter. Those strings will be snipped then it will be  knotted. Those strings held the layers together while I sewed the binding.

Linking to Needle & Thread Thursday, Put Your Foot Down, TGIFF!, Peacock Party, Whoop Whoop Party, Finished or Not  Friday, Off the Wall Friday, Beauty Pageant, Patchwork & Quilts, Scrap Happy Saturday

Sunday, September 24, 2023

Hearts & Wreaths, Border 2

I had more time for applique this week than I anticipated. The number of leaves that were on the first border was 62 so that is how many I need on this border. Fifty-five have been applied, the next seven should easily finish this border if I get an early start in the evening.

You can see the embroidered vine at the top where the leaves go. 

This is the 2nd long border, the next border to applique will be short side.

The pattern for Hearts & Wreaths is found in Quiltmania #138. Here is a link to my first post about Hearts & Wreaths which is dated August 29, 2021 which is a little over 2 years ago.

Once the borders are attached to the center of the quilt, I'll applique the corner leaves. These leaves don't seem to be taking that long. Maybe I can have this quilt the quilting frame by New Years?

I was busy with quilt stuff for the Relief Sale last week. Friday night I thought my legs were going to fall off, I'm not used to standing on concrete all day! 

We had a perfect autumn day for the Relief Sale. The 9 Patch Beauty quilt I donated to the sale sold for $1500 which is a respectable amount. Now I need to decide which pattern I'm going to use for next years quilt!

Northern Indiana has been extremely dry in September, we haven't received even an inch of accumulated rain. The edges of the leaves on the maple trees are turning brown and leaves are falling because it's so dry. This dryness is abnormal for us, usually we get rain in September after a dry August. 

We're hoping it doesn't start raining during harvest time in October, that's when we need it dry.

Linking to Kathys Slow Stitching Sunday, Stitching Stuff, Oh Scrap, Handmade Monday, Sew & Tell, Design Wall Monday, Craftastic Monday, Monday Musings

Friday, September 22, 2023

Scrappy Sprouts

The flowers for the Scrappy Sprouts quilt are pieced. I took the pictures outside so the colors are more true looking.

Here is the first arrangement.

Or they could arranged like this.

I'll probably move them around a dozen times before this quilt is finished.

I wasn't sure what to use for the green flower so I used this coleus as my inspiration. It has been my surprise plant for the summer. I had no idea this would grow to be so huge, I love it!

The flower pattern came from Preeti. She provided the pattern as part of her 2023 positivity quilt sew along. In an earlier post I had provided a link to the flower but that link no longer works. I knew when I saw the flower it would be perfect for my scrappy sprouts. Thank you Preeti! 

The next step is to fill space with neutrals to make all the columns the same height.

Here is a link to the pattern for Scrappy Sprouts.

Linking to Put Your Foot Down, TGIFF!, Peacock Party, Whoop Whoop Party, Finished or Not  Friday, Off the Wall Friday, Beauty Pageant, Patchwork & Quilts, Scrap Happy Saturday

Tuesday, September 19, 2023

Comforters for MCC

There are a group of ladies who meet Wednesday evenings at my church. They take the summer off but have now resumed. I don't attend Wednesday nights but I volunteer to bind the comforters after they have been knotted or strung.

I was recently given four comforters to bind. The first two, the lovely blue ones, are completely finished.

The other two have been stringed?, strung? strunged?, what is the proper word?

The strings will be snipped then knotted at a mini comforter bash at my church in October which is different from the BIG comforter bash in November.

I'm not naive. I know world peace isn't going to happen because my church is making comforters for MCC who sends them to refugees or disaster victims but it gives hope to the recipients and let them know they're not alone.

Here is a link to MCC where you can read about where these comforters are going.

Sunday, September 17, 2023

Hearts & Wreaths

A LOT of applique happened this week and I finished the first long border, I just couldn't put it down! It was so much enjoyable to be back to my evening applique again.

I was hoping I would have these borders finished by the end of this winter, at this rate it will before then. 

Of course this border isn't completely finished. After the main applique is finished, I'll sew a long and short border onto the center then miter the corner. Then I'll need to finish the applique in the corner. That will take longer since I'll have the whole quilt wadded up in my lap. But a quilt on the lap is a good thing in the winter.

I won't have a completed border to show you next Sunday, the Michiana Mennonite Relief Sale is this Saturday and I'm helping with the quilts. I will be home in the evenings but I have a feeling I'll be too tired to stay awake and applique.

The quilts in the auction are finally online and you can view them here. (I've fixed the link, sorry about that! 😟) Scroll down the page to see the quilts. My quilt, 9 Patch Beauty is Lot 141. Not all the items in the auction are quilts, there are also comforters, afghans and other quilted items.

* * * * * *
Back in 2020 I finished hand quilting the Sweet Surrender quilt which I renamed Floral Triangles. Over the years I have received many emails inquiring where the pattern could be found. The place I ordered the pattern no longer carries it. I didn't know where to  purchase it.

I recently received an email from Sue who no longer blogs. She told me she ordered the pattern directly from Sue Cody at this email address dragonfly.studio@bigpond.com. Here is your chance to buy the pattern! I'm looking forward to seeing a lot more Sweet Surrender (Floral Triangles) quilts online now, happy stitching!

Thursday, September 14, 2023

Sweet Kisses

The 3rd quilt Lori Null quilted for me is Sweet Kisses. I bought this pattern a year ago when Deanna and I attended the Garden of Quilts at Thanksgiving Point. You can buy the pattern here. I also bought several other patterns that haven't been pieced yet.

Sweet Kisses is a very scrappy quilt. I used a variety of fabrics for the background, white on white, grays and some creams. I also used some Christmas prints.

The snails trail design was used on this quilt. The curves are 1/2" apart. I don't like big designs, I think they make quilts look floppy. This design is closely quilted but the quilt is not stiff.

This quilt has a diagonal striped binding. It has more colors than green and red. I thought it was perfect for this scrappy quilt that has so many colors in it.


The backing of this quilt is very scrappy. The center part was purchased 20 plus years ago at an after Christmas sale. The top and bottom fabrics are from my mother's stash. I don't like them, I think they are dark and dreary but they are perfect for the back of a quilt.

My Sweet Kisses is 68" by 78". I'm not sure if this quilt will be displayed on a rafter or the back of the couch. I'll show you pictures in December.

Here is a link to other posts about Sweet Kisses.

Linking to Needle & Thread ThursdayPut Your Foot Down, TGIFF!, Peacock Party, Whoop Whoop Party, Finished or Not  Friday, Off the Wall Friday, Beauty Pageant, Patchwork & Quilts

Tuesday, September 12, 2023

A Little Table Topper

Last September I visited my friend Deanna in Utah. One of the outings we enjoyed was the Garden of Quilts at Thanksgiving Point where we viewed all 600 quilts in one day!

At the Ten Sister's booth they were selling their book and the fusible webbing used in piecing their quilts from the book. Deanna bought the book and fusible. 

The fusible has squares printed on it. You cut your fabric into the corresponding sized squares, arrange them on the fusible and iron them on. You fold on the printed lines, stitch your 1/4" then turn and stitch the other direction. I had never heard of this idea before! I assume this technique has been demonstrated at national quilt shows but I haven't been to one since several years before covid happened.

When we returned to her home, she cut a piece of the fusible for me to make a practice quilt using 2.5" squares. I pieced a small quilt top and brought it home with me.

After I finished quilting the hexie table runner, I decided to quickly quilt the little quilt and now it's finished after a year of waiting!

It's a little summer table topper and looks nice under the fern on my island.

The topper measures 14" by 14.5". I had thought the fusible would eliminate not having it be square, was the problem me or the fusible? I don't know and I'm not going to worry about it. 

I have more fusible that was gifted to me but I haven't started the project yet. It's for a larger quilt and I hope to start piecing it someday.

I used a piece of sage green fabric for the backing.

Sunday, September 10, 2023

Hearts & Wreaths Applique

The embroidered stems are finished on all 4 of the borders. Now the applique begins!

This is how much I've completed in the last couple of days. I like to arrange a group of the leaves at a time.

I have enough leaves for at least 3 borders prepped if not all 4. 

This ladder was on the north porch so it made a handy holder for the border.

These pictures are skinny and long. I don't know how people get two pictures to show in one space!

My leaves aren't appliqued as closely as the leaves in the wreaths. There are a few that are farther apart than I'd prefer but I'm not measuring them, I'm eyeing the space and the angle of the leaves. 

The leaves in the wreaths are smaller than the leaves in the borders. Each wreath has 40 leaves, with 12 blocks is 480 leaves in the center. When the borders are finished, I'll post the total number of leaves in the border then the total of the whole quilt.

The pattern for Hearts & Wreaths is found in Quiltmania #138. Here is a link to my first post about Hearts & Wreaths. Look at the picture of the whole quilt and you will see little leaf branches in the border also.

 Originally I had thought I would embroider those little leaves but I've changed my mind, I'm going to omit them entirely! 

If you had been following along while I made the 3/4" hexie tablerunner, it's finished! I posted about it last week. Since all the finishing work was machine stitching, it didn't qualify for a post on slow stitching Sunday.

Linking to Kathys Slow Stitching Sunday, Stitching Stuff, Oh Scrap, Handmade Monday, Sew & Tell, Design Wall Monday, Craftastic Monday, Monday Musings

Saturday, September 9, 2023

Scrappy Sprouts Flimsy

A big goal for me this year was to finish the scrappy sprouts blocks I pieced for several years in conjunction with the RSC. I did get the sprouts blocks sewn into columns and posted about it here.

I was pleased with that progress but was stymied as to what to use for a flower. Not all the sprouts quilts I've seen have flowers but I wanted them for mine.

Then around the same time, Preeti posted a flower to use in her Positivity 2023 Sew-Along, it was perfect for what I wanted!

Finally I've found time to make flowers. First I made this blue one. Sorry about the bad coloring.

It was cute but I don't know, do I want the flat bottom?

So I tried putting it down on top of the sprouts.

That would have worked but I decided to play around and came up with this idea.

Then I made a turquoise one which looks way darker in the picture than it actually is.

I do wish I had made the stems in the sprouts either all with the color of the month or green stems instead of both ways, oh well, too late now!

Two flowers completed, four more to go! Thank you Preeti for the lovely flower pattern!

Here is a link to the  Scrappy Sprouts pattern.

Linking to Patchwork & Quilts, Scrap Happy Saturday.


Thursday, September 7, 2023

Wintersweet Quilt

The 2nd of the quilts quilted by Lori is Wintersweet. Wintersweet was a free pattern from Cake Stand Quilts and you can find the tutorial information here.

This pattern is a very simple design but it's so elegant, I really like it! These pictures aren't in the correct order, they're the way blogger decided to load them.

For this quilt, I selected the snails trail quilting design. Lori made it smaller, the curves are 1/2" apart. All the background fabrics in this quilt are white on white fabrics. As you can tell, white isn't always white! There are at least 5 white/white fabrics. It was nice to use them.

Here is Wintersweet with her simple beauty! The white/white fabric doesn't really look this yellow in real life.

And the backside.

I made the binding with an assortment of the green fabrics after I finished piecing Wintersweet. In June I found this red/white stripe and used it instead. Now I'm wondering why I only bought 1 yard! I was on a shop hop with several friends and this was purchased at a store several hours from my home. The backing fabric is a white on white whole cloth fabric. Of course there was some of that fabric trimmed off after quilting so I have more white/white fabric to use in a scrappy quilt.

And a closeup back view of the quilting. I always think a swirling design looks good with a geometric design.

I made a change to the pattern and finished the chain, I thought it looked incomplete the way the instructions were written. You can read about that change in this post. My version of this quilt measures 81" by 82".

Several comments were left on my post about Peppermint Pines stating they would like to see the Christmas quilts hanging on the rafters. I will definitely show you but they won't be on the rafters until after Thanksgiving. 

In my house, Christmas comes after Thanksgiving, not before Halloween! 

Linking to NTTPut Your Foot Down, TGIFF!, Peacock Party, Finished or Not Friday, Off the Wall Friday, Beauty Pageant, Free Friday Patterns, Patchwork & Quilts

Tuesday, September 5, 2023

Grandmother's Flower Garden Tablerunner

The grandmother's flower garden table runner made with 3/4" hexies is finished! I'm sharing this with you today because it is machine quilted, it doesn't qualify for slow stitching Sunday.

Most of you said you couldn't see the mistake I made when sewing the hexie flowers together. You can clearly see it here. The side edges are supposed to be even, not zag over every two blocks! It's not perfect but I'm using it anyway.

The finished tablerunner measures 35" by 57" and it fit the blanket chest just fine, no more scratched lid!

Machine quilting is not my thing but I wanted this project finished so I could start working on Hearts & Wreaths again. I decided to use this stencil for quilting and quilt vertically. I sketched lines where there weren't any, I thought it would make a nice crisscross design. I also decided to stitch in between these marks so the stitching would be approximately 1/2" apart. The straight line in the center would not be stitched. That was the plan anyway.

The inside of the curves were too sharp for my skill level. Since I do so little machine quilt, my curved lines had zags in them and weren't that smooth. Fortunately you can't see most of them since the darker colors of the hexies make them hard to see.

Quilting the way I originally planned meant there were 4 lines that needed to be stitched each pass, with the space of 1/2" in between them. It was taking forever and I really began to dislike this table runner! I decided to just quilt the outer design and it went faster. I made myself quilt for an hour a day, I was always glad when that hour was past. 😓 

I will admit though, my curves became smoother the more the quilting happened.

It was finally finished and quickly bound. 

When I laid it on the blanket chest, the borders stuck out straight because it was stiff, sigh 😞. So I washed it, the corners were better but not draping like I had wanted. I'm finished with this tablerunner though, it's done, I'm done and I'm moving on!


One thing I am pleased with though is the machine buttonhole stitching I used to attach the hexie center to the background fabric.

At this year's November Jane Stickle retreat, I want to work on the Dresden Stars that I started at the November 2022 retreat. If I can get them sewn into the stars, I plan to use the buttonhole stitch to attach them to the background fabric. This tablerunner was good practice and I was very happy with the stitching.

I used a spool of a brown variegated thread for the quilting and I am happy to say that I won at thread chicken! There was an 18" thread left on the spool after I was finished!! I didn't do so well at bobbin chicken but oh well, it's finished.

Muslin was used for the backing fabric. I didn't measure the runner after washing so I don't know if it shrank or not. Pieces of batting were used, not a whole piece.

Sunday, September 3, 2023

Back to Hearts & Wreaths

One of my goals this summer was to have the borders for Hearts & Wreaths prepped and ready to start the applique  process by September 1, I made it! Here is a link to the last post about Hearts & Wreaths in December 2022. It's been in time out longer than I thought. In the picture you can see the true yellow background color of the fabric. It looks beige in some of the following border pictures but it really is a soft yellow.

In these pictures, not only does the fabric look beige, the cutting mat looks blue, not green.

The instructions said to cut the border 8.5" wide. I cut my borders a little wider. You lose some border when you finish the edges and I'll loose a little more when I applique the leaves. When I zigzag the edges, I use stitch #3 on my machine. It's a zigzag but it makes stitches in the zigs and zags so it doesn't pull the fabric in, it stays flat.

The borders have a top and bottom side. This is important when you sew the borders onto the center.


First thing you do is mark the center of the border. I left the selvage on the two long borders so they are wider than the short sides. The selvage will be trimmed off after quilting. This is marked with a normal ink pen.

I used a Frixon pen to mark the lengthwise center of the border at 4.25".


The instructions said to sew the borders onto the center then applique the leaves. No Way! I have to turn the border around to applique each leaf, I don't need that extra bulk of the center. Think how wrinkly it would get and maybe dirty too!

I will applique my borders then sew them onto the center. The corners will be mitered so I'm stopping the vine 8" from the edge of the center section. The vine will be at the top of the curve ready to swing down into the corner, make kind of half circle then curve back up to the other side. At least that's the plan.


There were several more steps involved but here is the prepped border before I start embroidering the vine. I chain stitch 3 strands of black embroidery thread, I think 3 strands makes the vine more distinctive.

 All of the markings you see are from the Frixon pen. I freehand drew those curves. Are they perfect, no but I've never claimed to be a perfectionist. 

I can't press these borders now until the applique is completed. I don't want creases or wrinkles in them so they're hanging on a hanger in the closet.

I'm looking forward to the day when I put this quilt flimsy into the hand quilting frame and start stitching. I already know which designs I'm going quilt. Look at this picture and imagine a quilted design in there. I have several stencils that will fit into an area that size, I'll probably use them all!

Here is a link to my first post about Hearts & Wreaths from August 2021

Linking to Kathys Slow Stitching Sunday, Stitching Stuff, Oh Scrap, Handmade Monday, Sew & Tell, Design Wall Monday, Craftastic Monday, Monday Musings