Tuesday, March 22, 2022

Flower Patch Sew Along, Blocks 12 & 13

Block 12 of the Flower Patch mystery is another bird block. I've made cardinals again as opposed to blue jays, they add color to my darker batik blues.


I think block 13 is the prettiest block of all! There were 2 different options for the center, I liked the 2nd option best.
Here are the top three rows sewn together. Block 13 is the first block in the 4th row and is not included in these pictures. 
The flying geese chain is so lovely! 

I took these pictures in the snow earlier this month when it snowed. I thought it was fitting with the cardinals. Cardinals bring such a splash of color in the wintertime.

I won't be posting for a week or so. I'm flying Wednesday afternoon to Phoenix for my spring visit. I never visit in the summer, 120* is too HOT even for this heat lover. 

Linking to To Do Tuesday, Flower Patch SALMidweek Makers, Wednesday Wait Loss, Stitch Sew & Show

Sunday, March 20, 2022

Welsh Beauty

In December I posted about a list of challenges I had made to myself. One of those challenges was to have hand quilted to the center of Welsh Beauty by the end of May. I've met that challenge 2 months early! I'm halfway finished with Welsh Beauty!

Here are the photos from left to right.


The above of the very center of the quilt, isn't this a lovely motif?


Halfway finished! This is an awesome feeling!

Here is a link to my first post about Welsh Beauty. It gives you information about Welsh Beauty, the thread and batting that are used in the quilting of this quilt.

I won't be having a Sunday post next Sunday. Later this week, I'm flying to Phoenix for a visit with our daughter before their summer heat sets in. It's in the 80's out there now which will be a welcome change from chilly mud season here in northern Indiana.

Friday, March 18, 2022

Redo!

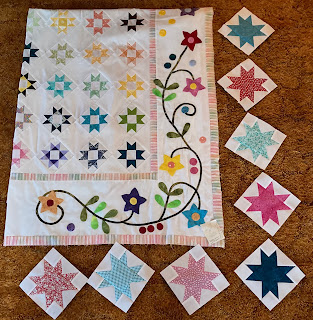
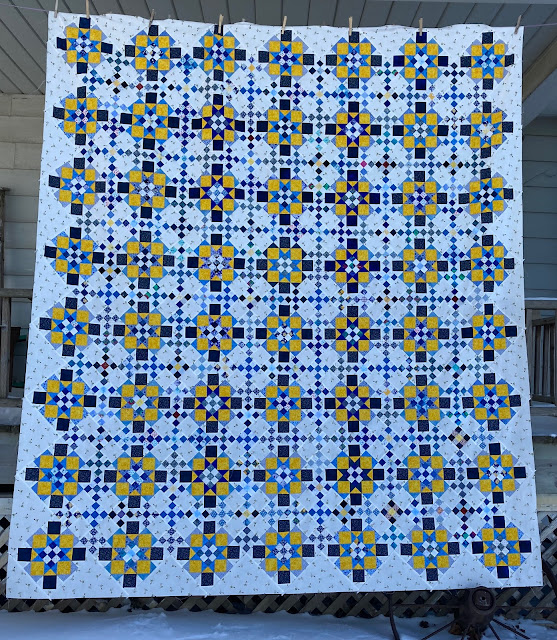
For the 2022 RSC challenge, I had decided in January that I was going to make 6" finished sawtooth stars as a way to enlarge my Star Dance quilt. I made stars for that purpose in January and February.

I pulled yellow and orange fabrics to make the stars for March, then I thought, are these stars going to look right? I thought I knew the size of the finished stars in the quilt center, 5", but decided I had better measure to be sure.

Guess what! They finish at 4"! When I randomly displayed the stars beside the center, they did not look right, the 6" stars overwhelmed the little stars. The sawtooth stars have been bagged and put aside for another day, possibly a future RSC project but not this year.

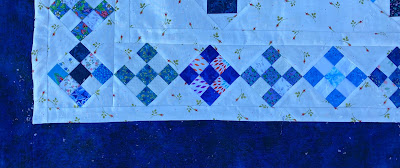
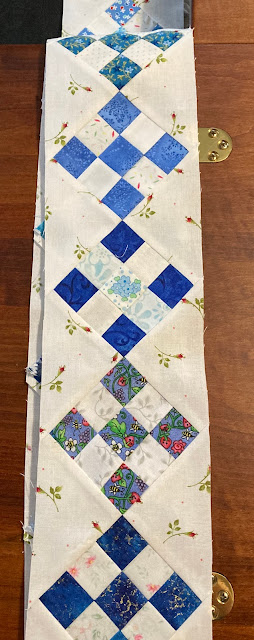
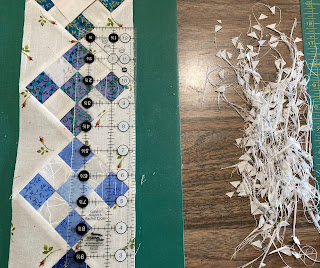
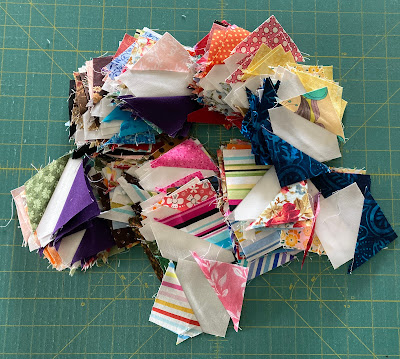
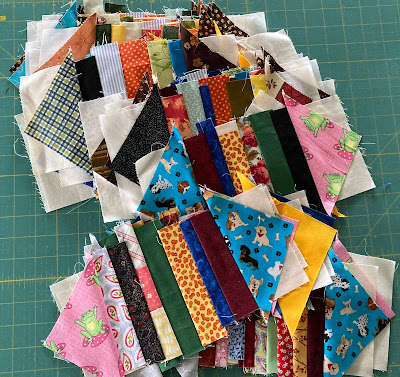
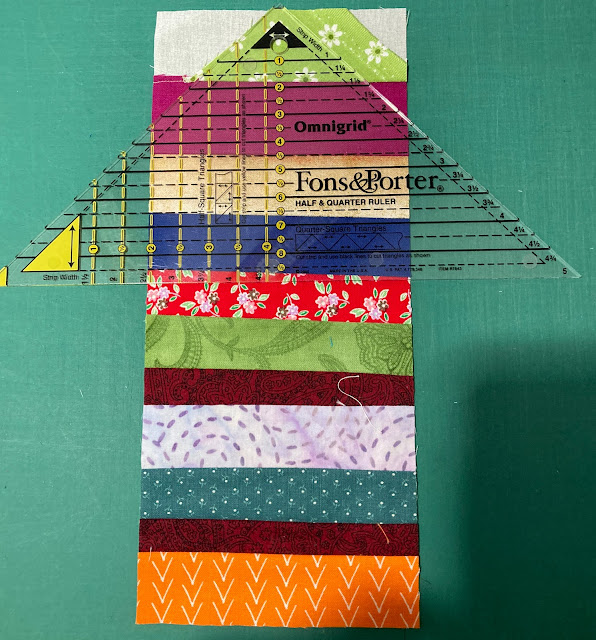
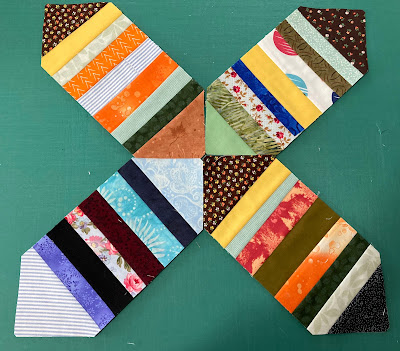
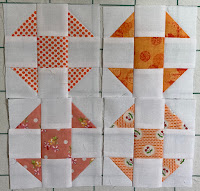
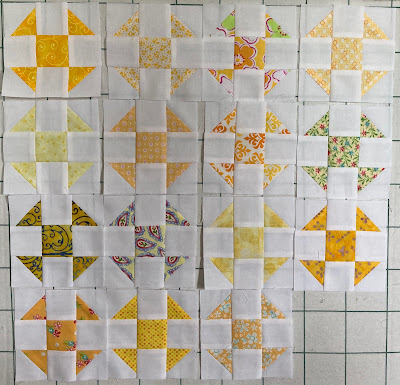
When Star Dance came out of the closet, I found a note pinned onto the side, it said to make 4.5" finished shoofly blocks. That size will work so I prepped fabric and sewed the shooflies, 28 of them! I'll go back and make red and teal blocks sometime.

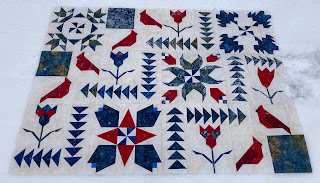
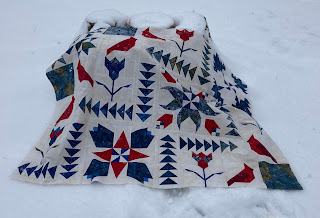
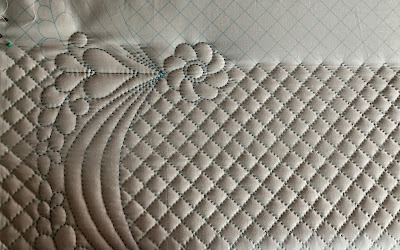
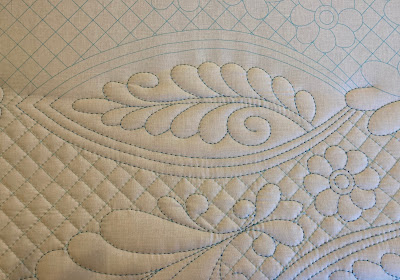
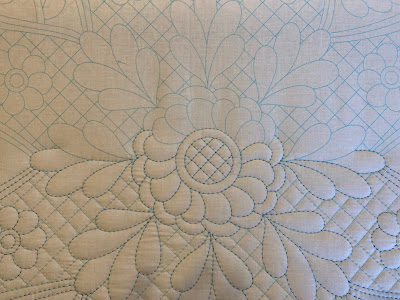
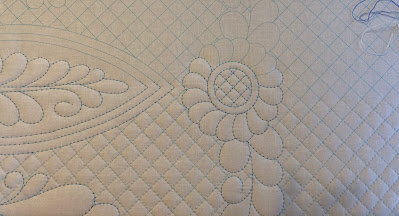
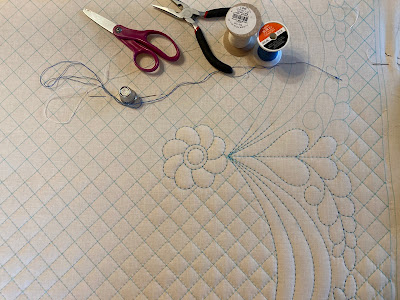
This quilt is very picky about how she is finished!

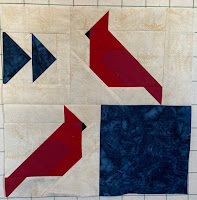
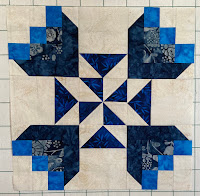
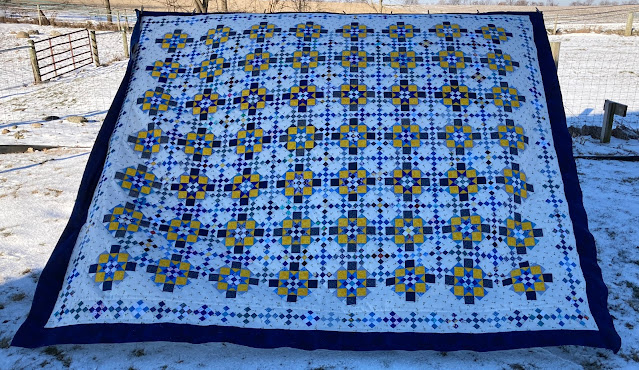
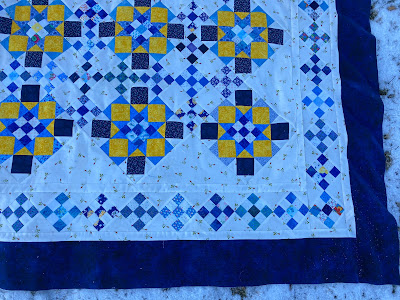
The pattern for Star Dance is located here. My Star Dance is not made exactly like the pattern design.

Linking to Put Your Foot Down, Needle & Thread Thursday, Peacock Party, TGIFF!, Finished Or Not Friday, Off the Wall Friday, Patchwork & Quilts, Scrap Happy Saturday, Oh Scrap.

Sunday, March 13, 2022

Welsh Beauty

Another roll of Welsh Beauty. I love the texture that is happening here!

The pictures run from left to right across the quilt.


I don't have a lot to say today, I'll just let my quilting speak for itself.

Linking to Kathy's Slow Stitching Sunday, Stitching Stuff, Show & Tell Monday, Monday Making, Handmade Monday, Design Wall Monday


Friday, March 11, 2022

Double Delight Flimsy Finish!

My king sized Double Delight flimsy is finally finished! I first posted about Double Delight on February 1st so I haven't been working on this quilt as long as it seems.

It was a little breezy out when I took the photos but I got a picture of the whole quilt.


This flimsy is BIG! As of now, it measures 110" by 122" but that will shrink during the quilting. The size of this flimsy is why I didn't hang it on the porch display line, it would drag in the flowerbed and I wasn't going to take any chances of it becoming soiled. You will have to accept my clothesline as a 2nd choice.

As I said earlier, I designed the 9 patch border myself. Bonnie did not include a pieced border with the quilt pattern. The border is not perfect, it figured it out with paper, pen and my calculator, but I am pleased with it. I felt quite creative!

One inch finished background borders run along each side of the 9 patch border to give the idea of the patches 'floating'.

The quilt top is now at the long arm quilter, no way am I going to attempt to hand quilt this flimsy!

Double Delight is a free pattern designed by Bonnie Hunter. It is one of her older mystery quilts and is found at the very bottom of the free list. Here is a link to a picture of her Double Delight.

Linking to Put Your Foot Down, Needle & Thread Thursday, Peacock Party, TGIFF!, Finished Or Not Friday, Off the Wall Friday, Patchwork & Quilts, Oh Scrap

Wednesday, March 9, 2022

Double Delight, Borders!

My double delight quilt has progressed to the border stage. Bonnie Hunter is well know for her pieced borders but apparently she hadn't reached that point yet when she wrote this pattern. Her borders are plain, just a wider border with 9 patches in the corners which is ok but I wanted something more interesting.

I had 3 ideas in mind for my border. Since I had so many 9 patch blocks pieced, I decided to go with that idea. I actually didn't have to make anymore 9 patches which made the borders sew faster. 9 patches on point was the idea, a 3" finished 9 patch measures 4.25" on point

I cut 5.5" squares diagonally into 4 triangles and sewed 2 of them on the sides of the 3" patches. Using triangles cut like this ensured the bias would be on the inside of the row, not on the outside.

I trimmed off the dog ears after the borders were pieced. 

I'm going to leave you hanging, the next post will show you the completed quilt flimsy. And no, I won't be writing a pattern to share with you. Pattern writing is not one of my skills but if I can figure out how to do this, so can you!

Double Delight is a free Bonnie Hunter pattern and is located at the very bottom of her free pattern page.

Linking to To Do Tuesday, Midweek Makers, Wednesday Wait Loss, Put Your Foot Down, Stitch Sew & Show,  Needle & Thread Thursday 

Sunday, March 6, 2022

Hearts & Wreaths

After I finished block 12 for my Hearts & Wreaths quilt, it was time to ready more blocks for applique. I have been working on 4 blocks at a time but this time I prepared 6 blocks.

First I chain-stitched embroidered all 6 blocks, then I appliqued hearts in the center of each block. 

Some of the blocks I really like, these turquoise and pinks hearts are my favorite of this group. I fussy cut the turquoise hearts, those butterflies are so cute!

There are 3 blocks with yellow in this group. Some of the yellow hearts are a little light but I think they'll show up against the background yellow. The leaves will brighten them up.


As usual, here is a link to the first post I wrote about Hearts & Wreaths. I have made a slight change to the pattern. The pattern recommends embroidering the circle with 2 strands of brown floss. I think black always makes fabrics pop so my circles are embroidered with 3 strands of black floss. 

Linking to Kathys Slow Stitching Sunday, Stitching Stuff, Oh Scrap, Show & Tell Monday, Monday Making, Handmade Monday, Design Wall Monday, BOM's Away

Friday, March 4, 2022

Double Delight

Are you tired reading about my double delight progress? In January one of my challenges was to make a quilt at a time, not start and stop. Double delight is the first quilt in that process. I'm glad to say the center is sewn together!


This is a controlled scrappy quilt, the only constant fabrics are the background fabric and the yellow in the rolling stone blocks. I love the way the fabrics look, even the farmer likes it! As of now it measures 90" by 102". I need to trim the edge of the center, I slightly over cut the inset triangles so there would be an edge to trim.

I didn't have a plan when I started piecing the 9 patch blocks, I didn't have a plan so some of the centers aren't blue or yellow. That's ok, that just adds interest to the quilt, same way with the blue fabrics that have other colors in them.

This quilt is going to be for our bed so it needs to be king sized. It's time to start working on borders.

Double Delight is a free Bonnie Hunter pattern which is located at the bottom of the free pattern page

Linking to Put Your Foot Down, Needle & Thread Thursday, Peacock Party, TGIFF!, Finished Or Not Friday, Off the Wall Friday, Brag About Your Beauties, Patchwork & Quilts, Oh Scrap

Wednesday, March 2, 2022

Indian Hatchet Blocks & String X

While I've been working on Double Delight, I've been running two leader/ender projects under the needle.

The first project is Indian Hatchet. I've accumulated quite a few small blocks. I've cut the white corners off the backs, now I need to get them trimmed to 2.5".


I don't understand why they're called Indian Hatchet, they don't look like any hatchet I've ever seen! I've made blocks similar to these as an autograph block.

The second project is String X. String X is a Bonnie Hunter pattern. I had a stack of stringed blocks so I counted to see how many more I needed. I'm using old muslin for the foundation and cut exactly the number I needed to make this quilt into a 60" by 80" quilt.

Those string blocks have all been sewn now they also need to be trimmed.

After the string X blocks are trimmed to 4.5" by 10.5", the corner point needs to be cut on the top and bottom of the strip.

Bonnie has directions with her pattern how to cut the points. I don't do it how she says, it's too complicated!

I don't have a lot of rulers but the ones I do have, pay for themselves with their convenience. One of my favorites is a Half & Quarter ruler. My ruler is a Fons & Porter brand (purchased with a 50% of coupon at JoAnn's) but there are many other brands available.

I simply lay my ruler on the trimmed rectangle with the 2" mark along the left side of the block. I make sure the black mark on the top of the ruler is even with the top of the rectangle, then cut the 45* angle.

All of the rectangles have been trimmed and are ready to have the side triangles attached. 


My mother has been gone for 15 years but I'm still using her fabrics. I dug deep in a box and pulled out this old dark red fabric. I think there is enough for all of the blocks. That brown calico corner piece is also from her stash.

This project has advanced to the next stage of leader/ender. I decided to trim the string X blocks because there were a LOT less of them than the hatchet blocks.

Linking to To Do TuesdayMidweek Makers, Wednesday Wait Loss, Put Your Foot Down, Stitch Sew & Show,  Needle & Thread Thursday