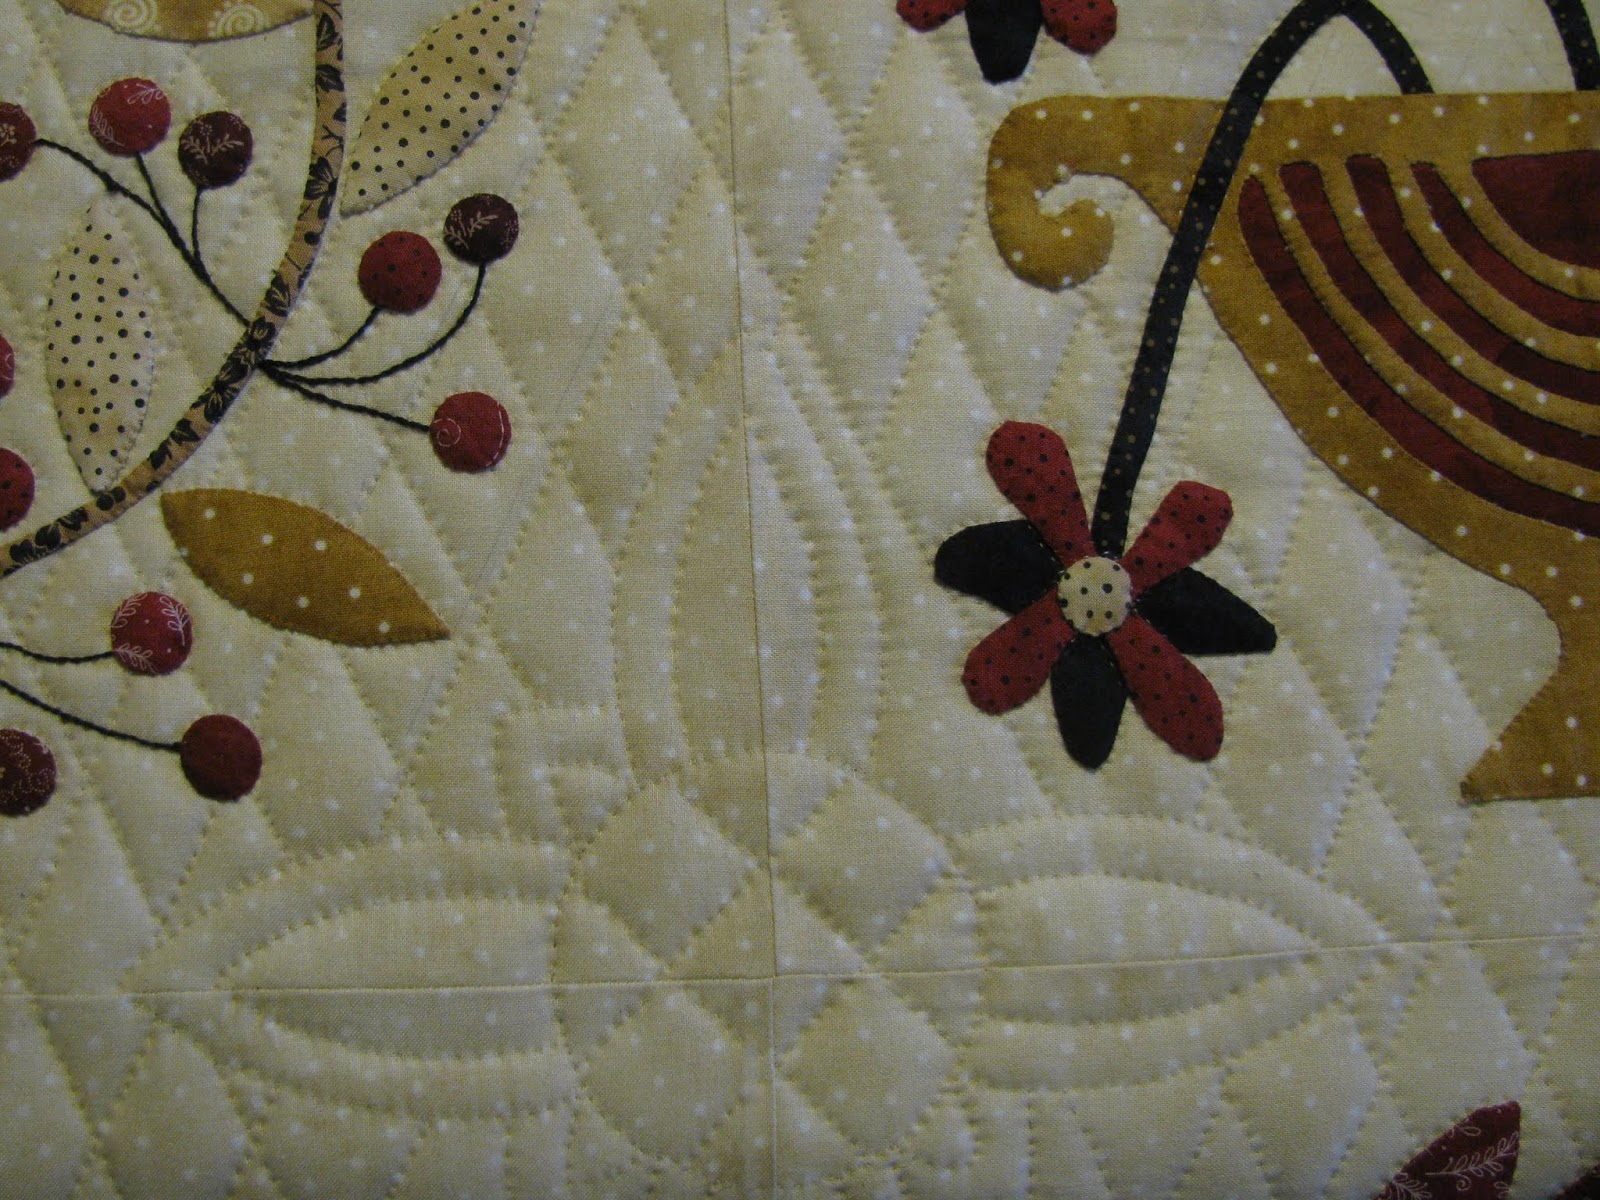
The row that was started 2 weeks ago on the Pastor's Attic quilt is finished. I think the quilting designs in the corners of the blocks look so nice.
The block I missed taking a picture of last week. I like to lightly brush my fingertips over the quilted applique, it has such wonderful texture.
It took awhile to get all those cherries quilted.
Now the rest of the row.
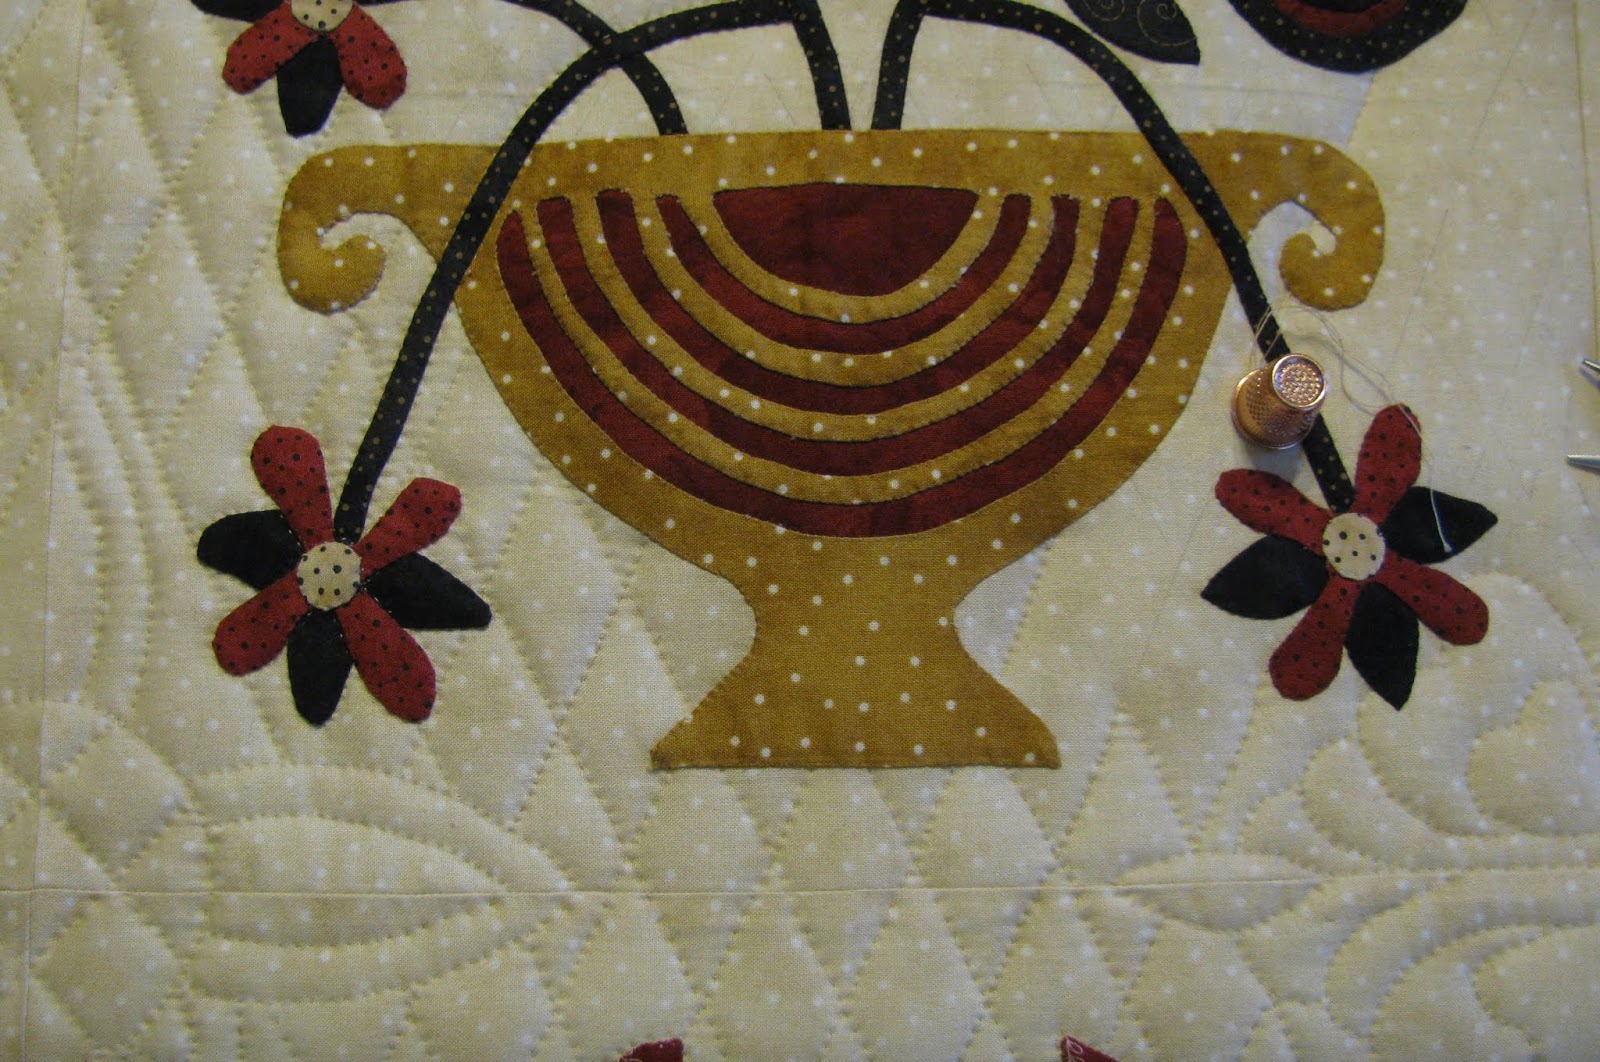
This vase also took quite awhile to quilt. The red area in the vase needed to be quilted on both sides but so worth the time and effort.
The quilting between these applique blocks. This is an older stencil I've had for years. Got to love the hearts!
Again I quilted along the embroidery and I stitched in the ditch around the centers of those flowers too. I don't just stitch around the outside of the flower petals, I stitch beside them on top of the black.
This flower design is my favorite of the stencils I'm using. I've had this one for several years but this is the first time I've used it.
This applique is not original to the quilt. There were two blocks I didn't like in this quilt so I substituted.
The pattern for this Rose of Sharon Block came from a quilting 12" stencil.
I had originally planned to use larger stencils in the corners but there just wasn't enough room. You wouldn't have been able to see enough of the quilting design to make sense of the quilting.
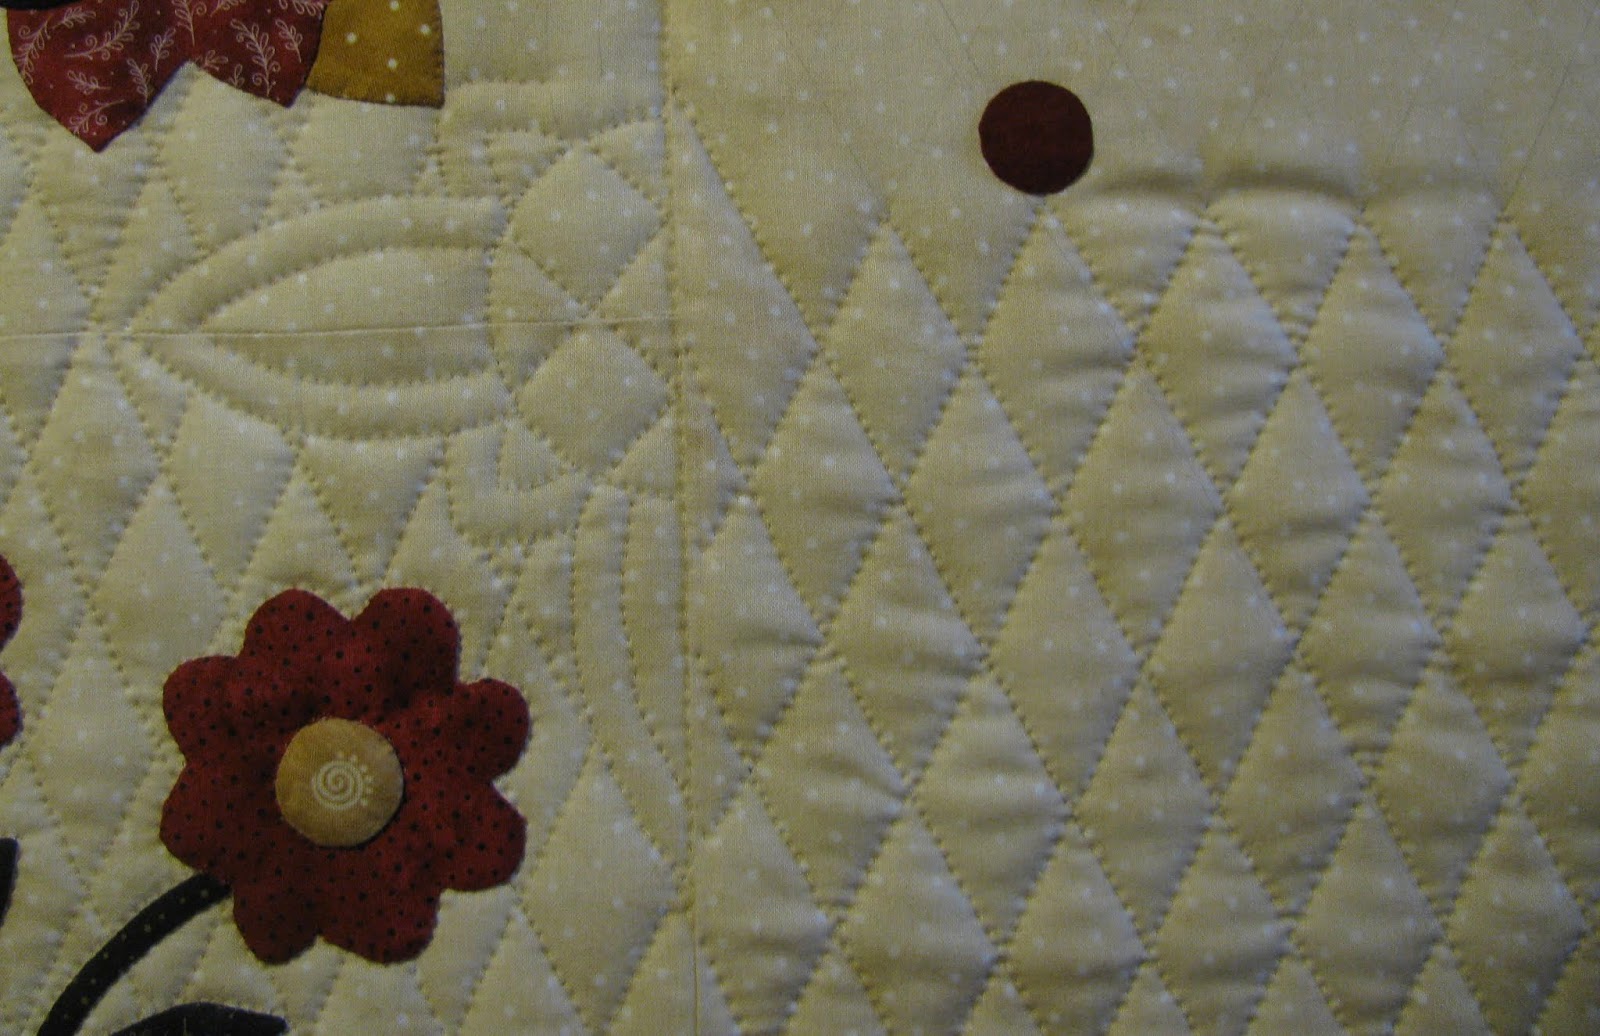
The half stencil dividing the center from the outside border. I only stitch in the ditch in the seam line when there's a stencil design. Otherwise the diamonds go across the seam from the border into the center.
Right side border. You can see I quilt around the randomly placed circles in the border. The pattern didn't have the circles. I added them because I wanted to.
Lucy is making progress. I've been EPPing the various components that go into this wall hanging. Some people are confused by what I'm doing. There's more to this project than just the fussy cut blocks everyone shows. There's the more mundane, not so beautiful blocks but very necessary.
This section is what I'm working on now. One is completed and need five more.
This is what the various parts look like now. Too much orange/gold together.
How about this layout? I don't need to decide today. I need to finish the edge pieces first.
You can tell by looking at these blocks, I liked the blues and orange/gold fabrics the best.
After the edge pieces are completed, I think I'll start sewing the sections together. Hexies will need to be added onto the outside edge but I'm ready to see some progress!
Linking to Kathy's Slow Sunday Stitching, Oh Scrap, Show & Tell Monday, Monday Making, Design Wall Monday, Esther's Wednesday WOW!
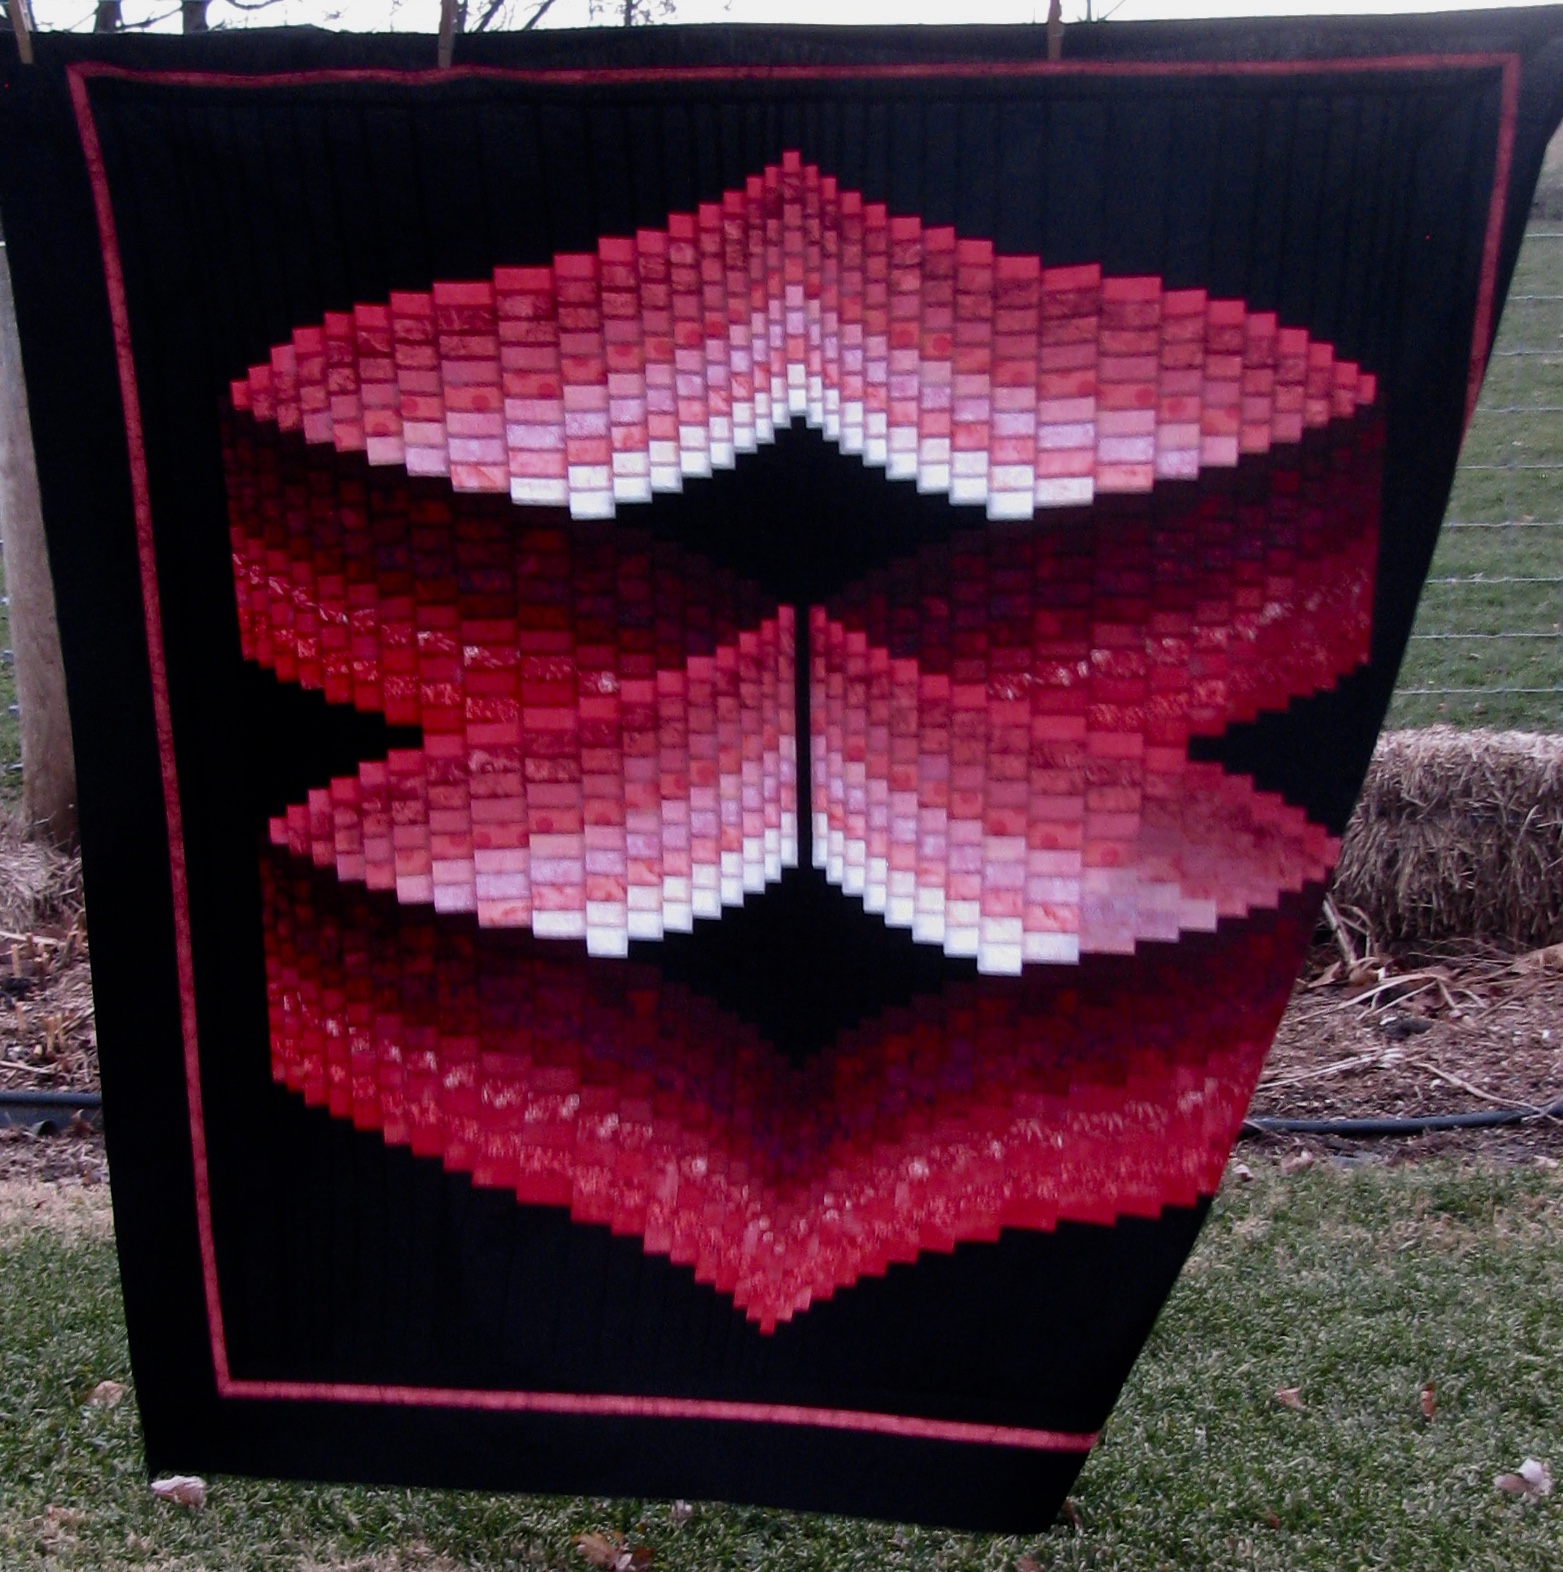
Infinity is pieced! She'll be heading to the long arm quilter in January. This quilt was so much easier to make than I thought it was going to be, it wasn't hard. If you can read a map, you can make this quilt.
Here she is! You can really see the individual pieces. That's not so noticeable in real life.
She measures 53" by 58".
The fabrics were for this quilt were purchased at Yoder Department Store in Shipshewana, Indiana. My friend Nancy helped with the selection and she did a wonderful job guiding me. The black is a batik and came from the Cotton Corner which is just across the parking lot from Yoder's.
If you are a long time reader of my blog you will notice something different about this quilt, there isn't any blue in this quilt at all! My daughter was along when I bought the fabrics. She was shocked.
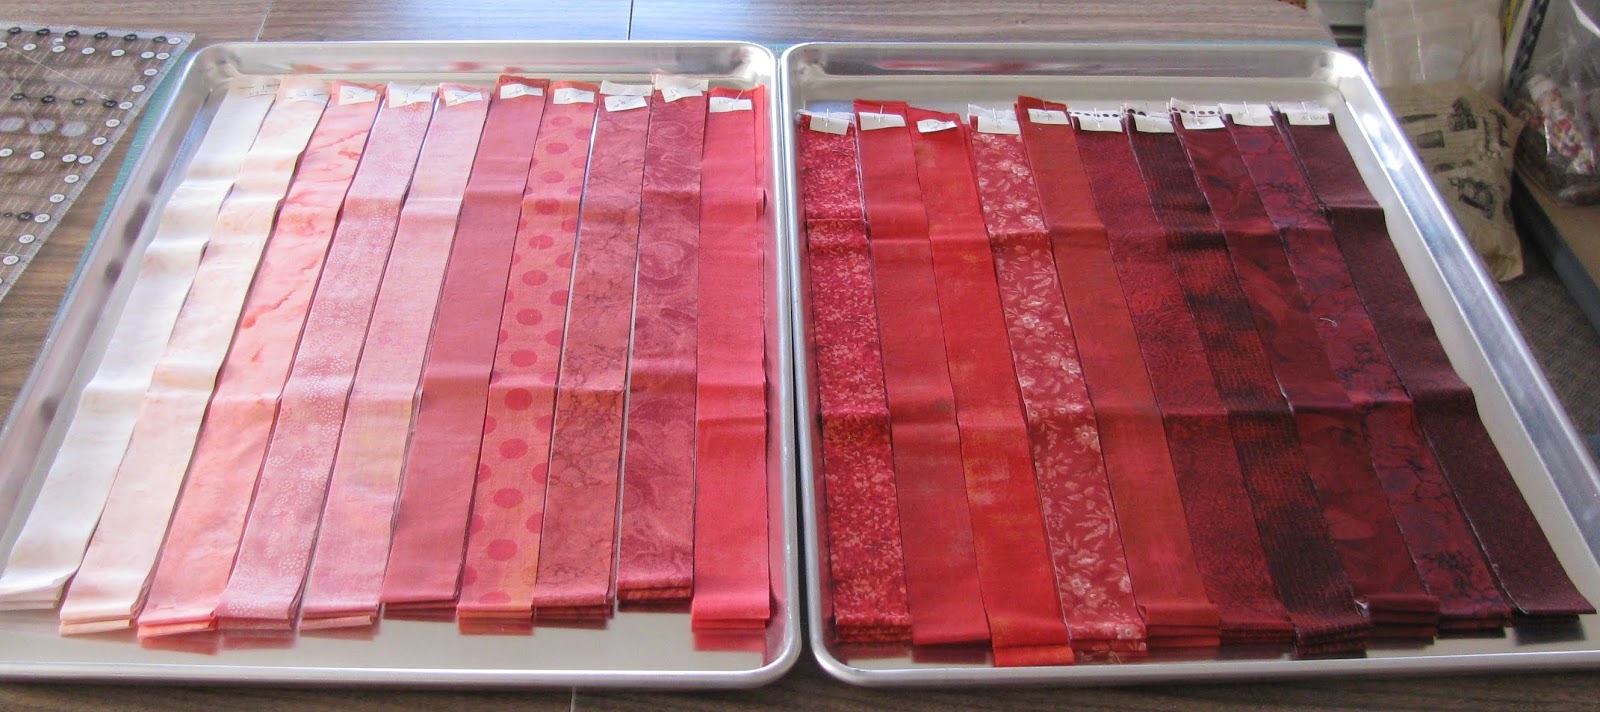
After I got the fabrics home and cut into the strips, I started second guessing myself, would they be bright enough?, should I have bought all batik fabrics? She turned out just fine.
The fabrics in the 2nd picture look more pink than they really are.
The hardest thing about making this quilt was the black
fabric, it made my eyes so tired. If you have trouble falling asleep at night, I suggest working with black fabric. That will do the trick, it did to me anyway.
Here is a link to last week's post about Infinity. If you are interested in information about the pattern link here.
Linking to Let's Bee Social, Needle & Thread Thursday, Confessions of a Fabric Addict, TGIFF!, Show Off Saturday
I've been hand quilting the Pastor's Attic quilt for 9 weeks. This week I quilted to the center of the 2nd applique row. There was a lot of detail to quilt in this row. I wouldn't have to quilt the embroidery but I think it adds nice texture when I do.
Left border. I had actually forgotten that the side borders have applique on them. I like the diamond designs I've chosen for the quilt but it was getting boring just quilting diamonds. The applique will break things up a bit.
First applique block. You can see the half design on the left side of the block.
Another design between applique blocks.
The applique block on the right is the one that took awhile with the embroidered stems.
I forgot to take a picture of the applique block in between these quilted designs. You can see it some. Next week I'll have a picture.
I'm quilting this applique block, it is the center of the row. The vase was appliqued with the reverse applique method. I'll stitch along the edge of the red.
I haven't forgotten about my Lucy Boston project. I'm still working on the different sections needed for this small quilt. I'll show a picture of the progress next week.
Linking to Kathy's Slow Sunday Stitching, Oh Scrap, Show & Tell Monday, Monday Making, Design Wall Monday, BOM's Away, Moving It Forward, Esther's Wednesday WOW!
A new quilting project called Infinity has begun. I've been wanting to make this wallhanging for years and have decided to dedicate the rest of December to this project.
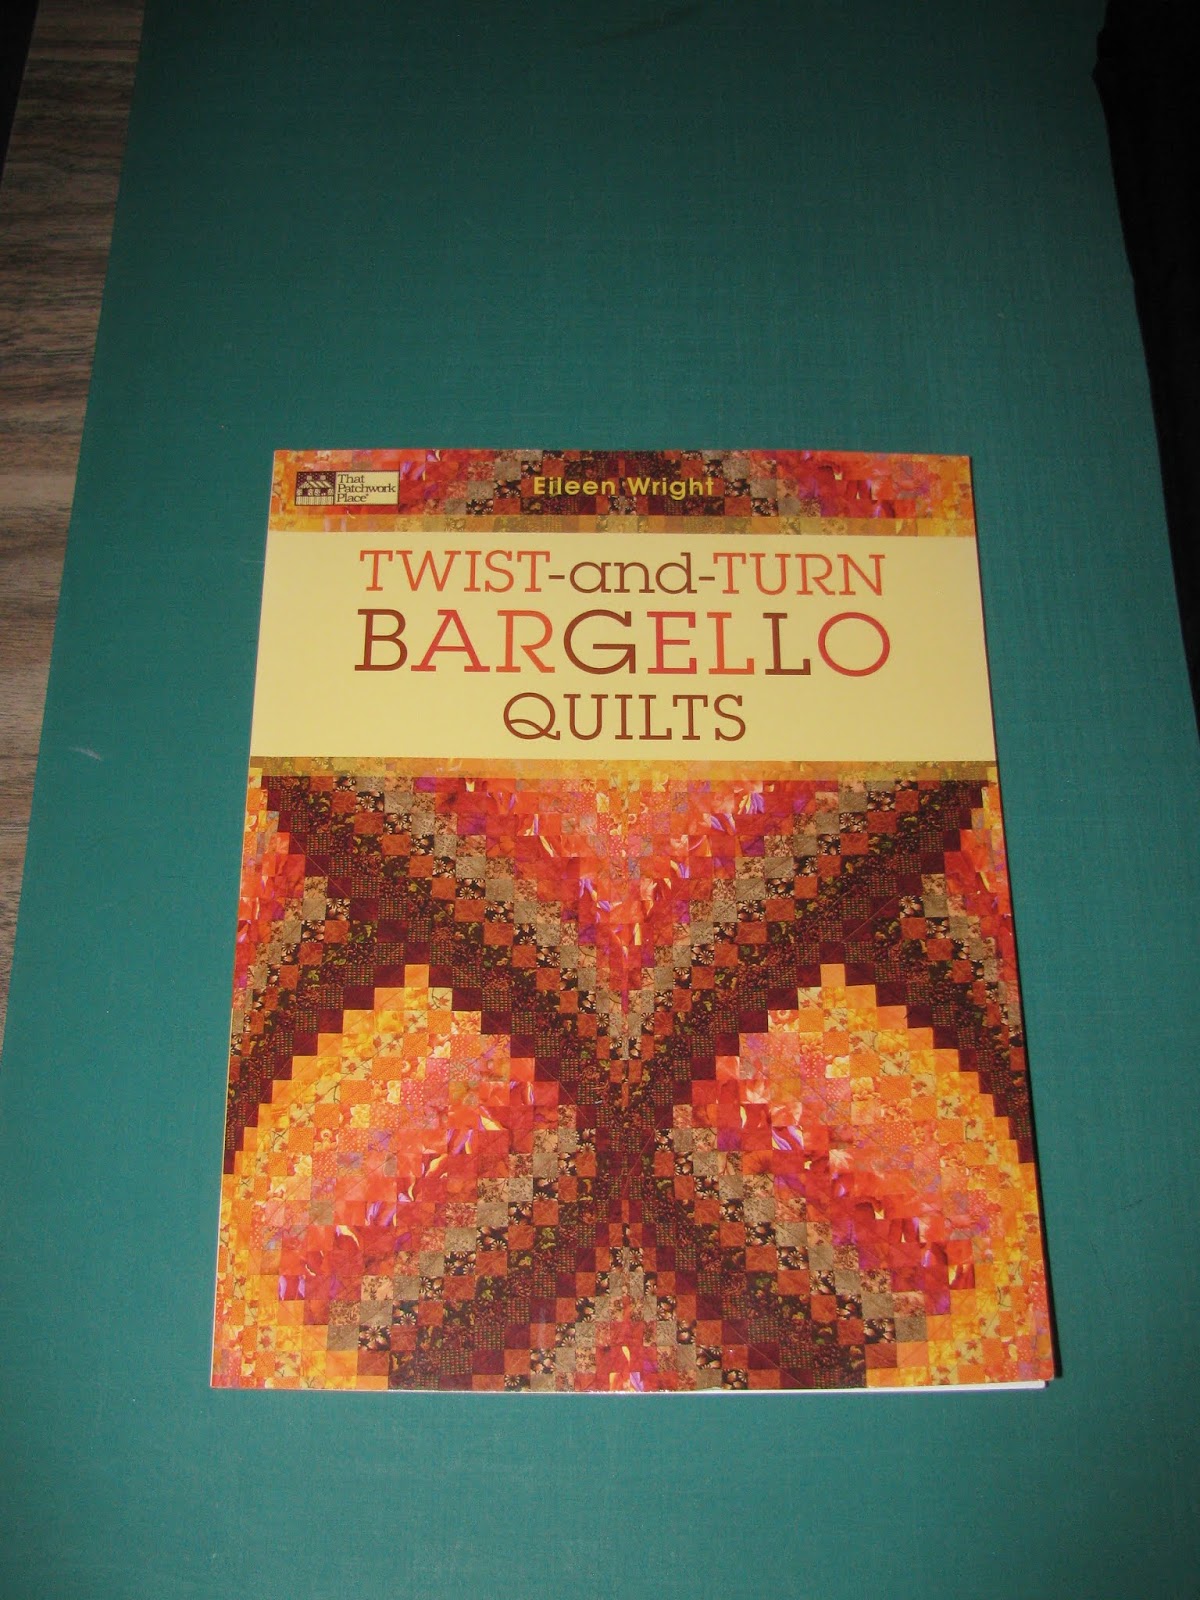
The pattern is found in Twist and Turn Bargello Quilts by Eileen Wright.
I don't like most Bargello quilts but this book has several that I do like. My preference is that they be symmetrical.
(I know I cropped this picture to remove part of the green. Looks like Blogger is playing with my mind again this week. At least the pictures are here and not lost in cyberspace!)
Infinity looks like an interesting pattern.
It looks even better when the page is turned the correct direction. Blogger!
The fabrics have been purchased. Sorry the photo is dark.
And they've been washed to remove excess dyes.
The black isn't shown hanging on the rack. That happened after these fabrics were removed, pressed and refolded.
The fabrics have been cut into strips.
After this picture was taken, I did rearrange some of the fabrics and I even remembered to change the label numbers.
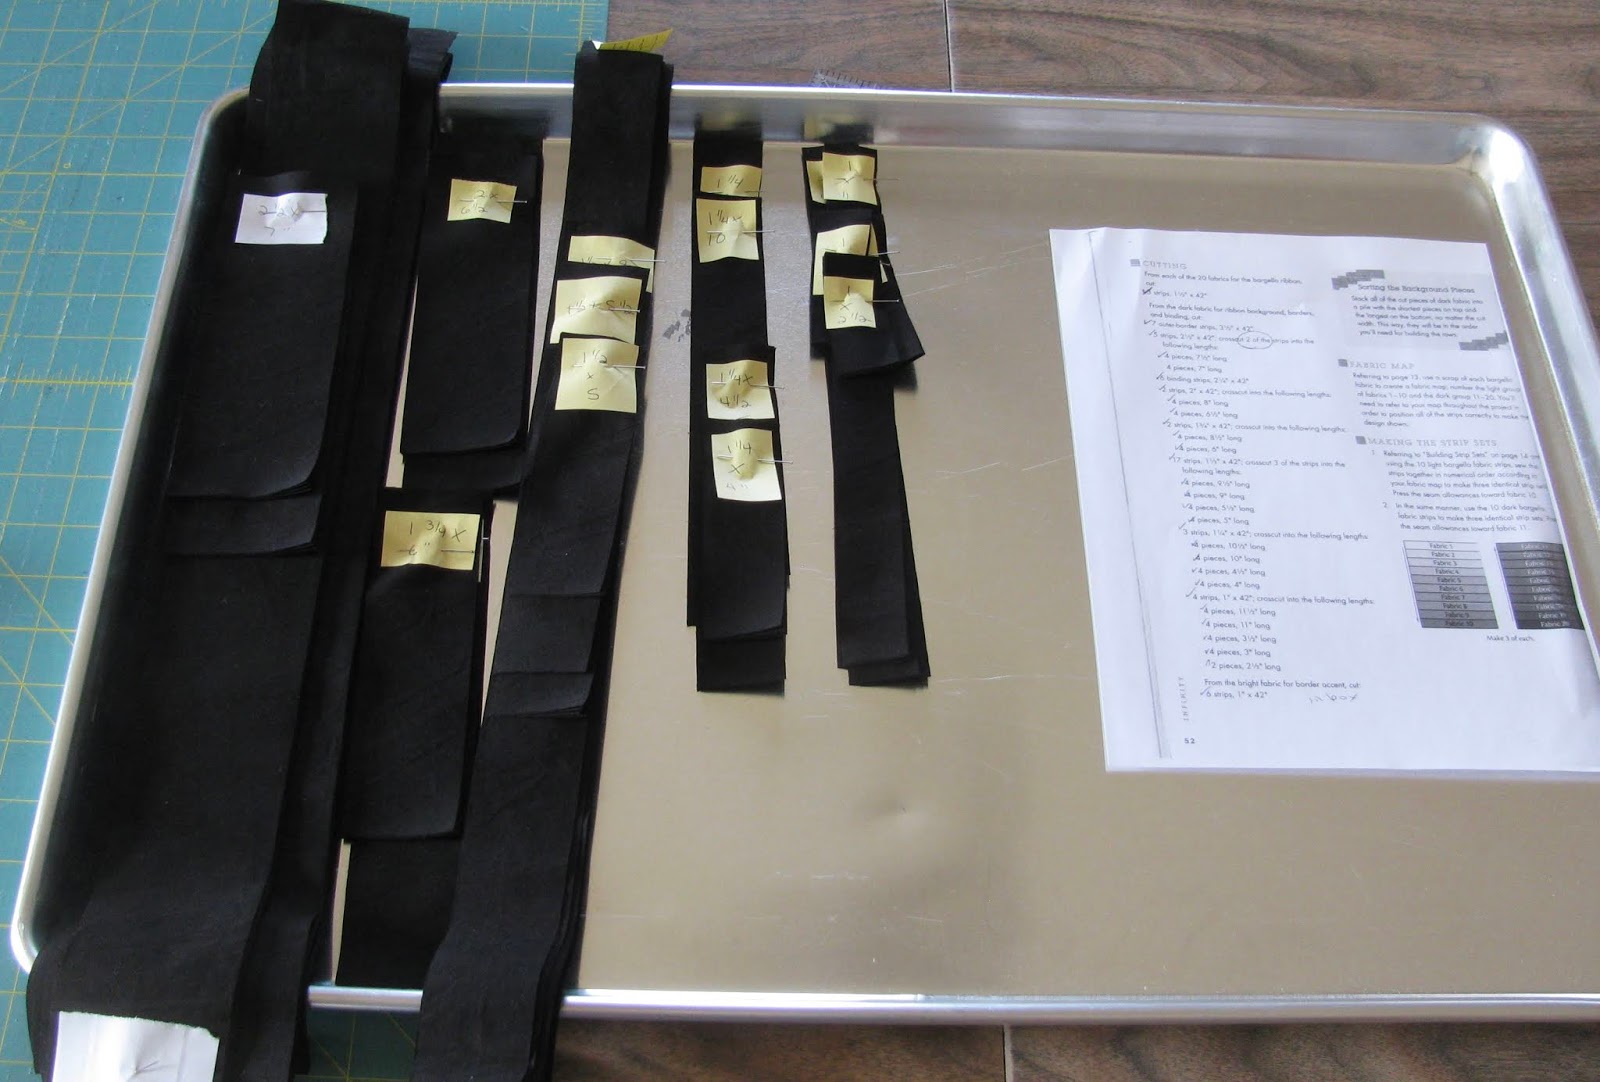
The important thing is label, label, label!
The black fabrics have also been cut and labeled.
And there there is also a black strip set sewn. I didn't take a picture, just imagine a bunch of black strips sewn together.
I copied the instructions from the book since it won't lay flat. I also like to do this so I can check off each step as it is completed so I can keep track of where I am. And it keeps my book clean and tidy in case I ever want to make another wallhanging from this pattern.
Now the strips sets are sewn and are ready to be cut for sewing.
This is my cutting zone, two mats and three strip sets.
Here is what I've sewn so far. I'm making progress. This is not a difficult quilt to make and I'm having fun!
Linking to Let's Bee Social, Needle & Thread Thursday, Confessions of a Fabric Addict, TGIFF!, Show Off Saturday
Starlight Express is finished. The stars started out as a jellyroll gifted to me by Nanette. The stars were pieced using the Starlight Express pattern from Jelly Roll Quilts by Pam & Nicky Lintott. The rest of the design came from my imagination.
I pulled fabrics from my stash that were similar to the original fabrics. I did buy the border fabric. Yoder Department Store in Shipshewana still had this original fabric from the line. I also finished up four background fabrics that needed to be used. I didn't intend to make a king sized quilt but that's what happened. The flimsy measures 99" by 111".
I wrote a post in November about piecing the stars and another post when I added the first checkerboard border.
This is a donation to the school auction the Pennsylvania grandchildren attend. It will be hand quilted by someone else.
Linking to Let's Bee Social, Needle & Thread Thursday, Finished Or Not Friday, Confessions of a Fabric Addict, Finish It Up Friday, Show Off Saturday, Oh Scrap!
I'm excited to show you what I've accomplished with my hand quilting on the Pastor's Attic this week.
Quilting between applique rows 1 and 2 happened this week. For the first time you can see the designs in the center corners of the blocks. I couldn't reach to the top of the designs but I think you'll get the idea.
You can see how I'm quilting into the above applique block. The top applique hasn't been quilted.
The edge of the corner quilting shows.
I enlarged the picture so you can see the quilting easier.
The design will be finished after I roll next week.
The fabric looks more yellow in some of the photos. The cream is the true color.
I enjoyed appliqueing this red design. It took awhile but it was fun.
The next corner section. I stitched on the edge of the seam allowance making sure I quilted the least amount of bulk.
This block was also fun to applique. At the Davis Mercantile in Shipshewana, they have a quilt on display with all the blocks this design. Maybe someday.
I've never used this stencil before. I was able to reach to the top so this design is finished.
For fun I fussy cut the centers of these flowers.
This is the right edge of the quilt. This is half a stencil on the edge. This is the same design as the second picture at the top.
I got the idea to have quilting designs in the corners years ago when I saw an antique quilt quilted this way. Of course I don't remember which quilt it was anymore, maybe Benjamin Biggs?
When I appliqued these blocks, I did not cut out the fabric behind the flowers and leaves. That would have made less bulk for quilting but the antique appliqued quilts weren't sewn that way. This way when my applique is old, worn and wears off, the original fabric will be underneath to make repairs easier.
Several of you have commented on how I'll be glad when this quilt is finished. I haven't thought that far ahead! I'll be glad to have the first row of applique completed next Sunday. There are four more rows of applique after this row is completed.
Hand quilting is not a fast activity. If you want speed, have your quilt machine stitched!
Linking to Kathy's Slow Sunday Stitching, Oh Scrap, Show & Tell Monday With Bambi, Monday Making, Design Wall Monday, BOM's Away, Moving It Forward, Esther's Wednesday WOW!