Ladies from my church knot comforter tops on Wednesday nights. I don't help with the knotting but I do donate comforter tops and help with binding.
We don't make separate binding for the comforters, we turn the backing fabric to the front then use that for binding. I was never pleased with my corners then I remembered a Eleanor Burns program from years ago. She showed how to self bind with mitered corners.
It took me awhile to remember how to do it. I'm going to share the process with you and this way it will be in writing so I can review it for myself.
After the top is knotted, you trim the batting to the edge of the top then cut the backing. You need to cut the backing twice the size of what you want to show on the top. If you want to show 1/2" binding, you cut the backing fabric at 1".
The backing fabric for this tutorial was trimmed at 1.5", the binding that shows on the top of the comforter will be 3/4".
On the inside of each corner, mark 3/4" lines and 1.5" lines. (Whatever size you want your binding to be, the outside lines are half the size of what the backing is trimmed to.) You've made a square inside of these lines.
Eleanor recommends folding the fabric over and pressing the 3/4" line which is a good idea. I don't do that because the batting in these comforters is polyester. Polyester and a hot iron don't mix well together for me.

Lay a ruler so a line intersects the intersections of the square and mark a line on top of the ruler.

Make sure the lines goes through the 3/4" lines on both sides.

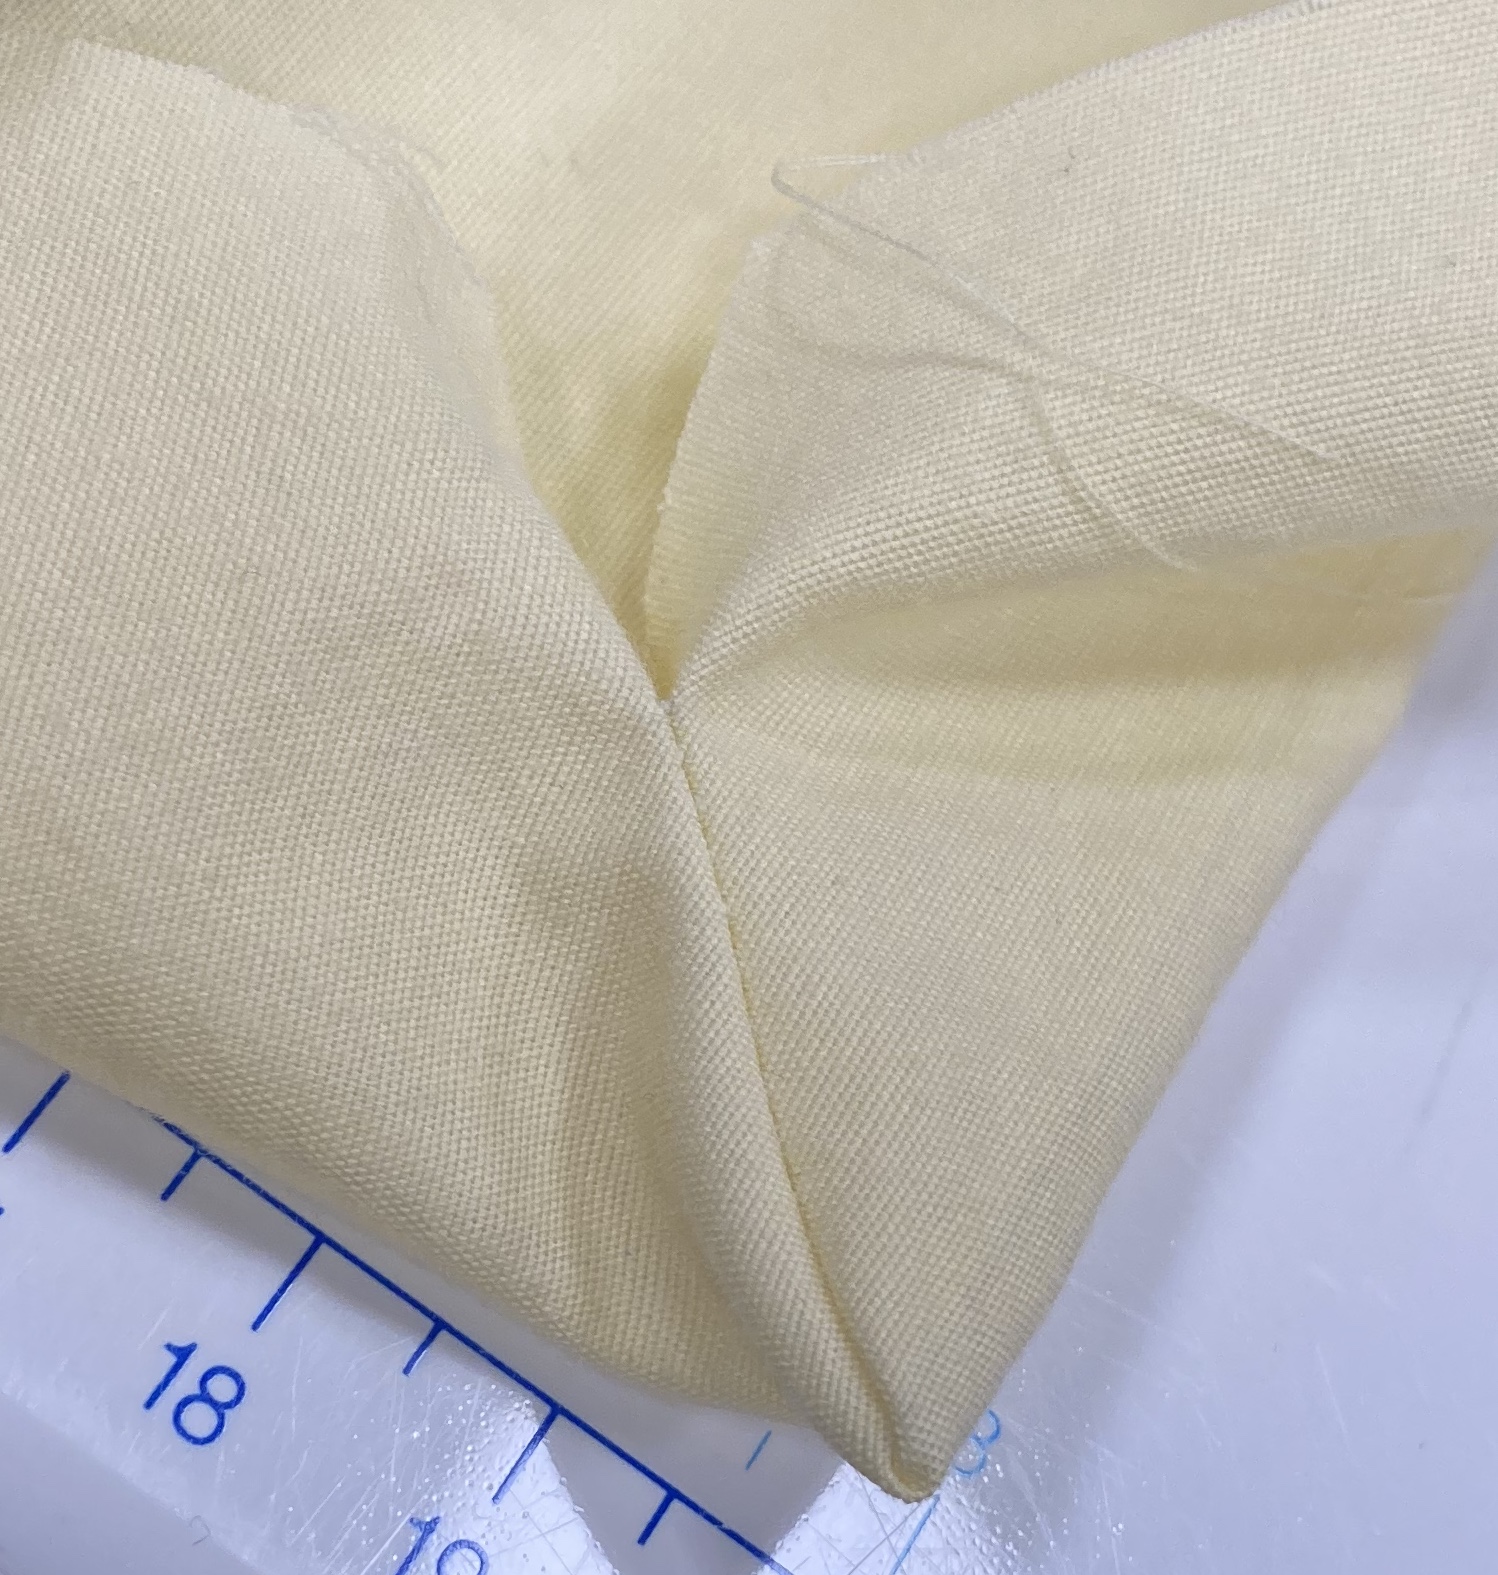
Fold the corner so it makes a triangle and pin like shown.

Stitch the line starting at the 3/4" line, make sure you back stitch.


Linking to To Do Tuesday, Midweek Makers, Wednesday Wait Loss, Needle & Thread Thursday, Put Your Foot Down
12 comments:
I always forget about this easier method of binding. Might need to give this a try for those quilts needing to be finished quickly. Thanks for the reminder.
Great tutorial Gretchen. Thanks.
What a great tutorial Gretchen! That makes such a neat corner.
Thanks for the tutorial Gretchen. I will keep it in mind for future.
I just finished a quilt with this type of backing/binding and it's very un-pretty compared with yours.
Thank you Gretchen for the tutorial. I had completely forgotten about the mitered corner method to use the backing as binding. Now I need to bookmark your post to come back to it. ;)
The comforters are so pretty and thank you so much for the tutorial on how to bind one in this fashion.
great technique - I will have to try it
What a great way to miter the corners for machine finishing the binding; thank you for the tutorial!
Great tutorial! Now that it's written down, it'll be easy to find if you need a refresher. Love that you help finish quilt for charity. The RSC quilt you made is especially pretty. How these will warm someone's heart! Thanks for sharing on Wednesday Wait Loss.
Thx for the tutorial! Hugs
Thanks for taking the time to share this very helpful tutorial.
Helpful tutorial, Gretchen! I usually just wing it when I get to the corner, but I like your plan better.
Post a Comment