First of all, there are many different types of hand quilting frames. Karen does a lot of hand quilting and her frame is different from mine. Kathi is also a hand quilter, she has pictures of her frame in this post. Our frames are similar in that they are stationary and we roll each section as it is completed but there are differences.
Our frames are very different from a person who sits in their easy chair and uses a hoop. For questions about hoop quilting, I suggest you contact Kathy.
My quilting frame is a Grace frame but they no longer make hand quilting frames. Hintenberg is another possible source for hand quilting frames, google it!
A stable quilting frame isn't better than a hoop, it's about what your preference is and whether you have room for the frame.

After it's pinned in place, I measure to make sure the sides of the roller are evenly space from each edge. Very important to have your fabrics centered!

Then I pin to the front roller, again making sure the fabric is centered and evenly space from the sides of the frame. After the front side is pinned, I carefully roll the front roller and roll the backing fabric onto the front roller. I'm smoothing the fabric as I roll and make sure it rolls evenly. One the fabric is on the front, I can adjust any unevenness onto the back roller.
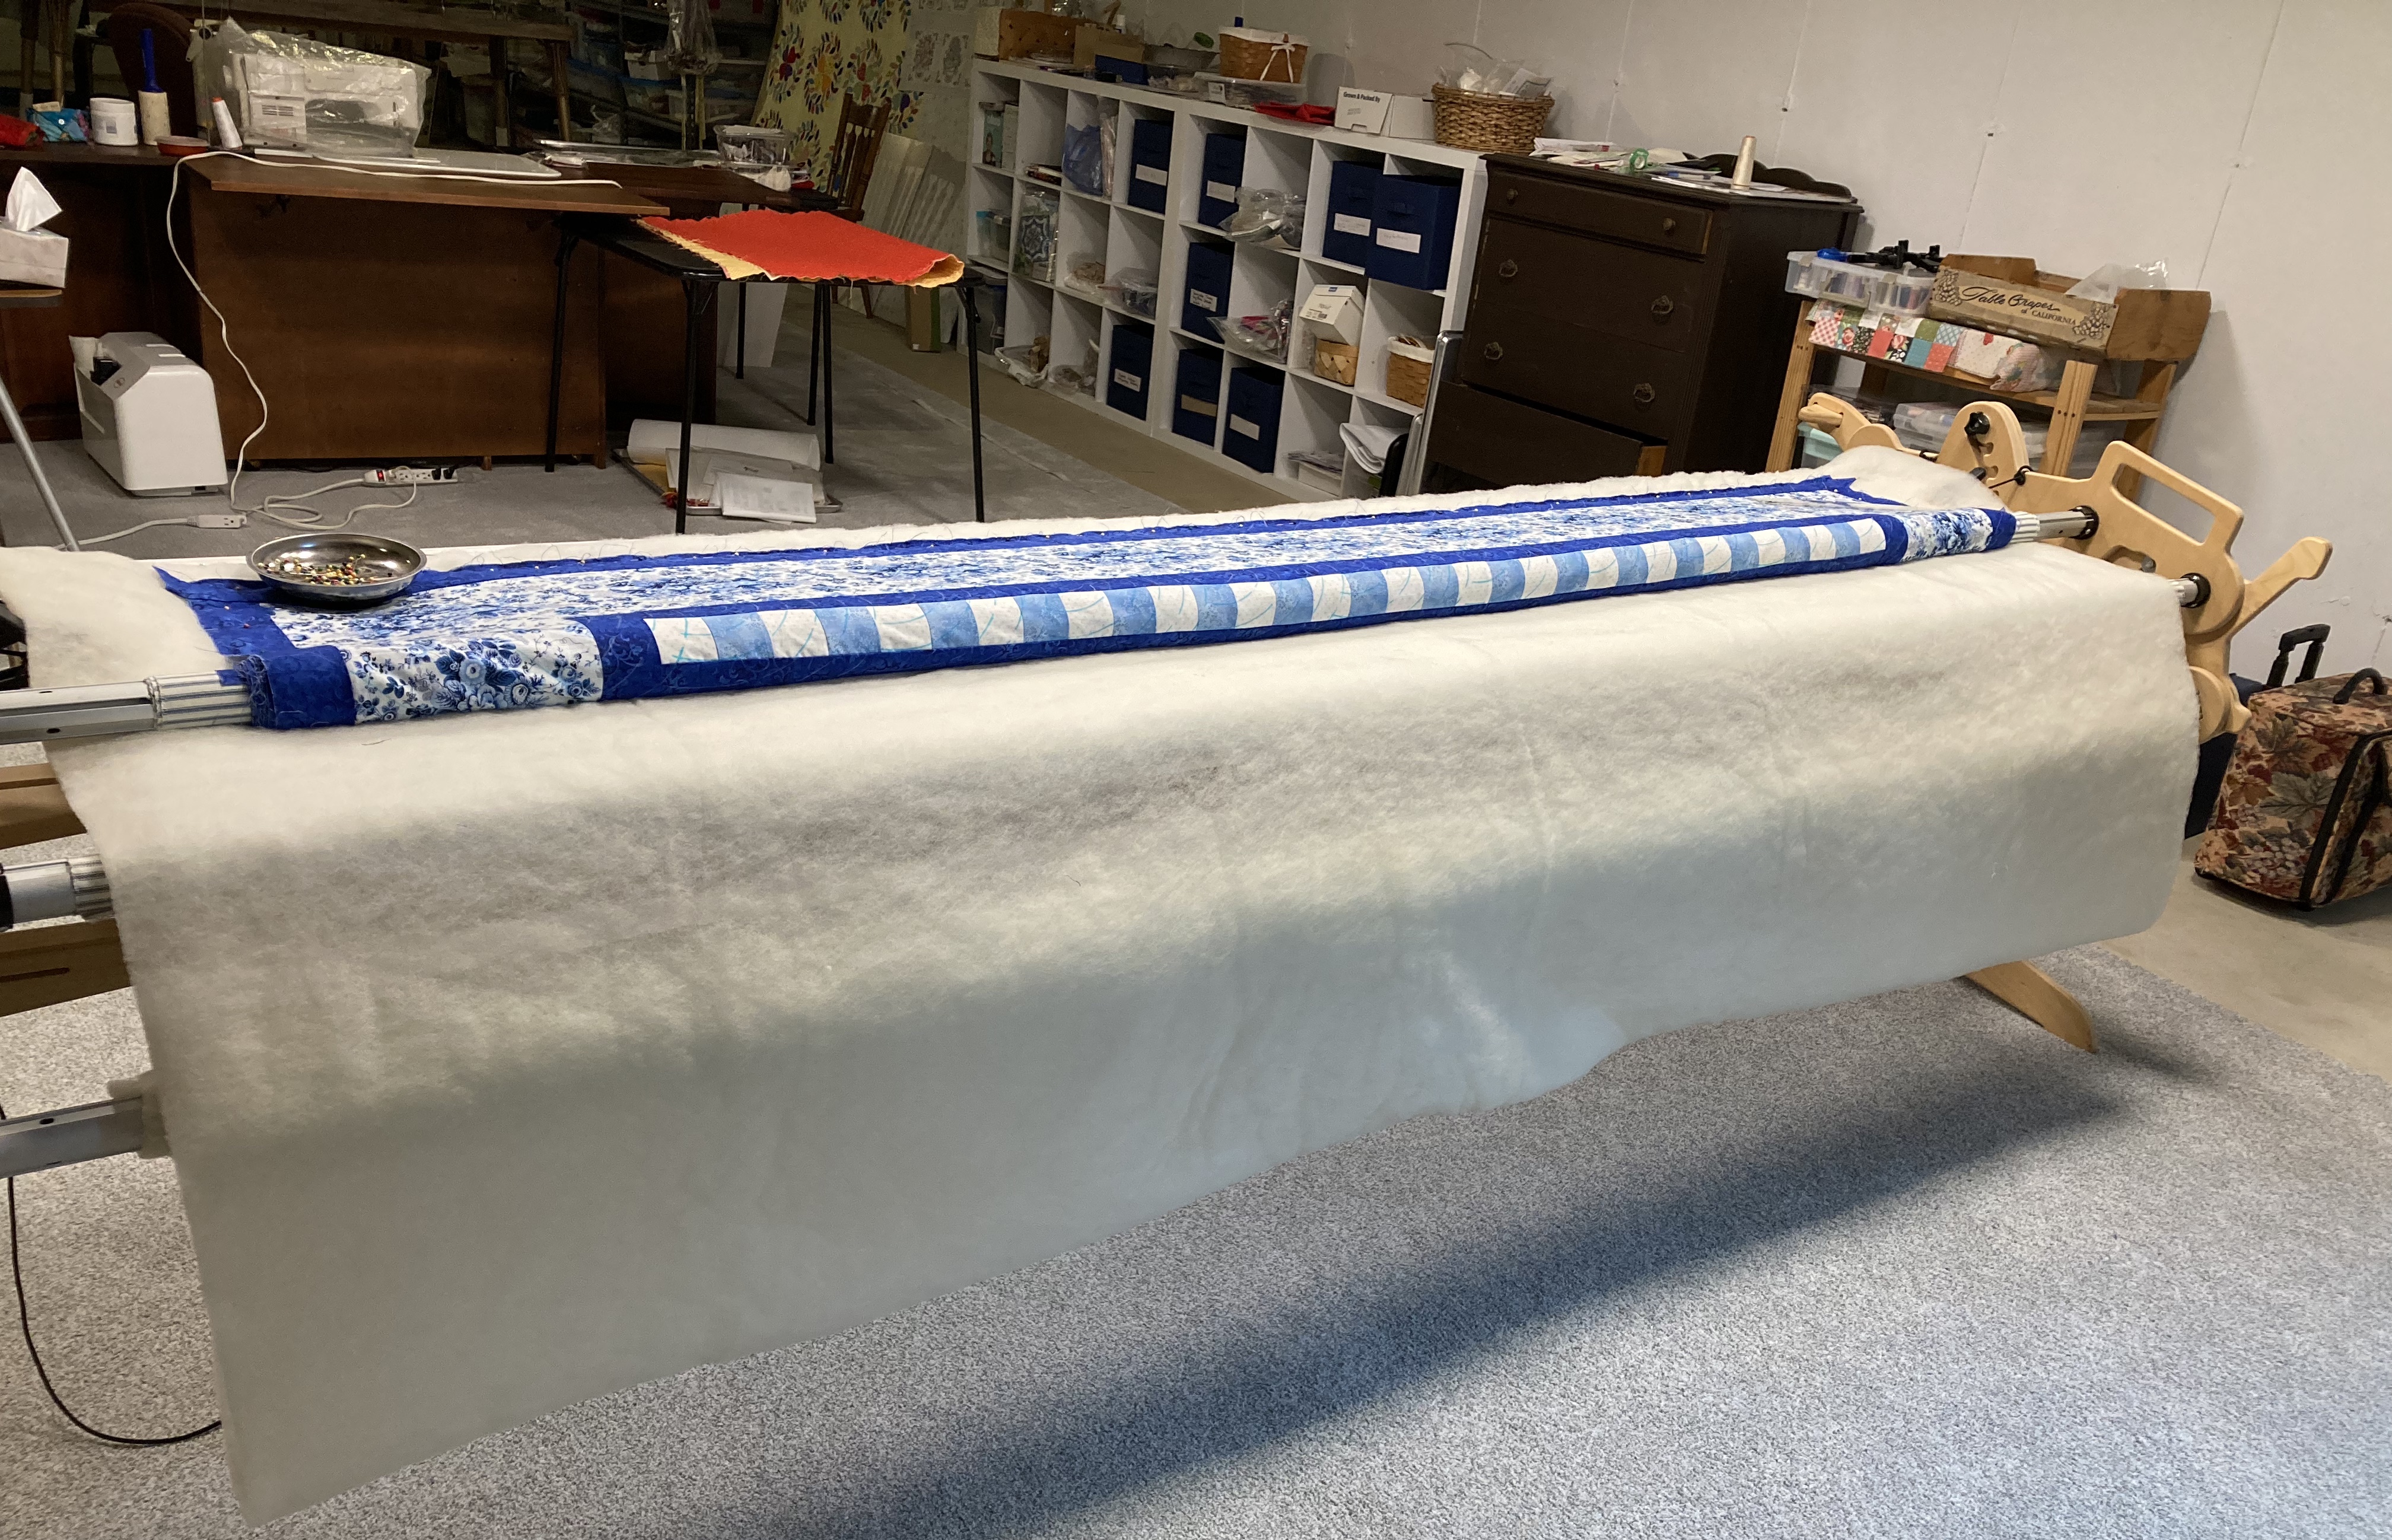
The below picture show all the fabric rolled onto the front. The ticking fabric roller in the center is the roller the top of the quilt will pin onto. The ticking fabric in the back is for the batting.

Once you have all the unevenness pinned out, roll the fabric from the front roller onto the backing roller (roller #3).

See how nice and smooth the backing fabric is? This is what you are aiming for. Measure the front again and make sure it is centered.
Now you're going to add the batting layer. From the backing, pull the batting toward the front UNDER the top roller. Make sure the batting is centered then pin in place.

Evenly spread the batting in the back so it isn't wrinkled.

I don't pin the batting onto the 4th roller yet, that won't happen until the quilt top is is in place.
Now we're finally ready to install the quilt top. I mark my quilting before installing but some quilters mark as they quilt. Again, that is your preference and there is no right or wrong way.
First I pin the quilt onto the front roller, on top of the batting and backing fabric. I always let an inch or so of batting show because that's my preference.
Measure again and make sure you're keeping the front roller centered. I can't over stress how important it is to be centered for even rolling when you are quilting!
Once that is pinned in place, I pin the other end onto the 2nd quilt roller, again I measure to make sure it evenly centered.

Now it's time to carefully roll the top onto the 2nd roller.

After the quilt top has been rolled onto the 2nd roller, you roll all 3 layers onto the front roller. If you have any fullness in the quilt top after rolling, repin the quilt top to the 2nd roller. After you are satisfied everything is smooth, roll the 3 layers back onto their respective roller.
I told you this is time consuming but you will be so glad you spent this time being careful. It really makes a difference when you are quilting.
Now the side clamps are fastened and I baste through all 3 layers along the edge of the quilt top as far as I think I can reach.
Since the top has been loaded, now I can pin then roll the batting onto the 4th roller.
Do you trim your batting before you put your backing and quilt into the frame? I don't. I trim after the top is pinned into the frame but only where the quilt has been basted. I trim after each roll.

I don't cut the patting off, I just lay it to the back. When it gets too long, then I cut it off.

The quilt is ready to be quilted. I subscribe to Brit Box and decided Downton Abbey is the perfect drama to watch while quilting Lady Jane.

Here is a link to the Lady Jane pattern.
Thank you for reading my post if you've made it to the end.
11 comments:
I loved and gleaned new info on easier ways to load my next quilt!
I love that yours has 4 rollers too! Thanks for taking time for this tutorial and for adding me to your links too!
Kathi
Great post. Yes loading a quilt on the long arm takes about 2 hours - I have 5 more quilts left and I am working toward having a quilt loaded each evening so I can just start quilting the next morning. By the time I have loaded a quilt (depends on the size) I am already beginning to feel it in my back. Yesterday I loaded a 65x65 quilt and it took me the full 2 hours. I stay stitch all my tops and that pays off. It took me 6 hours to get the quilt done, that included a few breaks and to cut the binding. I will never get so far behind again. Make a quilt top - quilt it - bind it - and hand stitch the binding! Much better. OR better yet, if I do a complex quilt it will go to Rebecca for quilting!
I have a Z44 so this tutorial is nice to have Gretchen, as I have 10 quilts that will be hand quilted. Some are small and will be done with a hoop.
Have a great day and thank you for taking the time to post about loading the Z44! I would love to sell mine since it has never been used! Hugs, Nanette
Dear Gretchen,
Thank you for the tutorial. I have the same Grace frame and it took a bit to get use to quilting on the frame. Before I quilted on a lap raised hoop. Hand quilting is beautiful and when I learned to machine quilt it was never the same look. Lady Jane is a beautiful quilt, the quilting will make it even more so. Have a great day.
i find it amazing just different 4 rods are from 3 - the whole process is somewhat similar but yet different. Thanks for sharing how your 4 rods are different than my 3 rods.
Thank you for sharing your process for loading your quilts. I only hand quilted in a frame once. A sweet gentleman made one for our little quilt group, but none in the group liked hand quilting besides me. I struggled a bit with quilting in different directions, since with a hoop, one can turn the quilt. I got used to quilting toward me or to the left, since I am right handed. Do you find that a challenge?
This is a very interesting post which I enjoyed reading, Gretchen. I presently have a large hoop that has a floor stand and I was fairly pleased with how it handled my last quilt which is a single size. Of course, I'm always eyeing the frames like yours and Karen's. You both do such wonderful hand stitching I so enjoy seeing.
Gretchen , thank you so much for the wealth of information. I have always wanted to know how to use a frame such as yours. I have eyed a large frame like you have for many years, but have wondered if I could load the quilt. I so appreciate the detailed instructions and tips.
This is a great and very informative post. I admire your hand quilting.
I have never seen a quilting frame, I guess very few people have a frame here in Brazil. I've never known anyone who uses one, or any store that sells it.
Thank you for the post on loading your frame. I have the same Grace frame as you. It was given to me by a woman who's husband gave it to her for Christmas, but she machine quilts only. Lucky me!!! I use it daily up to 8 hours a day. Absolutely love it.
What I found so interesting is that you load yours differently from me. I load the backing onto the 2nd roller (from the front) and the top onto the 3rd roller. The batting comes up between the two. If you looked at it from above you would only see the quilt top. I will finish this quilt in April and try loading it like you do to see if it makes any difference. Thanks again, I learn something new every day!
Thank you for the tutorial! My frame is only two rollers, but I start out the same, with the backing face down on both rollers and tons of pins and the batting floating.
Hey, spare auf einen Gaming-Laptop, damit ich ohne Ruckeln zocken kann. Kleine Einsätze haben nur Verluste gebracht, kam wochenlang nicht voran, war frustrierend. Hab auf spino gambino bonus mehr riskiert und in Gates of Olympus einen fetten Gewinn gemacht. Laptop fast bezahlt. Für Spieler aus Deutschland gibt’s spezielle Boni, die echt pushen. Bleib dran.
Post a Comment