I have several smaller flimsies I've pieced in the last year that I'm going to quilt with my home sewing machine. This works well with spring work outside, I can quilt awhile then go outside into the sunshine, play in the soil and admire all the flowers and green grass. Some of these little quilts I will keep, some are designated for other people and some are compassion quilts. That is what my Wednesday posts will be about for the rest of May, maybe even into June until all the little quilts are finished.
In January I pieced the kit I purchased at Caroline's last summer during my birthday outing. I call it the Peter Rabbit quilt, the kit name is Book Adventures.
I've started a month of machine quilting all the small quilts I've made this last year. Most of them are compassion quilts but this quilt is staying with me until I find the right child, someone who loves to read books.
Last year I experimented with spray glueing regular batting, I also tried a glue batting that you pressed and it stuck to the backing and quilt top.
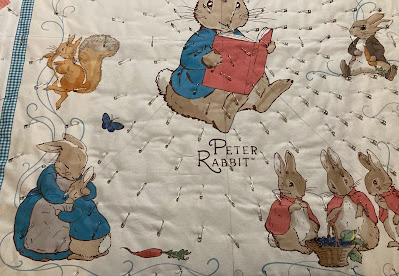
This year I stuck with the basics, pining only. I pin closely while watching a program on my ipad and time passes quickly.
Something else I do that might be different from the normal is I don't have a lot of backing on the sides of the quilt. I understand why long arm quilters do but I don't find it necessary to have excess fabric on the sides.
For the quilting I used X and + quilting design. I marked a diagonal X on the quilt flimsy from corner to corner then marked a + at the center of the quilt horizontally and vertically. You sew on the diagonal and pivot on the center lines. I use a Frixon pen for marking, which is easily removed with a hot iron after the quilting is finished.
I quilted a quarter of the quilt each day and I started with one of the sides because there is more quilting on the sides.
Here is a closeup of the quilting.
Day two of quilting. The opposite side was quilted. I don't know if it really makes a difference if the top or bottom was quilted after the first side. This just how I do it.
Day three, this time the top section.
Day four, the finish!
After the X quilting was finished, I stitched in the ditch around the neutral border between the book border and the outside border on both sides. See the blue gingham border, I also stitched in the ditch on both sides of it even though it was printed onto the fabric, not pieced. I just thought that would look nice.
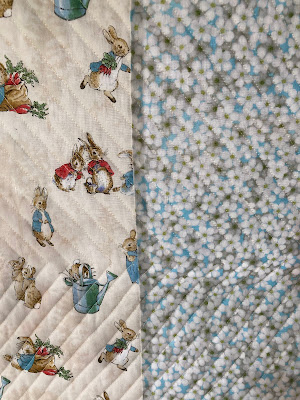
Backing fabric did not come with the kit. One day when I was at Calico Point I saw they had a bolt that coordinated with these fabrics so I purchased two yards. Of course that wasn't enough so I added this nice floral because rabbits like flowers. It has been in the stash for a long long time.
Sorry, forgot to crop this photo, you have a nice shot of the emerging hostas.
Obviously this quilt is directional and I even managed to have the backing fabric running the same direction as the front!
Of course I have to have a picture on the glider.
The quilt has not been washed so it will probably shrink slightly after laundering. As of now it measures 59" by 66.5" I have no idea who this quilt will be gifted to, probably a child who likes to read. The kit even came with the Peter Rabbit book!
I don't know if the kit is still available, I'll let you google it.
I'll be honest, I don't really think the side border blocks look like books but it's a nice idea.
I'll admit the quilting lines aren't perfectly straight, the measurement between the lines aren't a perfect 1/2" but . . . there are no tucks or pleats on the front or the back and it's a FINISH!
Peter Rabbit Quilt or Book Adventures was #17 on my list of 2025 quilts to make.
Linking to To Do Tuesday, Wednesday Wait Loss, Needle & Thread Thursday, Put Your Foot Down, Free Motion Mavericks, TGIFF!, Finished or Not Friday, Off the Wall Friday, Beauty Pageant, Patchwork & Quilts


