The binding has been completed on a couple flimsies I sent to the long arm quilter, Tammy from Three Sisters Fabric.
The first one is the 4 X 4 quilt which I pieced in September from leftover fabrics from Sweet Surrender.
I organized the blocks differently than the pattern arrangement.
I asked Tammy to use the same quilting design, Paisley Flowers, as she did on a different quilt. I think it turned out very nice.
She measures 56" X 64".
For backing I used fabric I had purchased years ago for a different project which was never made.
The second quilt was one of the tractor quilts I pieced earlier this month. I had originally planned to donate both quilts but decided to keep this one for myself. You never know when you'll need a crib quilt and it's nice to have one on hand ready to go.
This crib quilt measures 45" x 49".
I had no idea what overall quilting design I wanted on this quilt. I told her to do what she thought looked good. She used a geometric design with kind of circles. I don't know the name.
For backing I used a JD tractor print with a piece of leftover border to make the backing wide enough.
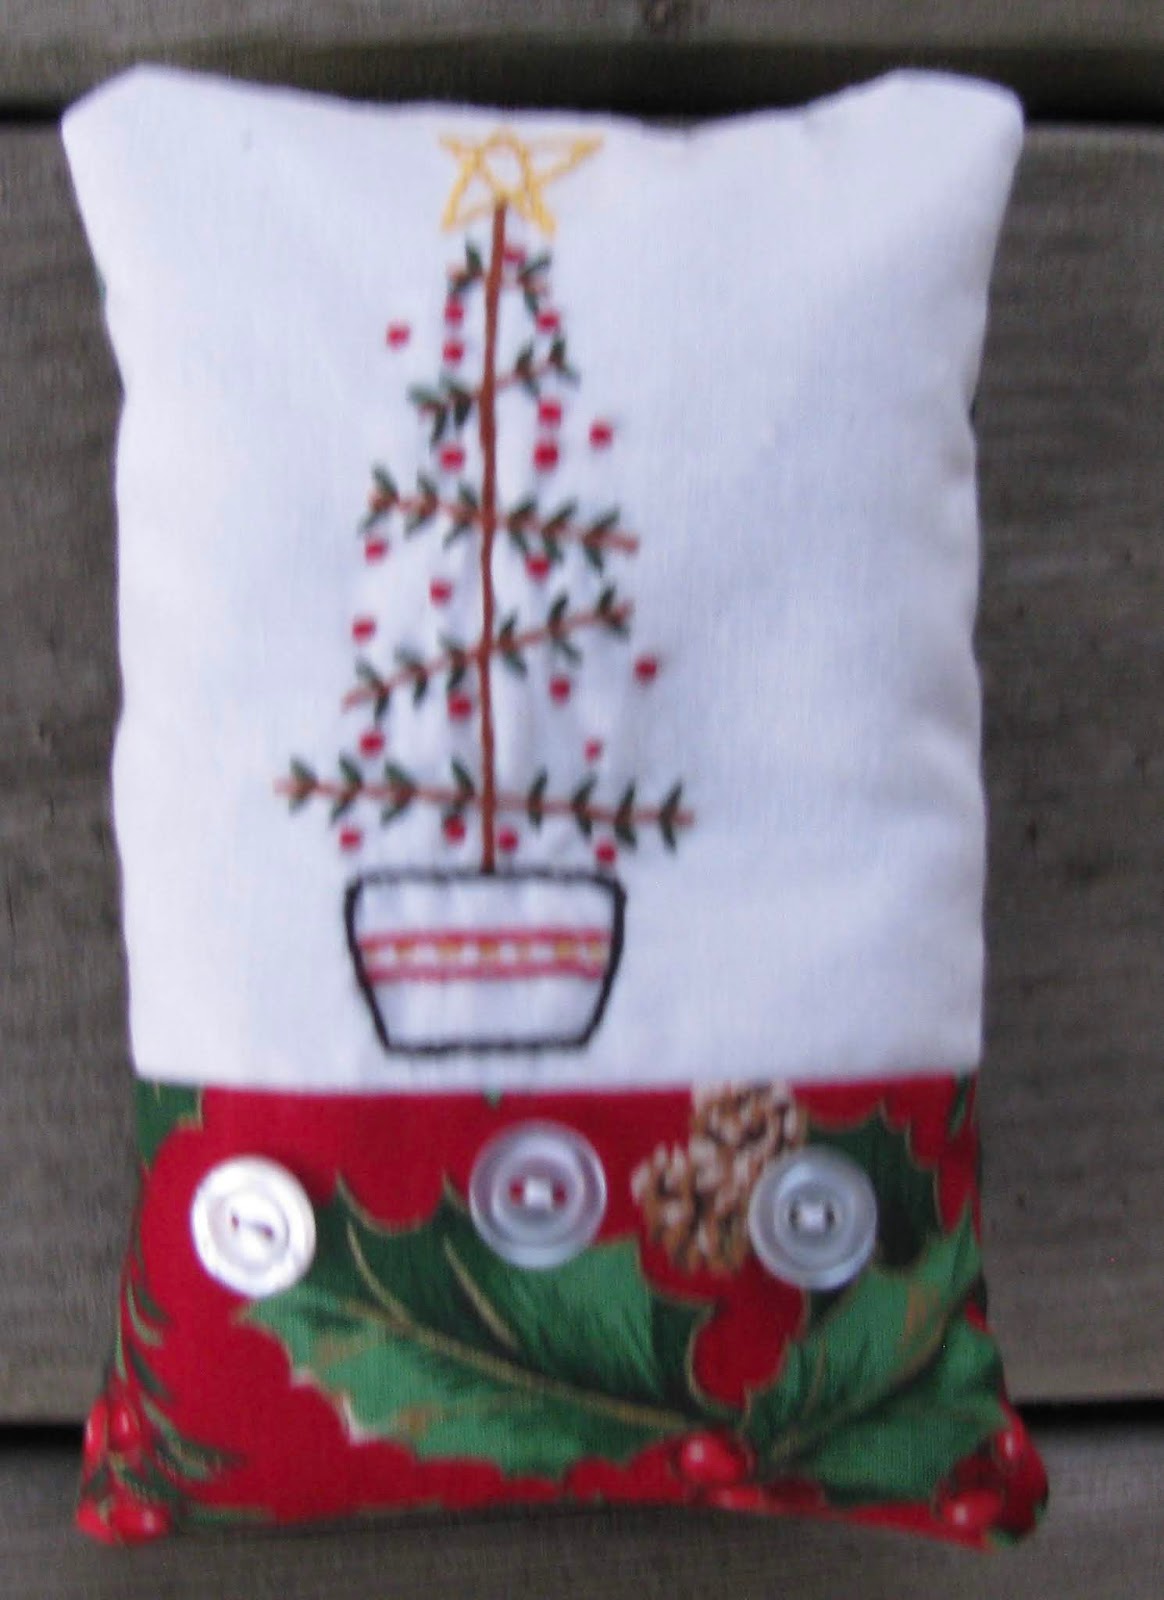
The corn has been harvested so I couldn't take a picture of the quilt with the cornstalks. Instead I took a photo with the tractor hanging on this little tree.
After spending most of 2018 finishing unfinished projects, I'm actually going to start a brand new project!
Linking to Let's Bee Social, Esther's Wednesday WOW!, Needle & Thread Thursday, Finished Or Not Friday, Confessions of a Fabric Addict, TGIFF!, Finish It Up Friday, Let's Make Baby Quilts!, Show Off Saturday, Oh Scrap!
Three weeks of quilting have been completed on the Pastor's Attic quilt. I had thought that I might pick up some speed with the quilting once I got used to quilting again, but that's not happening. It takes me a week to get from the right side of the quilt to the left. This quilt is just going to take a long time to quilt.
There may be less diamond stitching in the applique blocks but I need to stitch around all the applique.
Last week I told you I was quilting up into the appliqued blocks but working around the marked corners. This is what I was talking about.
Next week I'll have quilting in the applique blocks and you'll be able to see the corner designs.
A full side view.
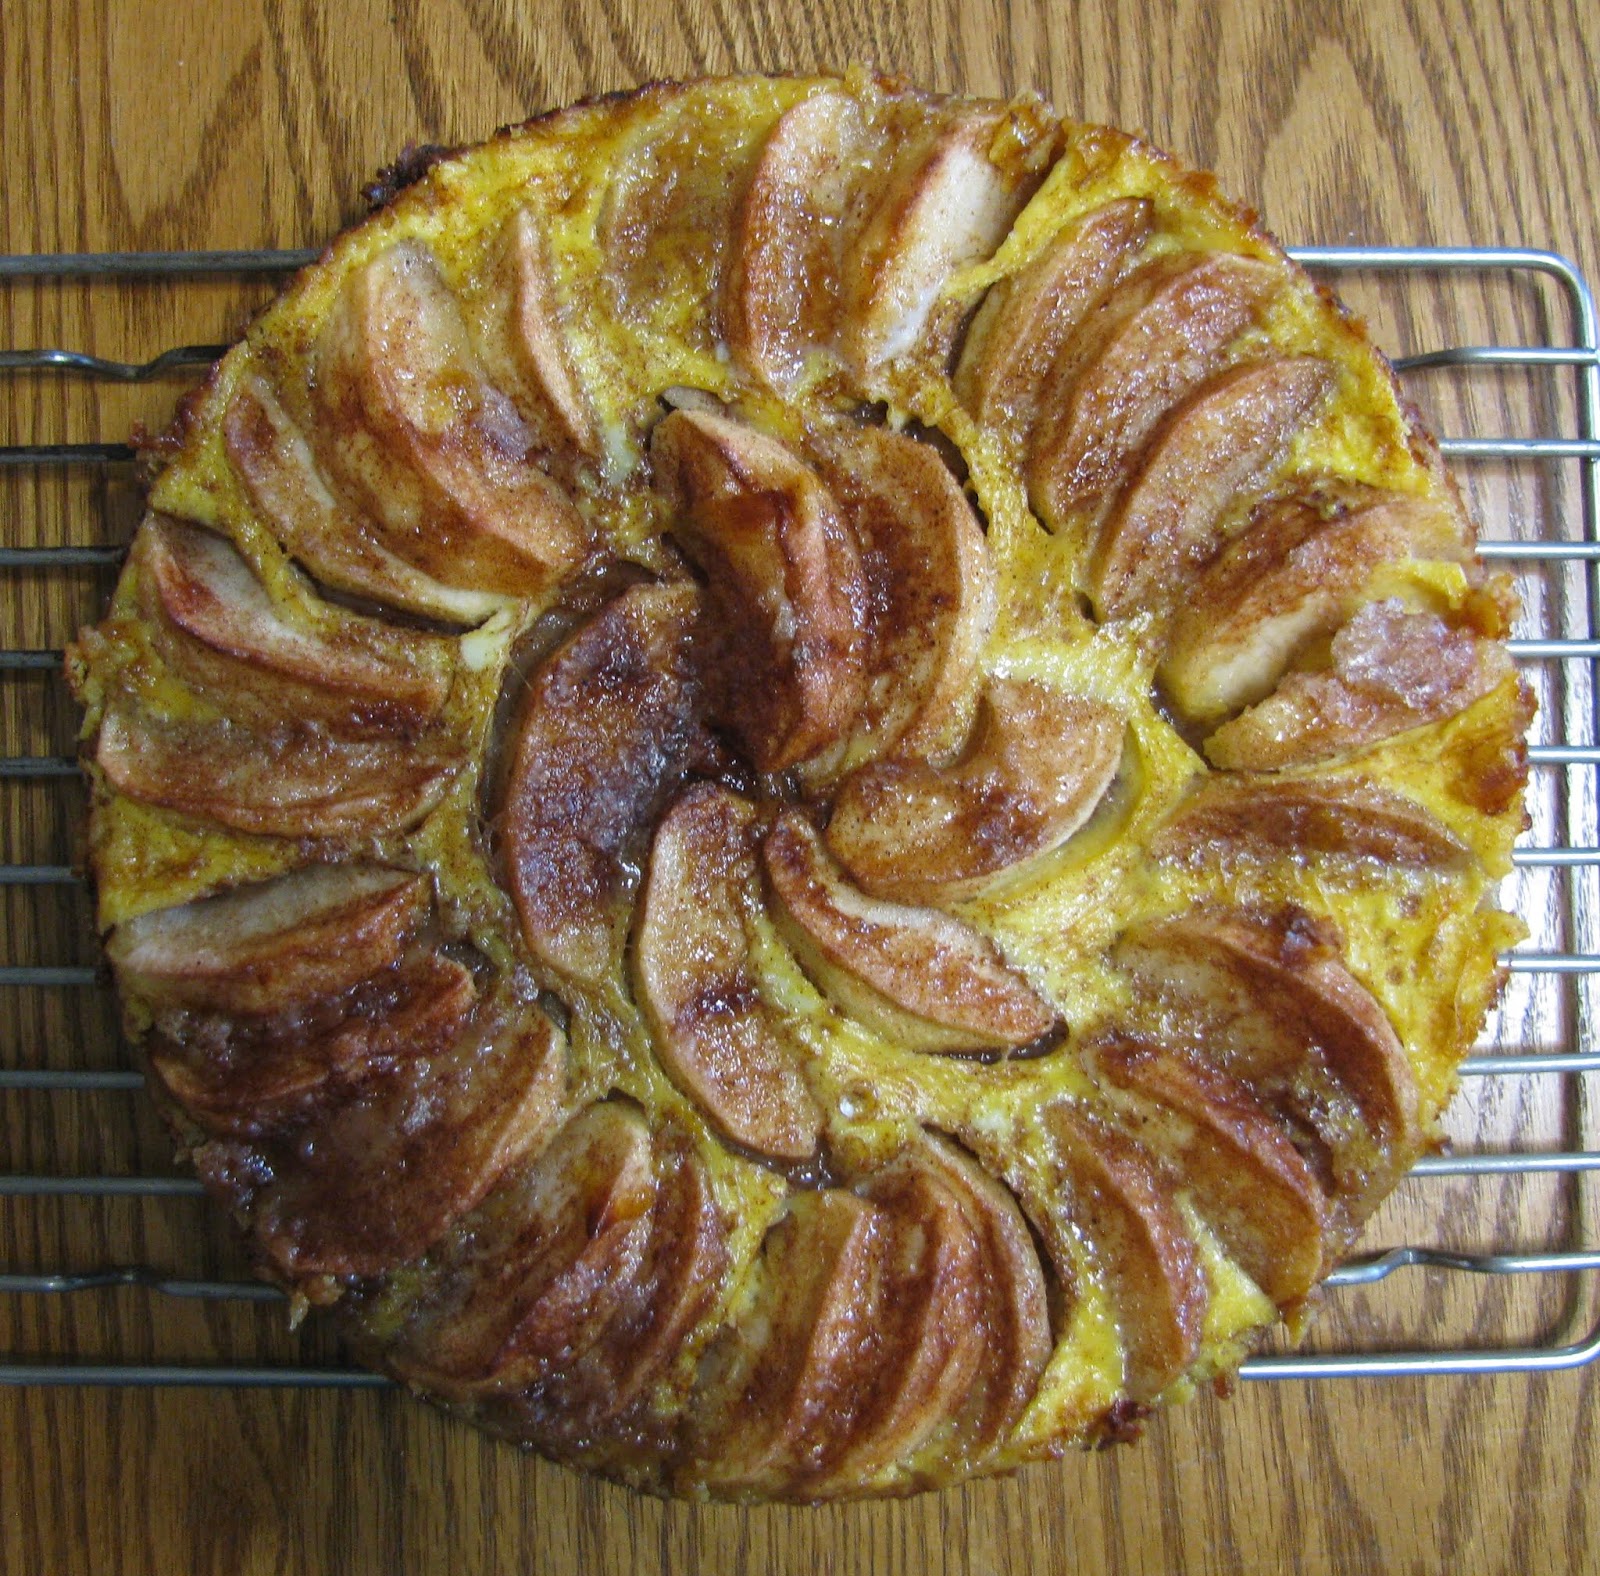
I've been trying to get back into baking every week. I've been baking bread on Saturdays for several weeks and now that autumn is here, fall desserts are making their way into the kitchen too.
This is Apple Custard dessert. The custard does look very yellow but I have my own laying hens and their yolks are much darker than eggs from a grocery store.
The is a recipe from the days long ago when I subscribed to Taste of Home magazine so it's a copyrighted recipe. I like it because it's not overly sweet. The farmer likes it because he likes any dessert.
I didn't work on any Lucy stitching this week. Those needlebooks kept me busy whenever I wasn't quilting.
Linking to Kathy's Slow Sunday Stitching, HQAL, Show & Tell Monday With Bambi, Monday Making, Design Wall Monday, BOM's Away, Moving It Forward, Jo's Junction, Esther's Wednesday WOW!
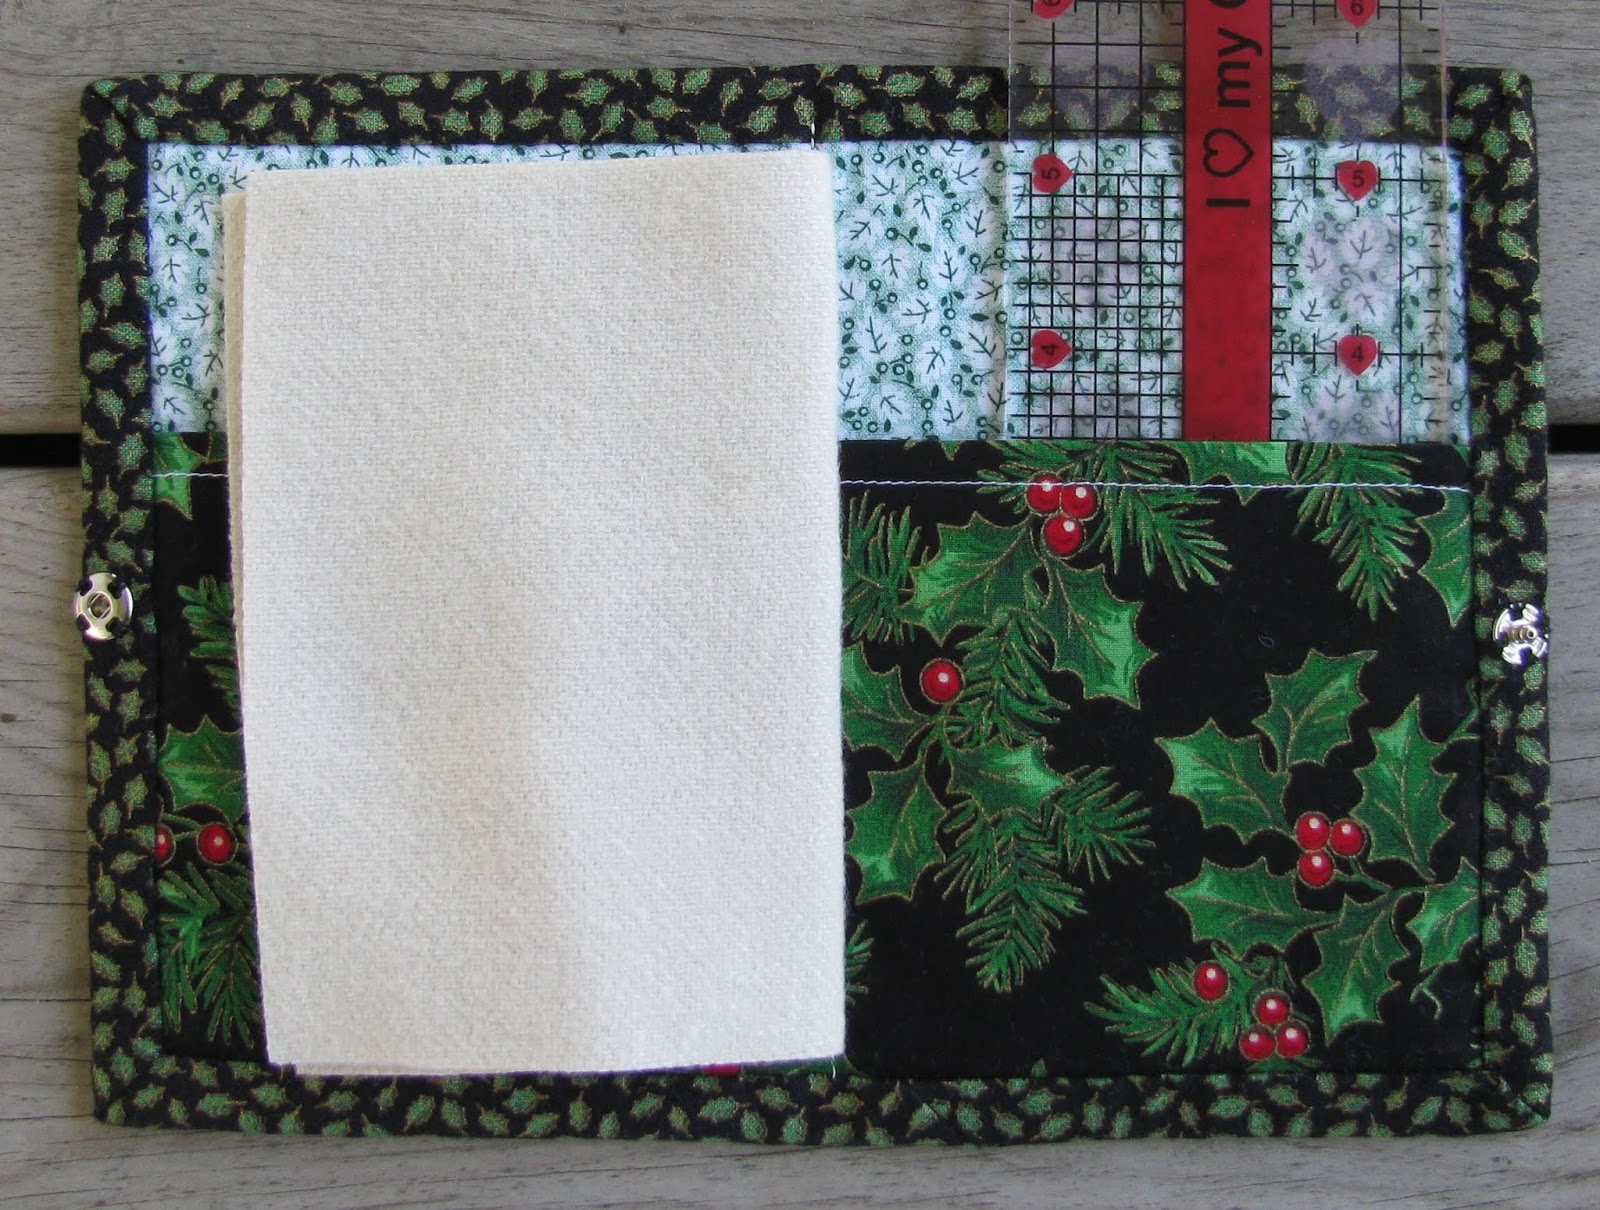
This past week I've worked on needlebooks. The directions are located in Gail Pan's Patchwork Loves Embroidery book but the embroidery for the books completed so far come from Gail's Christmas Patchwork Loves Embroidery.
First I made these books and followed the directions fairly completely.
I made the inside pocket finish at 3-1/2" instead of following the directions. I mean, if you're going to have a pocket, make it large enough to hold stuff.
Also the back of the book was supposed to be pieced but I didn't.
I don't like top stitching on the books so for the next 5 I made a few more changes. I did binding on all four sides which I turned and hand finished. I added snaps as my closures because I dislike ribbons on things. Ribbons never stay nice for me. I also sewed a velcro closure onto one side of the pocket to help keep items from falling out.
These embroidery designs came from Patchwork Loves Embroidery. I have to admit it is taking a lot more time to make these books than I anticipated. I'll be glad when they're all completed. You can be sure the people I gift these to will be lovers of hand work and will appreciate all the work I've put into the book.
This one is mine. I didn't notice I had switched the back and front before I sewed them together and I didn't want to take it apart.
There are 6 more books to be made but I'm not going to make them. I'll use the embroidered squares for something else. I just can't make anymore of these! Maybe I'll use them to make more pincushions someday.
Linking to Esther's Wednesday WOW!, Let's Bee Social, Needle & Thread Thursday, Finished Or Not Friday, Confessions of a Fabric Addict, TGIFF!, Show Off Saturday
Here is what I accomplished quilting this week. I finished this row with the border applique.
This the left side corner.
Sorry this is a dark picture. If I turn on the overhead light or use a flash on the camera, the quilting doesn't show.
Now a section with just diamonds. A section like this is also on the right side but I won't show it again.
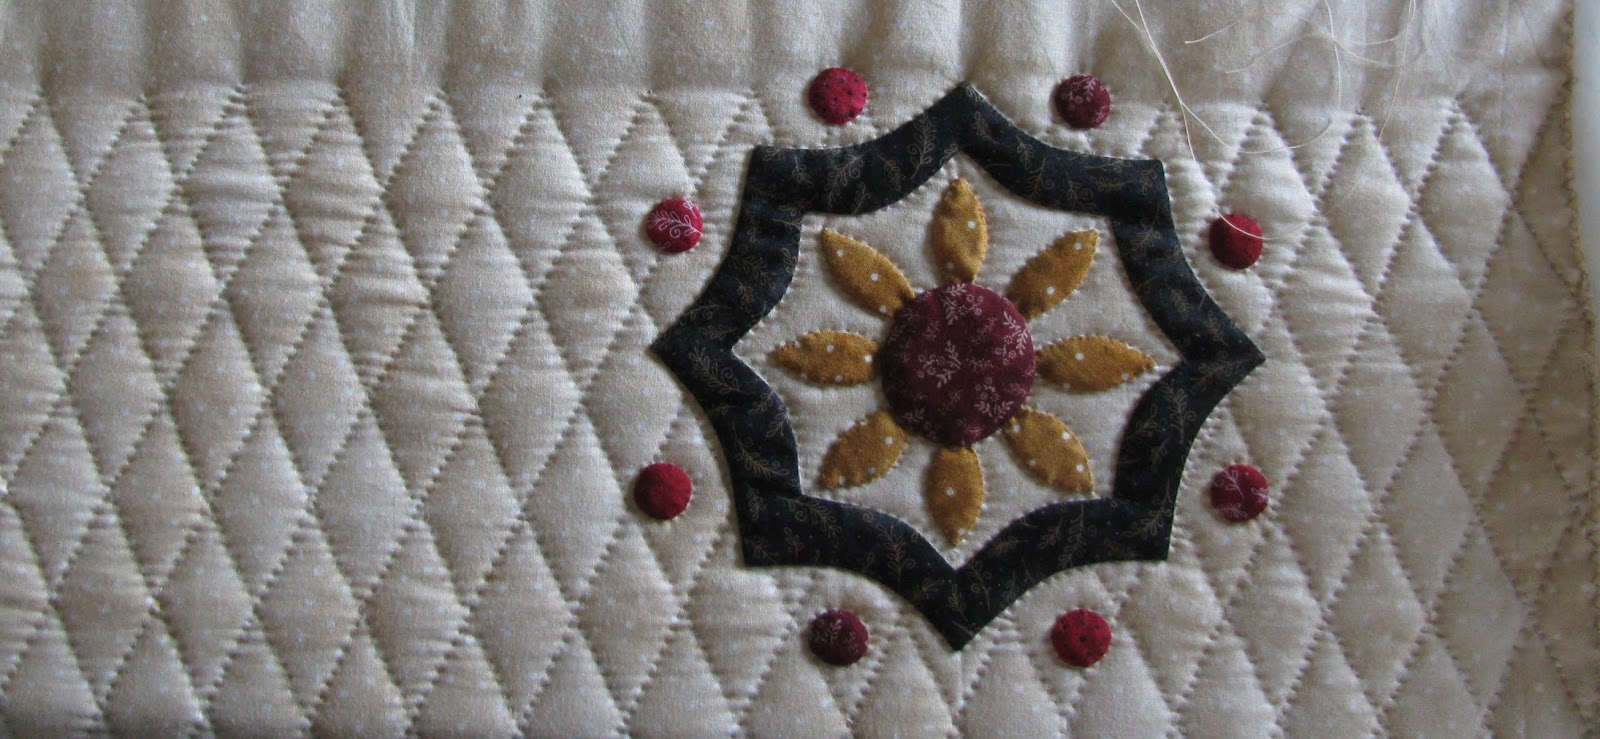
The left side of the center applique.
Center of the applique.
Right side applique.
On the right side of this applique is where the next section of solid diamonds are located.
The right corner applique, same which I had already quilted last Sunday.
This corner is closest to a window so it didn't show up as dark as the rest of the pictures.
The lines in the diamonds are space 1" apart.
I've rolled and started finishing the border.
In the corners of the center blocks are quilting designs. The diamond quilting is going to run into the center except where the alternate quilting is. Those will be stitched in the ditch along the outside edge. Confused? You'll see, just wait a week and I'll show you what I'm talking about.
I did work on some Lucy blocks this week. Block 5.
Block 6.
There are other sections to be stitched for this table runner. I'll start working on them when I'm finished with the hand sewing on the needle books I'm making. The needle books will be the topic of the midweek post.
Linking to Kathy's Slow Sunday Stitching, Oh Scrap!, Show & Tell Monday With Bambi, Monday Making, Design Wall Monday, BOM's Away, Moving It Forward, Esther's Wednesday WOW!
I purchased more walnut hulls (also known as pet bird litter) and filled the rest of the pincushions. Some fabric/quilt stores have small amounts of walnut hulls for sale in their stores. I just went to a pet store and purchased a 7 pound bag for $12.50. Not all the hulls were used so I'll keep the bag to be used the next time I need it.
Someone did suggest I add batting to the hulls when filling the pincushions. I was afraid they would be lumpy. Buying the hulls in bulk makes them not so expensive.
The Christmas embroideries come from Gail Pan's Christmas Patchwork Loves Embroidery book. Now these designs weren't designated for pincushions but I utilized them for that purpose.
The regular embroidery patterns are from Gail's book Patchwork Loves Embroidery.
There were a total of 14 pincushions made. It was so much fun to make something that sewed together so fast! A nice change from working on quilts that take much longer.
Linking to Finished Or Not Friday, Confessions of a Fabric Addict, TGIFF!, Show Off Saturday
Two weeks ago, after I finished sewing the backings and bindings for the tractor crib quilts, I cleaned, dusted and covered my sewing machine. I didn't touch it for a full week while I fall cleaned my house. Well, my home is clean enough and we've finally had the first freeze of the year. Autumn is definitely here and I'm ready to sew again.
Last winter I embroidered many little squares to be used for pincushions and needle books. This week I concentrated on the pincushions.
These embroidery designs are from Gail Pan's book Embroidery Loves Patchwork. They measure 4" by 6" and are filled with ground walnut hulls.
I've made 14 pincushions but only had enough hulls on hand to fill these 5. I'll pick up more filler and show you the rest of them in my next post.
Linking to Esther's Wednesday WOW!, Let's Bee Social, Needle & Thread Thursday
I made it to the end of the first quilting row.
I've rolled and now I'm starting on the next row. This has the border applique included in it.
Stitching in the ditch around the applique makes it puff nicely. I'm not quilting the diamond lines through all of the applique.
I prepped another block for Lucy this week but didn't get it sewn.
I have to admit I like the Lucy blocks when they're finished but this project isn't exciting me like I thought it would. Quilting is much more fun! I had originally said I was going to make 12 Lucy blocks and see if I was motivated to make more. I'm not motivated. The 12 block wallhanging is going to turn into a 6 block table runner. I'd rather quilt!
Linking to Kathy's Slow Sunday Stitching, Show & Tell Monday With Bambi, Monday Making, Design Wall Monday, BOM's Away, Moving It Forward, Esther's Wednesday WOW!
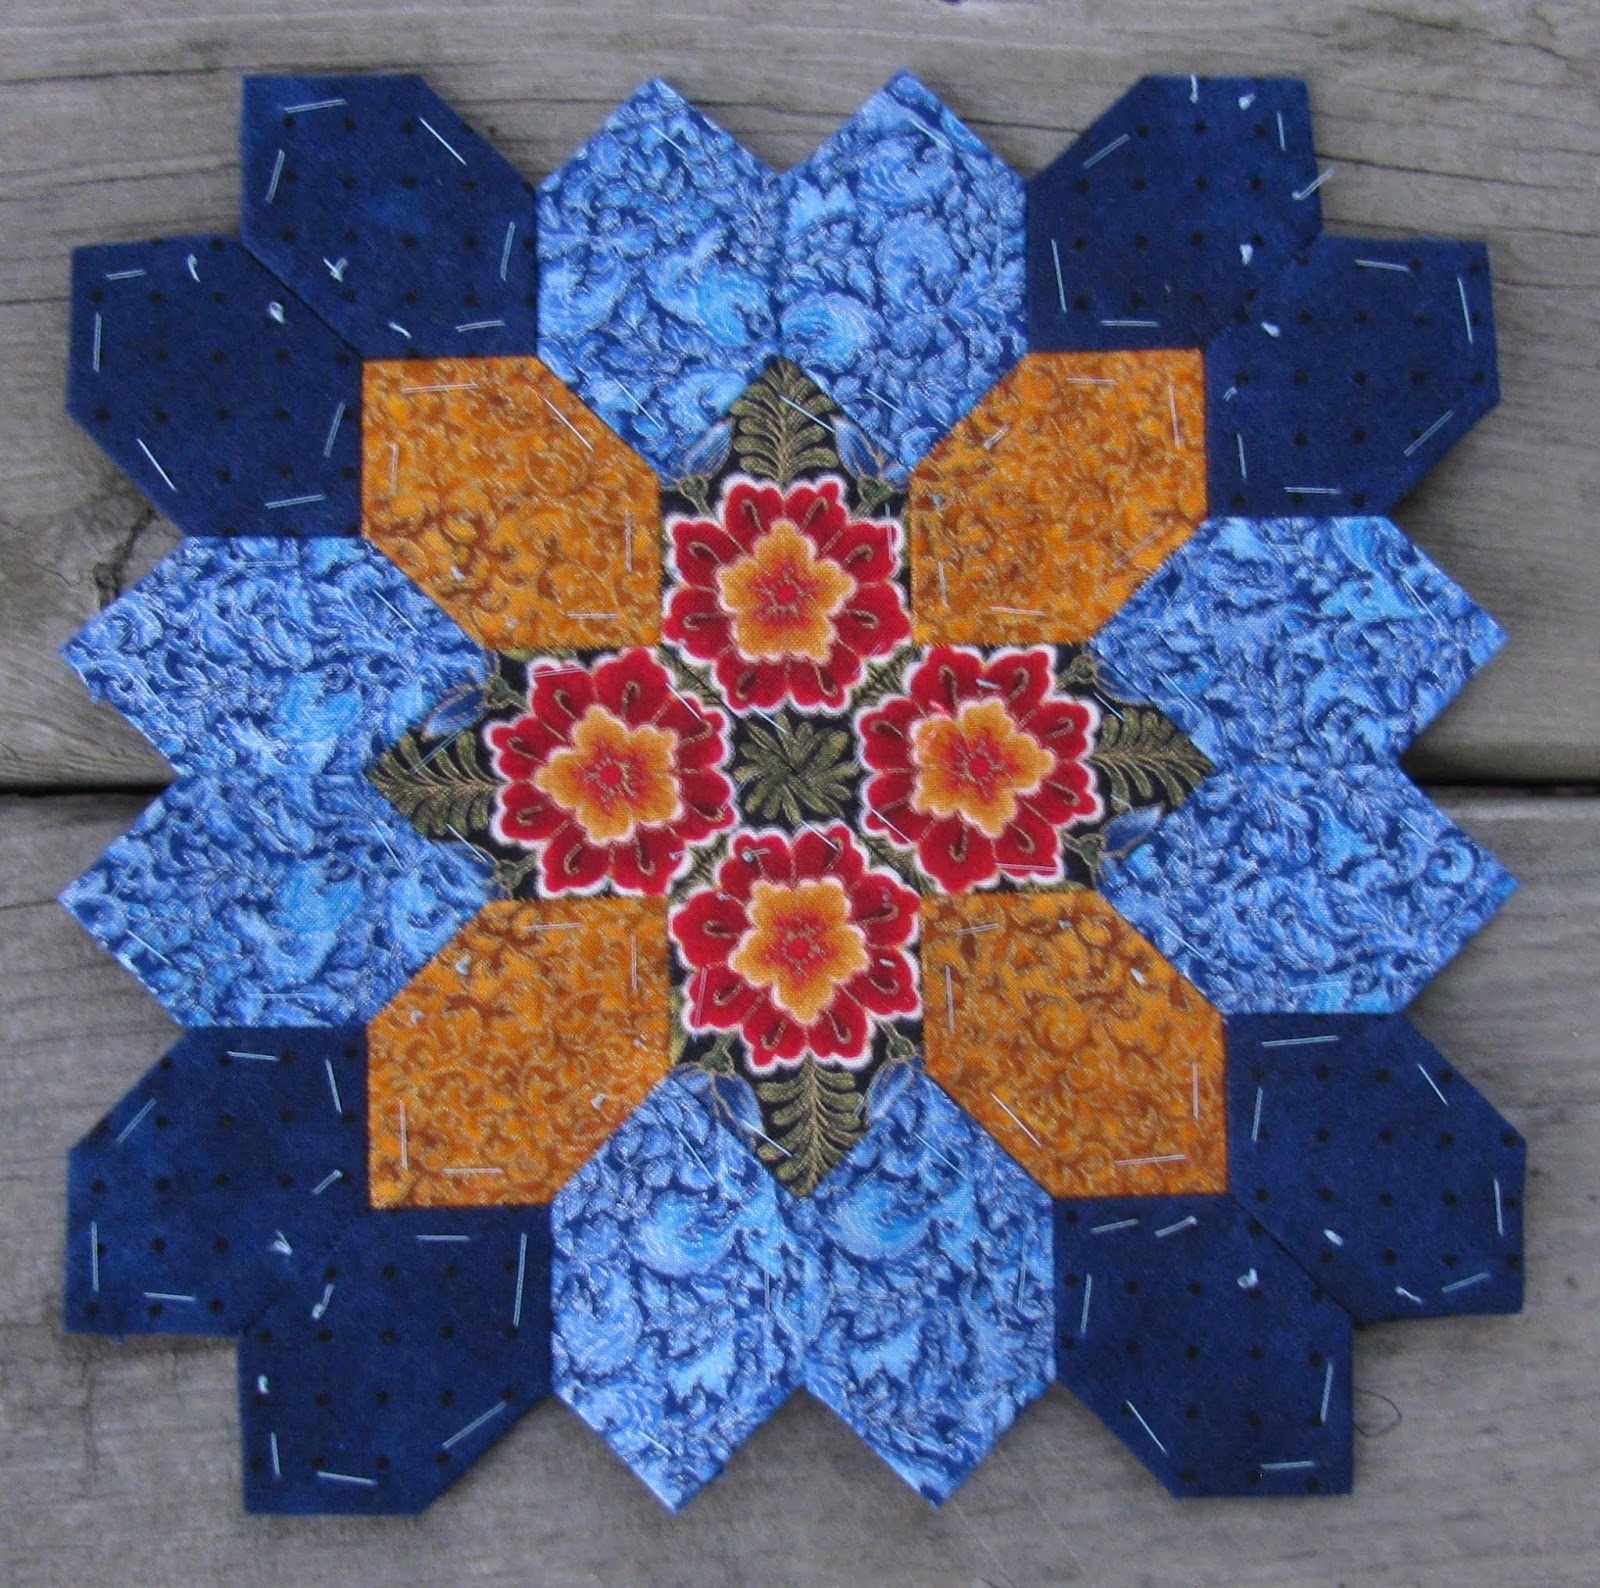
First I'm going to show you the photo of the block I made the end of September, you know, the one that ended up in the cyberspace abyss.
This block was completed this week.
You never know what the block is going to look like until it's finished.
I've also sewn several of the 4 patches that go in the corner of each section. I need to get the fabric cut for the colored squares.
They're not all matching pieces but they'll do.
The priority project this week was to finish the marking of the Pastor's Attic quilt. That took awhile because I marked an allover diamond background.
First I marked corners of the quilt with various stencils. I had taken a picture of this earlier which also disappeared into cyberspace so this is a retake. I forgot to tape it down for the retake. This is important because you do NOT want the stencil to slide while you are marking a quilt. Taping two sides of the stencil works for me.
When I was marking the diamonds, I put tape on the outside of the corner markings to keep from marking the corner design.
You can erase the markings with a fabric eraser (the label on the eraser says FACTIS extra soft, purchased at my local fabric store), but erasing is hard on the fabric. That is another reason to mark lightly.
After I've marked the diamonds on the block, I remove the tape and carefully mark the lines to the edge of the design mark. Once the applique blocks are marked, I marked the borders.
For years I have used silver pencils but I read on Sue Garman's website that she recommends Paper Mate Sharpwriter #2 fine point pencils. Supposedly the markings will wash out. I haven't tried it but I did test the eraser on a scrap of fabric. Don't use it, the crumbs are pink/red colored and you don't want that on your quilt, at least I don't. Use a Factis eraser, it's white and the crumbs easily brushed away.
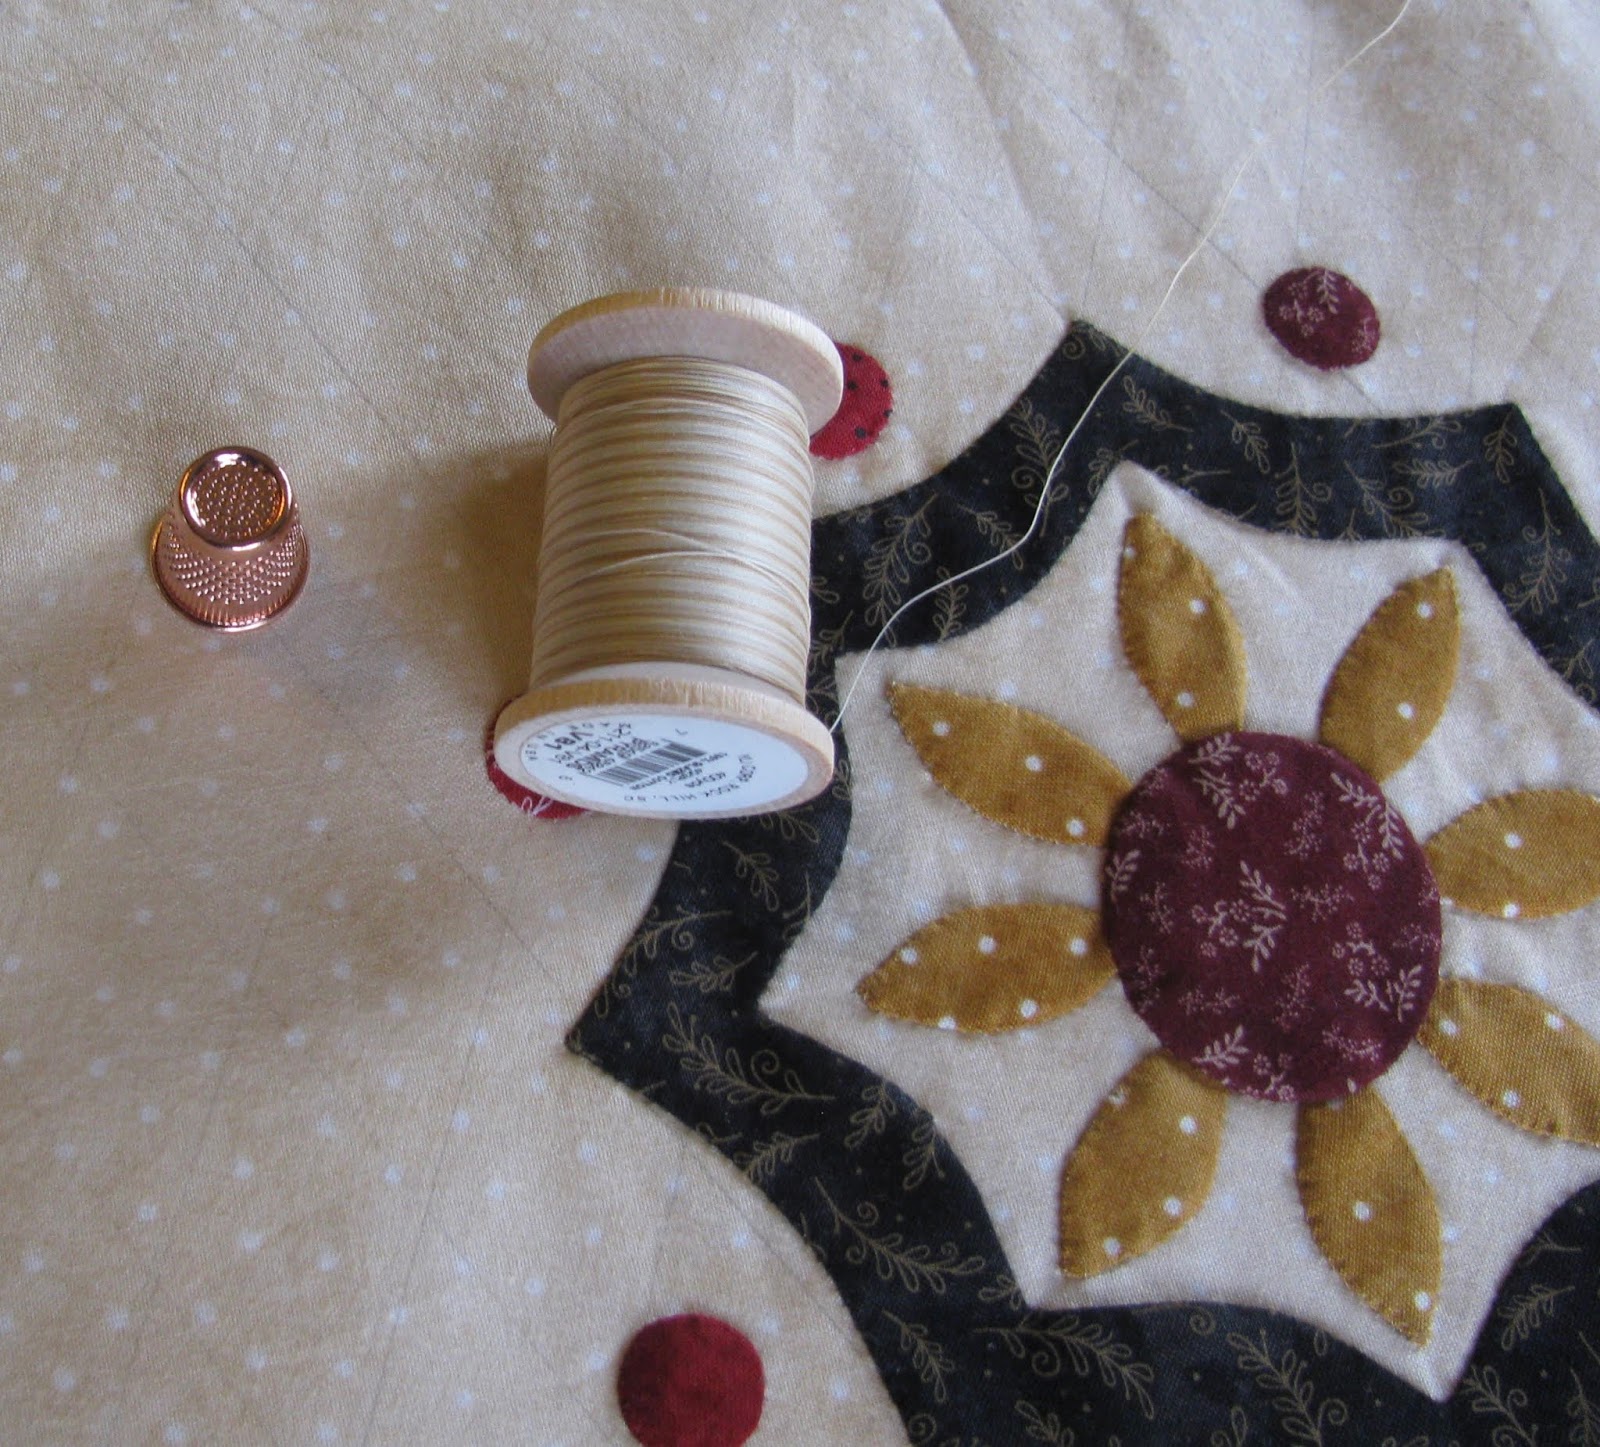
Anyway, the quilt is finally in the frame and a new quilting journey has begun. I'm using a variegated YLI quilting thread and my new copper thimble.
Wool batting stitches so nicely, the thread just glides through the layers.
This quilt is going to be in the frame for most of the winter. I hope you all don't get tired of reading about it.
Here is a link to past posts about the Pastor's Attic Quilt.
Linking to Kathy's Slow Sunday Stitching, HQAL, Show & Tell Monday With Bambi, Monday Making, Design Wall Monday, BOM's Away, Moving It Forward, Esther's Wednesday WOW!
The tractor quilts are finished. I think the borders make a nice frame to the center. They measure 45" by 49".
They definitely look like autumn with the fall leaf fabric.
Again I took pictures in the cornfield.
They both look exactly alike but there is different fabric used for the 'mud'.
One of the quilts will be sent to Pennsylvania to be quilted for the grands school auction.
The other quilt will be long armed quilted and donated to a fund raiser at our church.
Here is a picture taken further back so you can have a better perspective.
This corn was planted late in the growing season, the first of June. We were concerned we might have an early frost but that hasn't happened. Now the corn has matured so, let it frost!
The outside of this field was chopped and blown into the silo as silage to feed the cows this winter. The rest of the corn will be shelled and used in the cow feed ration.
Linking to Finished Or Not Friday, Confessions of a Fabric Addict, TGIFF!, Let's Make Baby Quilts, Finish It Up Friday, Show Off Saturday, Monday Making
Yes, I'm still working on unfinished quilt projects.
In November 2016, I made a John Deere crib quilt for our youngest grandson. I wrote about the start of that quilt here and the finished quilt here. If you want to see the pattern, go to the first link.
Last winter I cut fabrics for two more green tractor crib quilts. For our grandson's quilt, I had added the JD 42/40 because that is the size of one of our tractors but that isn't included on the actual pattern. I certainly don't want to end up in a lawsuit with the John Deere Corporation over copyright issues since these two quilts may end up in auctions.
For a really great photo shoot, I decided to clothespin the quilts to leaves on the corn stalks since tractors are definitely farmerish.
I think they need borders before they are really finished. Right now they measure 35-1/2" by 39-1/2" which is kind of small. I'll use fall colored fabric to finish them since the soil and mud are brown fabrics.
The farmer also critiqued the quilts, he says the pattern has the smokestack pointing the wrong direction. I'll change that if I make anymore quilts from the pattern.
I took a picture of our JD 42/40. I'm sure you can see the resemblance even though the real tractor is sitting in the opposite direction. And yes, the smokestack has the thingy on the side towards the cab.
Also, just for your information, the old time JD tractors have yellow seats. The modern JD tractors are not. I used yellow for the tractor seats because that is what our tractors have. Just thought I'd share that in case someone out there is a purist.
This is not a hard quilt to make but it is extremely important to label each piece you cut. I numbered the rows on the pattern and added the row number to the label of each cut piece.
Just for fun I took a picture of the tractor with gravity wagons. They're waiting for the combine to come and run beans (soybeans for you non farmers).
Linking to Let's Bee Social, Needle & Thread Thursday