Tuesday, January 31, 2023
SAHRR, Round 2
Wintersweet
Even though I have a very nice display wall, I organized the rows on the floor. It's hard to reach that high!
These blocks make me smile, I think this is going to be a lovely quilt.
I'll decide if I want to add borders while I'm sewing the rows together. The pattern doesn't show borders but I'm normally a border person.
The free pattern for Wintersweet is found here.
Linking to Monday Musings, To Do Tuesday, Midweek Makers, Magic Crafts, Wednesday Wait Loss
Sunday, January 29, 2023
Lady Jane Quilting Progress
Hand quilting Lady Jane has been so much fun! I'm so pleased to be able to roll every week!
This week I quilted the checkerboard section at the bottom of the quilt and used a Baptist fan design. Here is a close up view of a section.
 And a view across the length of this quilted section.
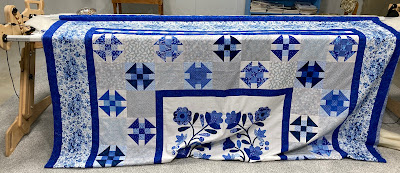
You can see the next section to be quilted, the churn dash blocks and the alternate plain squares.
 The plain squares are various gray fabrics and are all marked with the same design.
Friday, January 27, 2023
Wintersweet
What can I say? I love 9 patches! So when I ran across the Wintersweet quilt on Marie's Quilt Bee blog, I had to have that pattern!
Winter sweet is made with 2 blocks and I made the red 9 patches first.
Then I sewed green strip sets and made 4 patches . . . .
And green 9 patches. The green cutting mat seems to be affecting the coloring.
I arranged part of the blocks on the display wall. These are the true colors.
The 9 patch blocks finish at 6" and they look very nice. After I had placed these blocks on the design wall, I had to wonder how this quilt would look with 3" finished blocks? Then I thought how long would it take me? I'm not going down that rabbit hole right now, maybe someday but not now!
Wintersweet is the 2nd Christmas quilt I've pieced this month. I've using fabrics left from Peppermint Pines and from my stash. The background fabric is an assortment of white fabrics.
The free pattern is available from Cake Stand Quilts. Scroll down to the bottom of that post to print the pattern.
Linking to Needle & Thread Thursday, Put Your Foot Down, TGIFF!, Peacock Party, Whoop Whoop Party, Finished or Not Friday, Off the Wall Friday, Beauty Pageant, Patchwork & Quilts
Wednesday, January 25, 2023
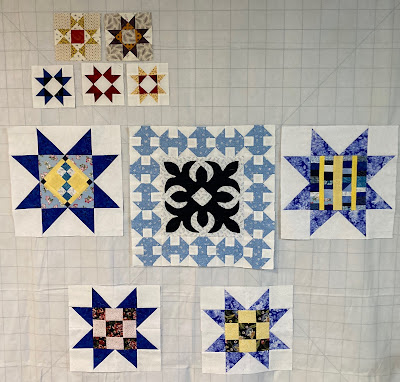
SAHRR, The First Round
Tuesday, January 24, 2023
Putting a Quilt in the Frame
First of all, there are many different types of hand quilting frames. Karen does a lot of hand quilting and her frame is different from mine. Kathi is also a hand quilter, she has pictures of her frame in this post. Our frames are similar in that they are stationary and we roll each section as it is completed but there are differences.
Our frames are very different from a person who sits in their easy chair and uses a hoop. For questions about hoop quilting, I suggest you contact Kathy.
My quilting frame is a Grace frame but they no longer make hand quilting frames. Hintenberg is another possible source for hand quilting frames, google it!
A stable quilting frame isn't better than a hoop, it's about what your preference is and whether you have room for the frame.
After it's pinned in place, I measure to make sure the sides of the roller are evenly space from each edge. Very important to have your fabrics centered!
Then I pin to the front roller, again making sure the fabric is centered and evenly space from the sides of the frame. After the front side is pinned, I carefully roll the front roller and roll the backing fabric onto the front roller. I'm smoothing the fabric as I roll and make sure it rolls evenly. One the fabric is on the front, I can adjust any unevenness onto the back roller.
The below picture show all the fabric rolled onto the front. The ticking fabric roller in the center is the roller the top of the quilt will pin onto. The ticking fabric in the back is for the batting.
Once you have all the unevenness pinned out, roll the fabric from the front roller onto the backing roller (roller #3).
See how nice and smooth the backing fabric is? This is what you are aiming for. Measure the front again and make sure it is centered.
Now you're going to add the batting layer. From the backing, pull the batting toward the front UNDER the top roller. Make sure the batting is centered then pin in place.
Evenly spread the batting in the back so it isn't wrinkled.
I don't pin the batting onto the 4th roller yet, that won't happen until the quilt top is is in place.
Now we're finally ready to install the quilt top. I mark my quilting before installing but some quilters mark as they quilt. Again, that is your preference and there is no right or wrong way.
First I pin the quilt onto the front roller, on top of the batting and backing fabric. I always let an inch or so of batting show because that's my preference.
Measure again and make sure you're keeping the front roller centered. I can't over stress how important it is to be centered for even rolling when you are quilting!
Once that is pinned in place, I pin the other end onto the 2nd quilt roller, again I measure to make sure it evenly centered.
Now it's time to carefully roll the top onto the 2nd roller.
After the quilt top has been rolled onto the 2nd roller, you roll all 3 layers onto the front roller. If you have any fullness in the quilt top after rolling, repin the quilt top to the 2nd roller. After you are satisfied everything is smooth, roll the 3 layers back onto their respective roller.
I told you this is time consuming but you will be so glad you spent this time being careful. It really makes a difference when you are quilting.
Now the side clamps are fastened and I baste through all 3 layers along the edge of the quilt top as far as I think I can reach.
Since the top has been loaded, now I can pin then roll the batting onto the 4th roller.
Do you trim your batting before you put your backing and quilt into the frame? I don't. I trim after the top is pinned into the frame but only where the quilt has been basted. I trim after each roll.
I don't cut the patting off, I just lay it to the back. When it gets too long, then I cut it off.
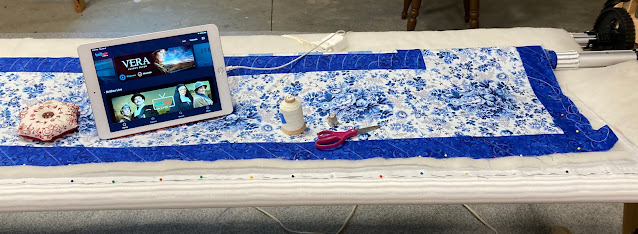
The quilt is ready to be quilted. I subscribe to Brit Box and decided Downton Abbey is the perfect drama to watch while quilting Lady Jane.
Here is a link to the Lady Jane pattern.
Thank you for reading my post if you've made it to the end.
Sunday, January 22, 2023
More Hand Quilting
Friday, January 20, 2023
Peppermint Pines
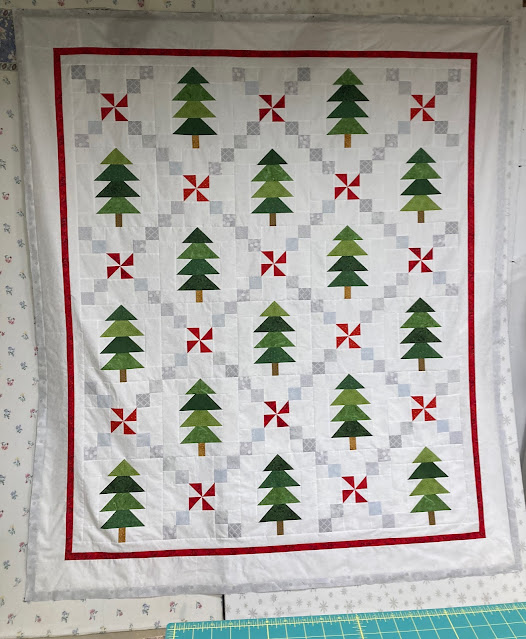
Peppermint Pines is a flimsy! This was a fun, fast quilt to make. I did make a slight change to the pattern, I added the narrow gray border on the outside. It doesn't show much now but the red binding will make it pop.
My peppermint pines measures 75" by 85" but if you pulled it more tight, it would probably be 76" by 86". For now peppermint pines is hanging in the 'to be quilted' closet. I have several more Christmas quilts I want to make. I'll be taking them to Lori in August. I asked her if she has any quilting designs with snowflakes in them, she does!
I read on various blogs that some quilters have to sew within the season, meaning they sew Christmas quilts in the Christmas season. Not me! I have no problem sewing out of season, I want to be able to hang my quilts in my house next Christmas.
And at the coming retreat in April, I'm going to be working on an autumn table runner gifted to me by my friend Linda. I'll be ready for fall!
Pattern review - This pattern was designed by Confessions of a Homeschooler and is a beginner friendly pattern. It really is! It is also a good pattern to use those small pieces of fabrics from stash. Yes, it does call for yardage but the odds and ends work fine too.
Linking to Needle & Thread Thursday, Put Your Foot Down, TGIFF!, Peacock Party, Whoop Whoop Party, Finished or Not Friday, Off the Wall Friday, Beauty Pageant, Patchwork & Quilts
Tuesday, January 17, 2023
Stay at Home Round Robin Center Block
I'm going to do something different this year and join in with the SAHRR (Stay at Home Round Robin). Click here for information about this challenge.
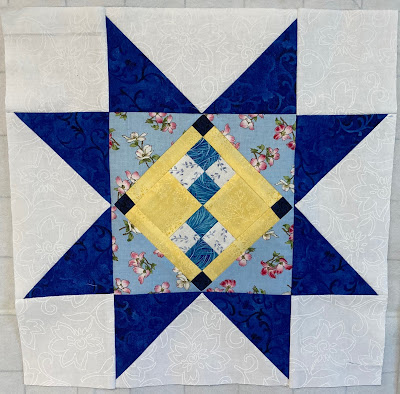
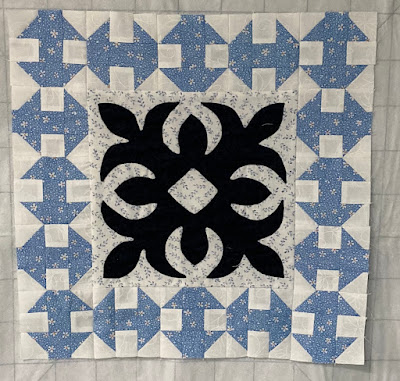
The center block for my quilt has been pulled from the orphan box. This block was appliqued many years ago before I started blogging. It was an extra block that wasn't needed for a sampler quilt.
This block isn't a large block, it's only 10" so there will be plenty of room for growth.
To make my SAHRR quilt more of a challenge, I pulled all of the blocks and partial blocks from the orphan box that have a white background. Somehow I'm going to incorporate them into the quilt.
Just a reminder, I can't reply to comments. Blogger won't let me, why, I don't know. Even my daughter couldn't figure it out. I will followup questions in coming posts.
Linking to To Do Tuesday, SAHRR Linky Party, Midweek Makers, Wednesday Wait Loss, Needle & Thread Thursday
Sunday, January 15, 2023
Lady Jane is in the Frame!
 The hand quilting frame is set up and ready to go. Lady Jane is the fortunate lady to be the first quilt hand quilted in the new house.
I'm being careful to only quilt for an hour a day until my fingers are used to quilting again.
 This quilt is not going to be closely quilted and the quilting is rather simple. I love this border fabric but you don't see the stitching very well. Diagonal lines have been marked 2" apart so progress is fast.
People always ask for more information so here it is. I'll use this post as a reference for future questions.
The wool batting is Hobbs Tuscany Collection. I've used this brand in several quilts, it hand stitches very nice.
The quilting thread is YLI hand quilting thread. Even though this spool holds 1000 yards of thread, there is no way there will be that much quilting on this quilt. I'm not even going to keep track of the yardage.
 My favorite brand of hand quilting needles are DMC needles, size 7. This is a larger size than most hand quilters use but I just can't manipulate smaller needles, they flip in my fingers! I'm able to quilt small stitches with the size 7.
I buy several packages at a time and have always purchased them at my local fabric store. They didn't have any the last time I was there. I asked if they were out or if they weren't going to carry them anymore. They said DMC was discontinuing manufacturing hand quilting needles. I still have several packages that aren't opened, I'm going to make my needles last as long as I can. I don't know what brand I'll use when they're gone.
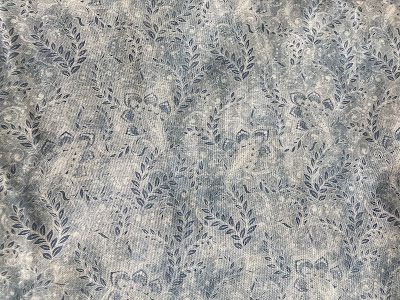 For backing fabric, I selected this blue/gray whole cloth fabric which doesn't show the stitches that well but I liked it. I always buy my backing fabric at my local fabric store. I like to be able to see and touch the backing.
I have ordered backing fabric from online stores before but it always has so much sizing on it. You can't possibly hand quilt it without washing it! The sizing doesn't really wash out, at least it doesn't for me. The fabric feels slimy while it's still damp. I don't like that!
Surprisingly, the backing fabrics at my local store are better prices than online stores, they're of good quality too.
 Here is a link to the Lady Jane pattern.
There will be an upcoming post about installing the quilt into the frame.
Linking to Kathys Slow Stitching Sunday, Stitching Stuff, Oh Scrap, Sew & Tell, Handmade Monday, Design Wall Monday, Craftastic Monday, Monday This 'N That, Monday Musings
Friday, January 13, 2023
Peppermint Pines
I was so inspired by all the Christmas quilts being pieced last November at retreat. When I got home I pulled my box of Christmas fabrics and organized fabrics for several Christmas quilts to start piecing in January.
The first one on the list is Peppermint Pines. Deanna was sewing this quilt and I thought it was so cute! The pattern says it is a beginner friendly pattern and it is. It is fun to be making a quilt that sews together fast.
The pinwheel blocks are completed. Piecing the pine tree alternate blocks is in progress, I'll show you in those in the next post.
The gray fabrics were pulled from my stash, they are a little darker then what the picture shows.
Linking to Needle & Thread Thursday, Put Your Foot Down, TGIFF!, Peacock Party, Whoop Whoop Party, Finished or Not Friday, Off the Wall Friday, Beauty Pageant, Patchwork & Quilts
Sunday, January 8, 2023
Another Hexie Flower
Another flower completed made with 3/4" hexie papers.
I'm trying to use fabrics that haven't been used in the flowers before. That said, there were a lot of basted black hexies so I'm using them because they are ready to use. I really like this pink fabric but the fabric piece wasn't very large and I could only get these 6 hexies.
Linking to Kathys Slow Stitching Sunday, Stitching Stuff, Oh Scrap, Sew & Tell, Handmade Monday, Design Wall Monday, Craftastic Monday, Monday This 'N That, Monday Musings
Friday, January 6, 2023
9 Patch Beauty, a Flimsy Finish!
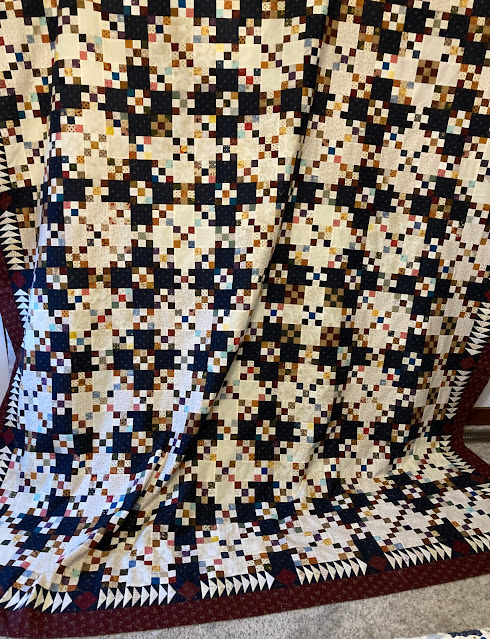
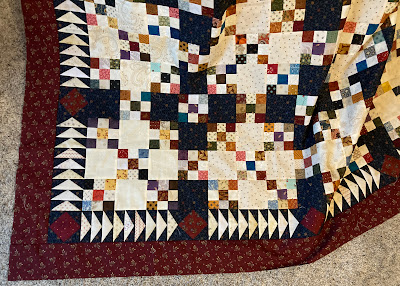
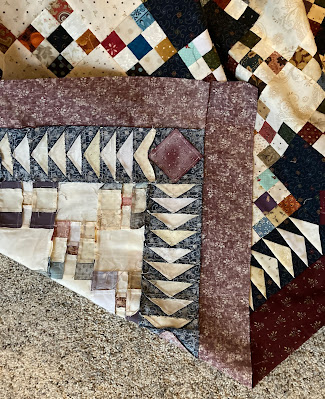
Nine patch beauty is now a flimsy! It only took a couple hours to remove the paper from the back of the flying geese sashing. I sewed the square/square blocks onto the sashing pieces then sewed them onto the quilt. The outside border is a red print fabric with no piecing, the quilt is busy enough without a busy border. At this point, the flimsy is 95" by 105" so he's a good sized queen. Some people call this size a king but it's not. We have a king sized bed and it wouldn't be large enough to hang over the sides and cover the mattress.
It's too wet outside to take pictures so I've done the best I can inside. Once the ground is dry, I'll take outside photos, the colors will look better.
There are a lot of seams in this quilt! It will be a heavy bed quilt.
I hung the flimsy onto the bedroom curtains. Now I need to use the sticky roller on them.
 I'm not sure what I'm going to do with this flimsy. Those who follow me know that every year I donate a flimsy that is hand quilted then sold in an auction that supports the school our Pennsylvania grandchildren attend. When the farmer and I visited them last summer, they told us of their plans to move in the spring to a new farm that is several hours east of their present location. Since they won't be attending the old school anymore, I won't be donating flimsies. I'll just keep this quilt in the to be quilted closet until it's needed then I'll have it longarm quilted.
9 patch beauty is my version of the Get Together Quilt from the April 2020 issue of American Patchwork and Quilting magazine. My version isn't better than the original, I just took the pattern and made changes to make it 'mine'.
Here are previous posts about 9 Patch Beauty, December 16, 2022, December 23, 2022, December 27, 2022 and January 3, 2023.
I used to be able to juggle having several quilts in progress at one time but I'm tired of that way. For me, right now, I am planning to focus on one quilt at a time until it's a flimsy, at least that's my goal.
There were several questions about foundation paper piecing in my last post. I googled foundation paper piecing and found this tutorial. I hope it answers your questions. There is a lot of information on the web about foundation paper piecing, just google your questions and find your answers! Like any other skill, it needs practice to become easier.
Linking to Needle & Thread Thursday, Put Your Foot Down, TGIFF!, Peacock Party, Whoop Whoop Party, Finished or Not Friday, Off the Wall Friday, Beauty Pageant, Patchwork & Quilts
Tuesday, January 3, 2023
9 Patch Beauty, the Flying Geese
All 30 of the flying geese sashing for the edge of 9 Patch Beauty have been pieced, I love the precision of foundation paper piecing!
The geese look nice sitting along the edge of the center.
 Of course the next step is to remove the paper from the back of the sashing. Some people leave the paper on the backside then remove after they've sewn the pieces to the quilt. I never do, I think removing before sewing is much easier.
Sorry, the blue edge blends into the carpeting.
My 9 Patch Beauty quilt is based on the Get Together Quilt. Here is a link to a previous post so you get read about the changes I made. I'm too impatient to spend time rewriting something I've written before.
Linking to Monday Musings, To Do Tuesday, Midweek Makers, Magic Crafts, Wednesday Wait Loss, Needle & Thread Thursday, Put Your Foot Down
