Another embroidered block for the redwork Christmas quilt is finished. This block was embroidered in a solid dark red and is a Gail Pan design. It was supposed to have a long stem but I couldn't figure out what it was supposed to be, so I shortened it so it would fit in the square.
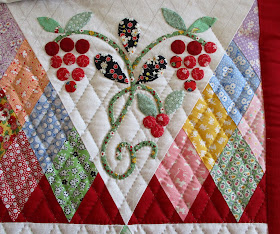
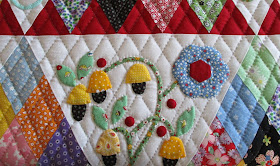
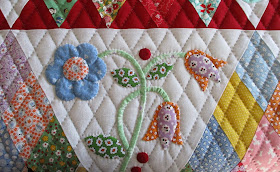
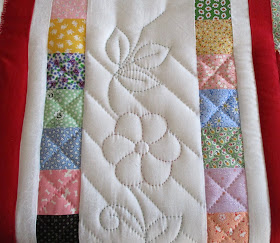
This is how far the quilting on Floral Triangles went this week.
The right side border.
Since I made my quilt larger than the original pattern, I made duplicates of each block. I made sure the blocks used different fabrics and colorway.
This is probably my favorite design of all the triangles. The other triangle with this applique was in purples. I love them both!
I tried to use a variety of colors in this quilt. This combination is my least favorite.
I love the dark aqua of the darker leaves but the light leaves and the stem just don't do it for me. Fortunately the block doesn't stick out when you look at the quilt overall.
The bottom half of the applique block is quilted.
I'll probably quilt the pieced triangle this evening, then start on the next applique block.
Linking to Kathy's Slow Sunday Stitching, Oh Scrap, Bambi's Show & Tell Monday, Monday Making, Design Wall Monday, BOM's Away
▼
Sunday, February 16, 2020
Friday, February 14, 2020
OMIGOSH! Borders!
The borders are on OMIGOSH! Right now it measures 47" by 51" and there are a total of 4090 pieces! This little quilt is right up there with Dear Jane and Nearly Insane in the number of pieces in a quilt. I am SO glad I didn't make a large quilt.
For the borders, I decided to use the fabrics that were in the 9 patches and make piano key borders. For now there's a wider white outside border. After quilting some of that border will be trimmed off.
I'm planning on quilting OMIGOSH! with my sewing machine but for now it's going in the to be quilted closet until I'm in the mood for machine quilting.
I think the yellow fabric actually looks yellow in these pictures, not greenish-yellow but the 4 square blocks still all look pink. Half of the 4 squares are orange.
It's nice to be able to take pictures outside. Most of our winter has been mud but since it snowed and was 3* this morning, everything is frozen. Outside pictures are the best.
Linking to Peacock Party, Confessions of a Fabric Addict, TGIFF!, Brag About Your Beauties, Finished Or Not Friday, UFO Busting
Tuesday, February 11, 2020
OMIGOSH! is a Flimsy!!!!
There is a lot sewing involved in OMIGOSH! I am SO glad I decided not to make a full sized quilt. Right now my little quilt measures 42" by 46-1/2" but I think I want to add borders. That means more sewing.
The above photo is enlarged to extra large. Here's the same photo in medium size which looks more true to life.
Remember, the blocks finish at 4-1/2".
The yellow seems to overpower the fabrics in the 9 patches but in real life, they don't. Also, the 4 patches all look pink, half of them are orange.
I used white Bella for the background fabric. I wanted the colored fabrics to shine and glow and they do. I used a different fabric for the shooflies because I thought if I used the same fabrics as were in the double 9 patches, the pattern design would be lost. I hate it when I look at a quilt and can't see what the design is. That's fine if that's what you want to make, but it's not how I want my quilts.
Two important tips for making an OMIGOSH!, starch! I'm not a starch person normally. I do use starch for hand applique pieces but in this case, starch is your best friend. I used Niagra spray starch I buy at the grocery store.
Also, cut your fabric strips the length of your fabric, not across the grain. Or, in other words, cut your fabric the same direction as the selvage.
I was asked several times if I pressed the seams open, NO WAY!, that means I would have had to pin every seam intersection! There's about a million seams in this thing. When I hold the flimsy, I can tell I'm holding something. I can't imagine how much a full size quilt would weigh.
I took a picture of the backside of 2 of the blocks. I do need to press the back again but you can see how it all easily locks together. If I would make another quilt, I would press the same way. You need to make sure you press your double 9 patch blocks differently than the shoofly blocks.
I confess, I used fat quarters for this project, not teeny little scraps and I do NOT feel one bit guilty! I save all scrap pieces less than 1-1/2" for a friend at retreat. She can make her OMIGOSH! from scraps.
I'm off to sew again, I'll be back when the borders are attached.
Linking to To Do Tuesday, Midweek Makers, Wednesday Wait Loss, Needle & Thread Thursday, Put Your Foot Down.
The above photo is enlarged to extra large. Here's the same photo in medium size which looks more true to life.
Remember, the blocks finish at 4-1/2".
The yellow seems to overpower the fabrics in the 9 patches but in real life, they don't. Also, the 4 patches all look pink, half of them are orange.
Two important tips for making an OMIGOSH!, starch! I'm not a starch person normally. I do use starch for hand applique pieces but in this case, starch is your best friend. I used Niagra spray starch I buy at the grocery store.
Also, cut your fabric strips the length of your fabric, not across the grain. Or, in other words, cut your fabric the same direction as the selvage.
I was asked several times if I pressed the seams open, NO WAY!, that means I would have had to pin every seam intersection! There's about a million seams in this thing. When I hold the flimsy, I can tell I'm holding something. I can't imagine how much a full size quilt would weigh.
I took a picture of the backside of 2 of the blocks. I do need to press the back again but you can see how it all easily locks together. If I would make another quilt, I would press the same way. You need to make sure you press your double 9 patch blocks differently than the shoofly blocks.
I confess, I used fat quarters for this project, not teeny little scraps and I do NOT feel one bit guilty! I save all scrap pieces less than 1-1/2" for a friend at retreat. She can make her OMIGOSH! from scraps.
I'm off to sew again, I'll be back when the borders are attached.
Linking to To Do Tuesday, Midweek Makers, Wednesday Wait Loss, Needle & Thread Thursday, Put Your Foot Down.
Sunday, February 9, 2020
Another Row Quilted
I've finished quilting row 5 of Floral Triangles.
Another hexden flower.
Someone suggested that I quilt along the seamline that divides the hexden pieces.
The problem is these flowers are very small so I'm actually stitching through fabric from the seam on the back of the flower. Another challenge is I didn't cut the background fabric out behind the flower so when I quilt these flowers, I'm actually stitching through 4 layers of fabric. My stitches are not very small but they work for me.
My favorite flower design, the circle flower.
I actually do like this hexden flower since I fussy cut it.
I guess that's the real problem, if I didn't fussy cut, the flower is rather blah.
Another fussy cut hexden.
Left side border.
My mind can be like a sieve.
For some reason I was thinking there were 5 rows but I think that was how many rows there were on the original pattern.
Anyway, row 5 was just finished. I rolled after taking the pictures, row 6 will be started this week, progress!
The embroidery on the Christmas block was finished this week. Floss is used quickly when using 3 strands.
I thought I had a lot of variegated thread but I used the last of what I had on this block! I have several skeins of dark red so that's what I used to finish this block. I don't think you can tell a difference.
I bought more variegated thread this week. Some of the blocks will be variegated, some will be completely dark red, need to reduce my embroidery thread stash!
Linking to Kathy's Slow Sunday Stitching, Oh Scrap, Bambi's Show & Tell Monday, Monday Making, Design Wall Monday, BOM's Away
Sunday, February 2, 2020
Slow Stitching Sunday
It's Sunday again, time to show you my hand quilting progress. I finished the row I was working on and started on the next row.
This was the block I was quilting last Sunday.
Next block.
Left side half triangle.
Left side border.
Then I rolled and started quilting again, right side border.
It looks puckery at the top. The next line in the top left didn't get quilted. That would have taken care of the pucker.
I'm quilting the right side triangle now.
I never touched the redwork embroidery last week.
Linking to Kathy's Slow Sunday Stitching, Oh Scrap, Bambi's Show & Tell Monday, Monday Making, Design Wall Monday, BOM's Away
This was the block I was quilting last Sunday.
Next block.
Left side half triangle.
Left side border.
Then I rolled and started quilting again, right side border.
It looks puckery at the top. The next line in the top left didn't get quilted. That would have taken care of the pucker.
I'm quilting the right side triangle now.
I never touched the redwork embroidery last week.
Hand Quilt Along is an opportunity for hand quilters and piecers to share and motivate one another. We post every three weeks, to show our progress and encourage one another. If you have a hand quilting project and would like to join our group contact Kathy at the link below.
Kathy, Margaret, Emma, Tracy, Deb, Susan, Nanette, Edith, Sharo
Kathy, Margaret, Emma, Tracy, Deb, Susan, Nanette, Edith, Sharo
Linking to Kathy's Slow Sunday Stitching, Oh Scrap, Bambi's Show & Tell Monday, Monday Making, Design Wall Monday, BOM's Away
Saturday, February 1, 2020
Orange RSC
I'm not making my OMIGOSH! in conjunction with the RSC but I thought I'd show the orange 4-patches I've pieced.
Then I went ahead and completed 2 shoofly blocks to see what they'd look like.
The challenge with these shoofly blocks will be to make sure I get the 4 patches turned the right way.
Sewing the white triangles onto the 4 patches is going to keep me busy this week. Once the white triangles are sewn onto the patches, they need to be trimmed to size.
I'm also planning on using pink for 4 patches.
These little 4-patches finish at 1".
Linking to UFO Busting, Scrap Happy Saturday


