One of my goals this summer was to have the borders for Hearts & Wreaths prepped and ready to start the applique process by September 1, I made it! Here is a link to the last post about Hearts & Wreaths in December 2022. It's been in time out longer than I thought. In the picture you can see the true yellow background color of the fabric. It looks beige in some of the following border pictures but it really is a soft yellow.
In these pictures, not only does the fabric look beige, the cutting mat looks blue, not green.
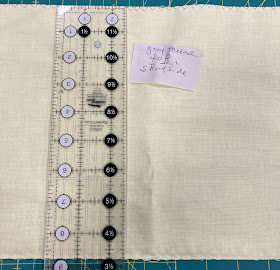
The instructions said to cut the border 8.5" wide. I cut my borders a little wider. You lose some border when you finish the edges and I'll loose a little more when I applique the leaves. When I zigzag the edges, I use stitch #3 on my machine. It's a zigzag but it makes stitches in the zigs and zags so it doesn't pull the fabric in, it stays flat.
The borders have a top and bottom side. This is important when you sew the borders onto the center.
There were several more steps involved but here is the prepped border before I start embroidering the vine. I chain stitch 3 strands of black embroidery thread, I think 3 strands makes the vine more distinctive.

I can't press these borders now until the applique is completed. I don't want creases or wrinkles in them so they're hanging on a hanger in the closet.
I'm looking forward to the day when I put this quilt flimsy into the hand quilting frame and start stitching. I already know which designs I'm going quilt. Look at this picture and imagine a quilted design in there. I have several stencils that will fit into an area that size, I'll probably use them all!
Here is a link to my first post about Hearts & Wreaths from August 2021.
Linking to Kathys Slow Stitching Sunday, Stitching Stuff, Oh Scrap, Handmade Monday, Sew & Tell, Design Wall Monday, Craftastic Monday, Monday Musings


I will be watching your progress on the borders of this quilt closely. I am doing a similar border on "Aunt Lottie's Garden". I'm choosing to put the borders on first, then applique. I may regret that, but it's a much smaller quilt than yours. I love how cheerful the colors are on the hearts and leaves, it always makes me smile.
ReplyDeleteIt's going to be a really "wow" quilt when it's all finished. It's pretty wow now without the applique borders.
ReplyDeleteI have loved following your progress on this quilt since the beginning. It's going to be absolutely gorgeous! I looked back at your original post when you started and saw the pattern--are you including those small leafy branches in the border? (I would leave them off.)
ReplyDeleteSuch a pretty quilt!
ReplyDeleteI am looking forward to watching you progress on those border. I can't believe how long it has been since you worked on this pretty quilt.
ReplyDeleteI look forward to seeing the borders and I appreciate that you are sharing the process. This is going to be gorgeous! ~Jeanne
ReplyDeleteAmazing quilt! All the hours of love that have gone into this quilt!!
ReplyDeleteThose are such beautiful blocks! I'm looking forward to seeing how the borders come together. I can definitely understand why you would want to applique the borders first and then sew them onto the center!
ReplyDeleteI agree completely. It is going to be a lot easier to sew the applique border to the quilt top rather than stitch the border now and then applique the leaves! This will be another stunning finish!
ReplyDeleteHearts and Wreaths is gorgeous. I look forward to seeing the progress on your borders!
ReplyDeleteSuch a beautiful quilt and love that you share your process for the borders! Wow!
ReplyDeleteThank you for sharing how you approach the boarders on this quilt. It is a beauty and is happy to be out of time out! Happy Stitching.
ReplyDeleteSuch a lovely quilt top, and your pretty applique borders will really finish it off so well.
ReplyDeleteA stunning quilt! The blocks are all beautiful, lots of colour!
ReplyDeleteIt's going to be another wonderful quilt. Thank you for sharing your process about the border, and have fun applique the leaves!
ReplyDeleteIt's just so very lovely
ReplyDeleteIt's going to be fabulous!
ReplyDeleteHi Gretchen! What wonderful tips you have shared about how you are finishing your quilt and the process you use. The vines and leaves will definitely be the frosting on the already lovely quilt. I look forward to seeing the finish and updates as you progress. Happy Labor Day to you. {{Hugs}} ~smile~ Roseanne
ReplyDeleteSuch a pretty quilt Gretchen. And with the borders it will be even more so. A wise idea to keep the borders separate as long as possible.
ReplyDeleteI've never seen machine applique done with your number 3 stitch. Thanks for the tip. It makes a lot of sense.
ReplyDeleteI agree about attaching the border, then appliqueing. Way to much to move around. Your work is beautiful.
This is coming on so nicely, it's going to be such a beauty when it's finished.
ReplyDeleteWow! What a beautiful quilt, Gretchen. I don't blame you for changing up and doing the applique prior to attaching the borders. It's hard to wrestle a large quilt under a machine! Looking forward to seeing this one come together!
ReplyDeleteAbsolutely perfect and great tips on how you do the border! YUP do not want to add a blank border, then applique the leaves! NO fun! Anxious for you to get it in the frame for quilting after the border! Great job Gretchen. Hugs
ReplyDelete